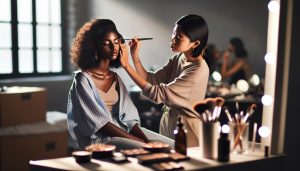
If you’re looking to enhance your makeup skills, learning how to apply Laura Geller products can be a game-changer. Known for their innovative formulations and wide-ranging appeal, Laura Geller’s makeup line offers something for everyone, from novices to seasoned pros. Understanding the application techniques not only boosts your confidence but also ensures you achieve that flawless, radiant look effortlessly. In this step-by-step expert guide, we’ll demystify the process, sharing insider tips and practical methods to elevate your beauty routine. Whether you’re preparing for a special occasion or want to look your best every day, mastering these techniques will help you find and express your unique style. Ready to enhance your makeup game? Let’s dive into the art of applying Laura Geller makeup!
Choosing the Right Laura Geller Makeup Products for Your Skin Type

Choosing the right makeup products is essential for achieving a flawless look, especially when working with Laura Geller’s collection, which is thoughtfully designed to cater to mature skin. Different skin types have unique needs that should be addressed to enhance your natural beauty effectively. For instance, those with dry skin may want to start with a hydrating primer, such as Laura Geller’s bestselling option designed to prep the skin. This step not only moisturizes but also helps the foundation glide on smoothly, creating a radiant base.
Conversely, if you have oily or combination skin, selecting a lightweight, oil-free foundation can help control shine throughout the day. Laura Geller’s baked foundations offer a unique finish that can work beautifully for these skin types, balancing coverage with a natural look. It’s crucial to choose a formula that not only matches your skin tone but also complements your skin’s texture. The inclusion of ingredients that provide staying power will ensure that your makeup looks fresh from morning until night.
For sensitive skin types, the focus should be on products that are free from harsh chemicals and fragrances. Laura Geller’s gentle formulations often include soothing ingredients that help to reduce irritation while providing coverage. Always conduct a patch test with any new product to ensure compatibility with your skin, and consider using a CC cream for light coverage that evens out your skin tone without feeling heavy.
In summary, understanding your skin type and selecting corresponding Laura Geller products can profoundly impact your makeup application and overall appearance. By matching products to your unique skin needs-whether it’s hydrating, oil-controlling, or sensitive skin-friendly-you’ll not only enhance your beauty but also boost your confidence. Explore the diverse range within the Laura Geller collection to find what works best for you, and enjoy the journey of discovering your ideal makeup routine.
Essential Tools for a Flawless Laura Geller Makeup Application
To achieve a flawless application with Laura Geller makeup, having the right tools at your disposal can make all the difference. A well-equipped makeup toolkit not only enhances your application but also elevates your overall look, ensuring that your makeup feels comfortable and lasts throughout the day. Here’s a guide to the essential tools that will help you create a stunning finish with Laura Geller products.
Start with the fundamentals: a quality foundation brush or sponge is crucial for applying the Baked Balance-n-Brighten Color Correcting Foundation evenly. Brushes like the flat-top kabuki or a damp beauty blender allow for buildable coverage while preventing streaks. Consider a stippling brush for a more airbrushed effect, as it blends product seamlessly into the skin.
Key Tools for Your Makeup Application
- Foundation Brush or Sponge: An indispensable tool for achieving a smooth and flawless foundation finish.
- Concealer Brush: Ideal for applying and blending Laura Geller’s powerful concealers in targeted areas.
- Blush Brush: A soft, fluffy brush will help you apply blush to your cheeks for a natural, radiant glow.
- Eyeshadow Brushes: A variety of brushes such as flat, fluffy, and precision brushes are key for blending and layering colors effectively.
- Brow Brush: Essential for grooming and filling in brows evenly with Laura Geller’s brow products.
- Setting Powder Brush: Use a large, fluffy brush to apply setting powder for a matte finish that keeps makeup in place.
For those who appreciate precision, having both a pencil and an angled brush for brows ensures that you can achieve everything from a bold to a natural look. Pair your eye makeup application with quality eyelash curlers and mascara applicators to open up your eyes, creating a wide-awake appearance that complements your overall makeup.
Additional Tips for Optimal Application
Utilizing tools like setting sprays or mists will help to lock in your makeup. Not only do they provide a refreshing burst of hydration, but they also help to extend the wear of your makeup. Experiment with different brushes and sponges to find what feels best for your application style; everyone’s preferences differ, and the right tool can enhance your comfort and confidence.
Consider investing in a clean makeup organizer to store your tools and products effectively, promoting longevity and hygiene within your beauty routine. Properly maintained tools not only adhere to best practices for skin health, but they also enhance the overall efficacy of your makeup application.
By using the right tools and implementing thoughtful techniques, you can elevate your makeup game and ensure your Laura Geller products shine to their fullest potential.
Step-by-Step Guide to Apply Foundation Like a Pro

Achieving a flawless foundation application can elevate your entire makeup look and make you feel confident throughout the day. With Laura Geller’s innovative products, particularly the Baked Balance-n-Brighten Color Correcting Foundation, you have the perfect base to work from. Begin with a well-prepped canvas; cleansing and moisturizing your skin is crucial for a smooth application. A hydrating primer can also create a barrier, ensuring your foundation glides on effortlessly.
To apply the foundation, start by choosing your application tool-whether it be a flat-top kabuki brush or a damp beauty blender. Place a small amount of foundation on the back of your hand or a makeup palette for better control. Using your chosen tool, dab the foundation onto the center of your face (forehead, nose, and chin), then work outward, blending as you go. This technique encourages even coverage without overwhelming your skin with product. For those seeking a more airbrushed effect, a stippling brush can be particularly effective, allowing for buildable coverage while minimizing streaks.
Blending Techniques to Master
Ul>
Finish by checking your application in natural light, which reveals any uneven spots or areas that may need extra blending. If necessary, use a concealer brush to spot-conceal any imperfections. Once satisfied with your base, set your foundation with a light dusting of translucent powder to keep it locked in place, especially in areas prone to shine. With these steps, you can confidently achieve a professional-level foundation application using Laura Geller products that feel as good as they look.
Mastering Laura Geller Concealers for Perfect Coverage
Mastering concealers can transform your makeup routine by elevating your overall look and boosting your confidence. Laura Geller offers a range of concealers designed to provide perfect coverage without feeling heavy or unnatural on the skin. The secret to achieving a flawless finish lies in understanding how to select the right shade and applying it correctly. Start by choosing a concealer that matches your foundation for covering blemishes, or one that is one shade lighter for brightening under the eyes.
To apply concealer effectively, the tools you use can make a significant difference. Using a dense brush or your fingertips can help achieve seamless blending. Begin by dabbing a small amount of the concealer on the back of your hand to warm it up, allowing for better application. For blemishes, gently tap the product onto the area with your finger or brush, focusing on layering it slowly until the desired coverage is achieved. When it comes to brightening the under-eye area, apply in a triangular shape, extending it towards your temples to provide a lifted effect.
Blending Techniques to Achieve a Natural Look
- Pat and Blend: Use your ring finger to gently pat the concealer. This light touch prevents skin from becoming overly stimulated, which can cause further puffiness.
- Use a Damp Sponge: A beauty sponge is excellent for achieving an airbrushed finish. Gently bounce the sponge over the concealer, blending it seamlessly into the skin.
- Set with Powder: To ensure your concealer lasts throughout the day, set it with a light dusting of translucent powder. This helps to prevent creasing and keeps everything in place.
For those learning how to refine their skills, it might be beneficial to practice applying concealer at different times of the day, allowing you to assess how it wears and changes under various lighting conditions. Remember, the goal is to enhance your natural beauty while providing enough coverage to boost your confidence. By mastering the art of concealers using Laura Geller products, you unlock a vital skill that enhances not just your makeup but your entire beauty regimen.
Creating Radiant Cheeks with Laura Geller Blush Techniques
Achieving radiant cheeks is a transformative step in any makeup routine, and Laura Geller’s blush products offer an exceptional way to elevate your look. Infused with luminous pigments, Laura Geller blushes are specifically designed to enhance your natural complexion while providing a healthy flush. Whether you’re seeking a subtle enhancement or a bold statement, understanding how to apply and blend blush can make a significant difference in your overall appearance.
To start, selecting the right blush shade for your skin tone is crucial. For fair skin, soft pinks and corals work beautifully, while medium skin tones can experiment with peach or berry shades. Deeper skin tones often shine with rich berry or plum shades. Once you’ve chosen your perfect color, it’s time to gather your tools. A fluffy blush brush is ideal for seamless application, as it allows for even distribution of product and helps avoid harsh lines.
When applying your blush, begin by smiling to locate the apples of your cheeks. Use the brush to apply the product in a gentle sweeping motion, starting at the apples and blending back towards your temples. This application technique creates a natural lift and enhances the shape of your face. For added dimension, consider layering with a cream blush for a dewy finish; apply the cream first and set it with a powder blush for longevity.
Blending Techniques for a Flawless Finish
- Smile and Swipe: Smile to find the apples of your cheeks, then apply the blush in a sweeping motion towards your temples.
- Layering: Start with a light application and gradually build up to your desired intensity; it’s easier to add than to subtract.
- Use Circular Motions: After applying, use circular motions to blend out the edges, creating a seamless transition with your foundation.
For those who prefer a more sculpted look, you can also use blush as a contouring tool. Opt for a deeper blush shade and apply it just below your cheekbones, blending upwards to create definition. This technique not only adds color but also enables a more chiseled cheekbone effect.
Remember, the key lies in blending; the more you practice these techniques, the more confident you’ll become in your application skills. Whether you’re heading to a coffee date or a glamorous evening out, Laura Geller blush can help you achieve that radiant, fresh look that lights up your face.
Enhancing Your Eyes: Laura Geller Eye Makeup Essentials
When it comes to eye makeup, the right products and techniques can create stunning transformations that highlight your natural beauty. Laura Geller’s eye makeup essentials are tailored to ensure that everyone can achieve a flawless look, whether aiming for a subtle daytime appearance or a bold evening statement. A key element in eye makeup application is selecting high-quality products that blend effortlessly and enhance the gorgeous contours of your eyes.
Start with a clean canvas by applying an eye primer to your eyelids. This essential step not only helps your shadows last longer but also intensifies their color. Once prepped, consider using Laura Geller’s Eyeshadow Palette, designed with a range of shades to suit all skin tones and preferences. When choosing your colors, opt for a combination of matte and shimmer to create depth. Apply a neutral shade over the entire lid as a base, then transition to deeper tones in the crease to define your eye shape. Use a crease brush for precision; this will prevent harsh lines and ensure a blended look.
Techniques for Eye Makeup Application
- Layering: Start with a light hand and build the color gradually, as it’s easier to add product than to remove excess.
- Smudging: For a smoky effect, take a darker shade and apply it along the lash line, then use a smudge brush to blend it gently for a seamless transition.
- Highlighting: Add a touch of a light shimmer shade to the inner corners and brow bone to open up the eyes and give them a bright, wide-awake appearance.
When it comes to eyeliner, Laura Geller offers gel and liquid options that glide on smoothly, allowing for both precise lines and a more smoky look. For a defined style, apply the eyeliner close to your lash line, adding a subtle wing if desired. Mascara is the finishing touch; choose one that volumizes and lengthens for maximum impact, framing the eyes beautifully.
Lastly, consider your brows as an essential part of your eye makeup routine. Well-groomed brows can elevate your entire look. Use Laura Geller’s brow products to shape and fill in sparse areas, ensuring your brows complement the eye makeup without overpowering it.
In summary, mastering Laura Geller eye makeup essentials involves a few simple steps: priming the lids, selecting the right shades, and applying techniques that enhance your features while building confidence in your application skills. With practice and the right products, your eyes can become the focal point of any makeup look.
Achieving the Perfect Brow with Laura Geller Products
Achieving perfectly defined brows can dramatically enhance your overall makeup look, framing your face and complementing your features. With Laura Geller’s expertly formulated brow products, you can easily shape, fill, and style your brows to suit your unique aesthetic. Start by choosing the right product based on your brow goals and the look you prefer-whether that’s a soft, natural finish or a bold, sculpted look.
Begin your brow routine with a good grooming session. Use a brow brush to comb through your brows and assess their natural shape. For added definition, consider using Laura Geller’s Brow Gel which not only adds color but also shapes your brows, keeping them in place throughout the day. This gel is perfect for those with sparse brows as it can fill gaps with a natural finish. For more precision, opt for the Brow Pencil; choose a shade that closely matches your hair color for the most harmonious look. The fine tip allows for easy hair-like strokes, mimicking the natural texture of your brows.
Application Techniques for Stunning Brows
- Define the Shape: Lightly outline the desired shape of your brows using the pencil. Start at the base and outline the top arch, then connect the lines for a clean look.
- Fill In: Use light, feathery strokes to fill in any sparse areas. Concentrate most product where the brow is less dense to keep a natural appearance.
- Blend: After applying product, comb through your brows with a clean spoolie to blend the color and soften any harsh lines.
- Set Your Brows: Finish with a clear or tinted brow gel to keep everything in place. This ensures a polished look that lasts.
For a finishing touch, consider highlighting the brow bone just above your eyebrows with a subtle, shimmering shade. This simple step will draw attention to your brows and open up your eyes, creating an overall fresh appearance. Remember, practice makes perfect; the more you experiment with different products and techniques, the more you’ll find what works best for your unique brow shape and personal style.
Tips for Long-Lasting Laura Geller Makeup Looks
To achieve a makeup look that endures from dawn till dusk, it’s essential to incorporate both preparation and finishing touches tailored specifically for Laura Geller products. Start by prepping your skin with a suitable primer, as this step creates a smooth canvas and enhances the longevity of your makeup. Laura Geller offers a range of primers, including those designed for specific skin concerns, ensuring that whether your skin is oily, dry, or combination, you’ll find a match that locks your makeup in place.
Once your primer is set, opt for long-wearing formulations that Laura Geller is known for, such as their Baked Balance-n-Brighten Color Correcting Foundation. This product not only ensures even coverage but also resists fading and shine, making it a perfect base for lasting wear. When applying foundation, use a damp makeup sponge or a brush to stipple it onto your skin, ensuring even distribution and maximum adherence.
After foundation, don’t overlook the importance of setting your makeup. Dust a light layer of translucent powder or use a setting spray to seal everything in. Laura Geller’s products often feature long-lasting formulas, so complementing them with a setting spray can really help maintain that fresh, just-applied look. Consider using the setting spray as a mist after each application step; this method helps to fuse the layers together, making your makeup resistant to environmental factors.
Moreover, choosing the right colors can also influence the longevity of the look. Opt for richer, deeper shades for your eyelids and lips, as these hues tend to withstand wear better than lighter tones that might fade more quickly. When it comes to eye makeup, using a primer before your eyeshadow can make a significant difference. Laura Geller’s eye makeup products are designed to be both vibrant and durable, especially when paired with a primer that prevents creasing and enhances color payoff.
Lastly, keep in mind that touch-ups throughout the day are normal and expected, especially after meals or long hours. Packing a small kit with essential items like a compact powder, lipstick, and a travel-sized setting spray can help refresh your look without starting from scratch. Embrace these small rituals to keep your Laura Geller makeup looking flawless and vibrant, all day long. Remember, a well-prepared base and thoughtful finishing touches are key to achieving that long-lasting, polished effect.
Setting Your Makeup for All-Day Wear
To ensure your makeup lasts all day, the final step of your routine is as crucial as the initial preparation. Setting your makeup not only locks in your hard work but also provides a barrier against the elements, whether it’s humidity, heat, or even a long day at the office. One of the standout features of Laura Geller products is their long-lasting formulas, which can be further enhanced through effective setting techniques.
Start by applying a light dusting of translucent setting powder to your face, focusing on areas prone to shine, like the T-zone. This helps to absorb excess oil and prevent your makeup from slipping throughout the day. Given Laura Geller’s innovative Baked formulas, these powders offer a weightless finish that doesn’t cake or settle into fine lines, making them ideal for mature skin. For an extra layer of protection, consider using a setting spray after applying your powder. Spritz it across your face in an X and T motion to ensure even coverage. A setting spray not only enhances the longevity of your makeup but can also impart a refreshing finish, making your skin look vibrant and alive.
Layering Techniques for Optimal Wear
One effective method to achieve a long-lasting look is to use the setting spray in conjunction with each application step. After applying foundation, mist your face to help fuse the foundation with your skin, creating a more natural and seamless appearance. Repeat this process after applying concealer, blush, and eyeshadow. This technique provides additional hydration and creates a cohesive makeup look that enhances wearability.
Touch-Up Essentials
Lastly, keep a small touch-up kit handy to address any unexpected wear throughout the day. Equip yourself with a powder compact, a mini setting spray, and your favorite lipstick. These essentials will enable you to refresh your look wherever you are. Remember, it’s normal for makeup to need touch-ups, especially after meals or during busy days. By being prepared, you can maintain a polished appearance without the hassle of starting from scratch.
Incorporating these setting strategies into your makeup routine will not only enhance durability but also boost your confidence throughout the day, allowing you to focus on what truly matters while looking fabulous.
Seasonal Makeup Trends with Laura Geller
As the seasons change, so do the tones, textures, and overall aesthetics of makeup trends. This year, Laura Geller empowers beauty enthusiasts by offering versatile products that cater to the latest seasonal looks, encouraging creativity and personal expression. Whether you’re prepping for vibrant summer festivals or cozy autumn evenings, you can effortlessly adapt your makeup routine using Laura Geller’s innovative formulas.
To embrace spring and summer, consider a fresh-faced approach featuring luminous skin and playful pops of color. Highlighter infused with light can enhance a natural glow, and Laura Geller’s Baked Gelato Swirl Illuminators are perfect for achieving that dewy finish. Opt for vivacious shades of eyeshadow, like turquoise and coral, to capture the essence of warmer weather. Pair these with a lightweight foundation to keep your look breathable and allow your skin to shine through, reflecting the season’s vibrancy.
As the leaves transition into fall, shift into deeper, richer hues. Rich berry tones and earthy shades can redefine your makeup look. Experiment with burgundy lipsticks and warm eyeshadow palettes that echo the beauty of autumn foliage. Laura Geller’s Baked Eyeshadow can create that effortless blend of colors, giving depth and dimension to your eyes. Additionally, cream blush formulations not only provide a natural flush but also ensure longevity against cooler air, aligning your makeup choices with the season’s essence.
Lastly, don’t forget the importance of a good setting spray as you navigate through seasonal changes. Laura Geller’s setting sprays not only lock in your makeup but also hydrate and refresh your skin, adapting to environmental factors-be it summer humidity or the brisk autumn air. By integrating these seasonal insights and leveraging Laura Geller products, you can effortlessly elevate your makeup game, ensuring you’re always in tune with the trends while expressing your unique style.
Common Application Mistakes and How to Avoid Them
Mistakes in makeup application can lead to a less-than-flawless look, especially when using premium products like those from Laura Geller. Recognizing and correcting common errors not only enhances your final appearance but also boosts your confidence. Below are several pitfalls and how to avoid them to ensure you achieve a stunning look every time.
One common mistake is mismatching foundation shades. This can create a stark contrast with your natural skin tone, making your makeup appear unnatural. To avoid this, always test foundation shades in natural light. Use Laura Geller’s versatile formulations, such as the Balance-n-Brighten Foundation, which adapts to various skin tones, ensuring a seamless finish.
Another frequent error is applying too much product. Overloading the skin can lead to cakiness and emphasize imperfections. Instead, start with a small amount, build coverage gradually, and utilize tools like a damp beauty sponge. This helps control product application and allows for a more natural look, especially when using Laura Geller’s lightweight offerings.
Blending is crucial, yet many neglect it, resulting in harsh lines and uneven application. Invest time in properly blending foundation and concealer around tricky areas like the jawline and eyes. Utilize a stippling brush or your fingers to softly diffuse edges for a cohesive appearance. Laura Geller’s Baked Concealer is a great choice for achieving that smooth, blended finish.
Lastly, many makeup enthusiasts forget the importance of setting products, leading to makeup that slips or fades throughout the day. Apply a light dusting of setting powder to lock in foundation and concealer. Likewise, finishing with a setting spray-such as Laura Geller’s Baked Setting Spray-can give you a fresh, radiant look that lasts.
By staying aware of these common application mistakes and implementing simple corrections, your makeup routine can rise to a new level of polish and effectiveness, enhancing both your beauty and your confidence.
Expert Tips for Removing Laura Geller Makeup Safely
When the time comes to take off your Laura Geller makeup, doing so effectively and safely is key to maintaining your skin’s health and radiance. Removing makeup is not just about cleaning; it’s a crucial step in preventing clogged pores and allowing your skin to rejuvenate overnight. Here’s how to ensure a safe and clean removal routine that respects your skin while preserving the beauty you’ve created.
Start with a quality makeup remover that suits your skin type. For example, if you have dry or sensitive skin, a gentle cleansing oil or micellar water can be do wonders without stripping moisture. For those with oily skin, consider a gel cleanser that effectively cuts through makeup while controlling excess shine. Look for Laura Geller’s own makeup removing wipes or cleansing oils that are designed to complement their products, facilitating easier removal without leaving residue.
Step-by-Step Makeup Removal Process
- Begin by Removing Eye Makeup: Since eye makeup can be the most stubborn to remove, use a dedicated eye makeup remover, preferably one that’s oil-based, to gently dissolve mascara and eyeliner. Soak a cotton pad in the remover, press it against your closed eyelids for a few seconds, then wipe away without rubbing harshly.
- Cleanse the Face: Following eye makeup removal, use your chosen facial cleanser. Apply it to dry skin and massage it in to dissolve foundation and other face products. You can also use a soft facial brush or a cleansing pad for enhanced exfoliation. Rinse thoroughly with lukewarm water to open up your pores and wash away impurities.
- Double Cleanse: If you wore a full face of makeup, consider a double cleanse. After the initial cleanse, follow up with a second cleanse using a gentle foaming or cream cleanser, particularly if you used a lot of long-wear or water-resistant products. This ensures any leftover residue is completely cleared away.
- Tone and Hydrate: After cleansing, apply a toner suited to your skin type to restore pH balance and refresh your complexion. Then, apply a nourishing moisturizer or overnight mask to lock in hydration.
Key Tips for Effective Makeup Removal
- Be Gentle: The skin around your eyes and face can be delicate. Avoid aggressive scrubbing to prevent irritation and premature aging.
- Use the Right Tools: Soft cotton pads, microfiber cloths, or bamboo wipes can help remove makeup without causing friction. Invest in quality reusable makeup remover pads for an eco-friendly option.
- Listen to Your Skin: If you notice irritation or redness, reassess your products. Your skin may require gentler formulations or a change in routine.
With these expert tips, not only can you effectively remove your Laura Geller makeup, but you can also set the stage for healthier, glowing skin. A thoughtful removal routine is just as essential as the application itself, fostering beauty that feels as good as it looks.
Q&A
Q: How do I choose the right Laura Geller foundation for my skin type?
A: To choose the right Laura Geller foundation, identify your skin type (oily, dry, combination) and finish preference (matte or dewy). Opt for a foundation that matches your undertone-warm, cool, or neutral. For more details on skin type compatibility, check the section on “Choosing the Right Laura Geller Makeup Products for Your Skin Type.”
Q: What are the must-have Laura Geller makeup brushes for application?
A: Essential Laura Geller makeup brushes include a foundation brush, concealer brush, blush brush, and a blending brush for eyes. Each tool helps achieve a seamless and flawless application. For further tips on tools, explore “Essential Tools for a Flawless Laura Geller Makeup Application.”
Q: How can I make my Laura Geller makeup last all day?
A: For long-lasting Laura Geller makeup, start with a primer that suits your skin type, use setting powder to reduce shine, and finish with a setting spray. For more tips, refer to the section on “Tips for Long-Lasting Laura Geller Makeup Looks.”
Q: What are common mistakes to avoid when applying Laura Geller products?
A: Common mistakes include applying too much product, choosing the wrong color, and neglecting skincare prep. Always blend well and use the right tools for application. Explore “Common Application Mistakes and How to Avoid Them” for more insights.
Q: How do I remove Laura Geller makeup effectively?
A: To remove Laura Geller makeup, use a gentle cleansing balm or micellar water, followed by your regular cleanser. This ensures all products are thoroughly washed away without irritating your skin. For detailed removal tips, see “Expert Tips for Removing Laura Geller Makeup Safely.”
Q: Which Laura Geller products are best for a natural makeup look?
A: For a natural makeup look, use Laura Geller’s Baked Balance-n-Brighten foundation, cream blush, and a light eyeshadow palette. These products enhance without overpowering. For more product recommendations, visit the “Creating Radiant Cheeks with Laura Geller Blush Techniques” section.
Q: What setting products does Laura Geller offer for makeup?
A: Laura Geller offers several setting products, including the Spackle Matte Make-Up Primer and the Coconut Water Setting Mist, both designed to lock in makeup and hydrate the skin. For more about setting your makeup, refer to “Setting Your Makeup for All-Day Wear.”
Q: How can I achieve a dewy look with Laura Geller products?
A: To achieve a dewy look, start with a hydrating primer, followed by a luminous foundation. Incorporate cream blush and highlighter for added glow. Check out “Enhancing Your Eyes: Laura Geller Eye Makeup Essentials” for complementary eye products.
To Wrap It Up
Now that you’ve mastered the art of applying Laura Geller makeup with our step-by-step guide, you’re all set to enhance your beauty game! Don’t wait-try these techniques today and discover how easily you can elevate your look. If you have any questions or need more personalized tips, be sure to check out our detailed makeup tutorials on Seint and Thrive to further refine your skills and find the perfect products for your style.
For those eager to dive deeper into beauty and grooming excellence, explore our comprehensive reviews of Ilia and ELF products, or learn professional barbering techniques that will not only refine your personal routine but also elevate your grooming expertise. Remember, beauty is an evolving journey; embrace it!
We invite you to share your thoughts in the comments below and let us know about your favorite Laura Geller products. For more beauty insights and exclusive updates, don’t forget to sign up for our newsletter, and keep exploring our site for all things beauty and grooming. Your next beauty adventure awaits!