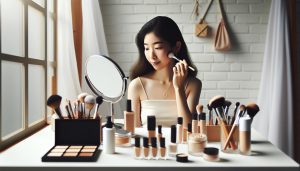
Makeup can be a powerful way to express creativity and enhance one’s features, but for beginners, the journey can feel overwhelming. In “How to Apply Makeup for Beginners: Foolproof First Steps,” we unveil straightforward techniques that demystify the application process. This guide addresses common concerns-like choosing the right products and mastering essential skills-while encouraging confidence and exploration in your makeup journey. Whether you’re preparing for a special occasion or simply looking to refine your everyday look, understanding the fundamentals of makeup application is key. Join us as we break down the steps, empowering you to create stunning looks with ease and fun.
How to Choose the Right Makeup Products for Beginners
Choosing the right makeup products can feel overwhelming, especially for beginners who may not know where to start. However, the key is to approach your selection based on your unique skin type, preferences, and desired look. Start by identifying your skin type-whether it’s oily, dry, combination, or sensitive-as this will significantly influence which products will work best for you. For example, those with oily skin might benefit from mattifying foundations and powders, while dry skin types could look for hydrating formulas and cream-based products.
When selecting products, prioritize quality over quantity. Consider investing in a few versatile essentials that can be used in multiple ways. For instance, a tinted moisturizer with SPF serves as both a skin treatment and foundation, providing coverage without feeling heavy. Similarly, a lip and cheek tint can add a touch of color to both your lips and cheeks. Reading product reviews and watching tutorials can give insight into which items are highly regarded and effective. Brands like Seint, Thrive, Ilia, and ELF are known for their beginner-friendly offerings and provide varied products across multiple price ranges, making it easier to find something that suits your budget and needs.
Don’t forget to consider the color palette that complements your skin tone. Warm, cool, and neutral undertones should guide your choices for foundations, blushes, and lipsticks. Testing products on your skin, ideally in natural light, can help ensure you select shades that enhance your natural beauty rather than clash with it. Finally, keep an eye out for products that cater to your specific needs, whether that’s non-comedogenic options for acne-prone skin or fragrance-free items for sensitive skin, ensuring you maintain a healthy base as you explore your makeup journey.
Essential Makeup Tools Every Beginner Needs
To embark on your makeup journey, having the right tools is essential for achieving seamless and polished looks. Just as a painter needs a brush and canvas, a makeup artist-novice or seasoned-requires specific tools to blend, define, and enhance their natural beauty. Investing in these essential tools will make the application process easier, more enjoyable, and significantly elevate your skills.
Start with the basics: a good makeup brush set is non-negotiable. Brushes are designed for different purposes, allowing for precise application and blending. A flat foundation brush, a fluffy blending brush, and an angled brush for your brows are foundational tools. Additionally, consider adding a beauty sponge, such as the popular beauty blender, which is excellent for achieving a flawless foundation finish. When it comes to affordable yet quality options, brands like ELF and Real Techniques offer fantastic starter sets that won’t break the bank.
Tool Essentials for Every Beginner
- Foundation Brush: Ideal for applying liquid or cream foundations evenly.
- Blending Brush: Perfect for softening edges and blending eyeshadow.
- Angled Brush: Great for filling in eyebrows and applying eyeliner.
- Beauty Sponge: Essential for dabbing, blending, and achieving a dewy finish.
- Powder Brush: Useful for applying setting powder and bronzer.
- Lip Brush: For precise application of lip color.
- Eyebrow Razor or Tweezers: Important for maintaining clean brows.
In addition to brushes, tools for hygiene and skin preparation should not be overlooked. A facial cleanser and a moisturizer tailored to your skin type will ensure a smooth canvas. Regular skincare enhances makeup application, helping it to sit better on the skin and last longer throughout the day. Consider using alcohol-free makeup wipes or a gentle cleansing oil for effective makeup removal, which keeps skin clear and healthy.
Getting creative with your tools can also enhance your makeup experience. For example, a fan brush can be used not only for highlighter but also for applying setting powder in targeted areas. The key is to explore how each tool performs for you and adapt it to your desired looks. Embrace your journey into makeup, and remember that practice is the path to proficiency-every brush stroke counts towards mastering your craft.
Step-by-Step Guide to Flawless Foundation Application
Achieving a flawless foundation application is a defining moment in your makeup journey, transforming your overall look and setting the stage for the rest of your makeup. The right technique can create a smooth, even canvas, enhancing your natural features while allowing the colors of your eyes and lips to pop. This guide breaks down the essential steps for applying foundation like a pro, ensuring every beginner feels confident and capable.
Start by preparing your skin with a clean and hydrated base. This involves using a gentle cleanser suited to your skin type, followed by a moisturizer. A well-hydrated face not only helps the foundation glide on more smoothly but also ensures that the product adheres better and lasts longer throughout the day. For those with oily skin, consider using a mattifying primer; for dry skin, a luminous primer can provide that coveted glow.
Next, it’s time to select the right foundation formula for your skin type. Options include liquid, cream, or powder, each offering different finishes. For a natural look, opt for a lightweight liquid foundation or a BB cream. Using your chosen foundation, dispense a small amount onto the back of your hand or a palette to maintain hygiene and control the amount applied.
The application method is crucial. Using a foundation brush, beauty sponge, or your fingers-each method provides a different finish. For a more airbrushed effect, use a damp beauty sponge. Start in the center of your face and blend outward, using a stippling motion to build coverage gradually. This technique allows you to cover blemishes without caking on too much product.
Once you’ve achieved an even application, set your foundation with a light dusting of translucent powder, especially if you tend to get oily throughout the day. Focus on areas like the T-zone, where oil tends to gather. This step not only locks in your foundation but also helps prevent it from settling into fine lines or pores.
Always remember: practice makes perfect. Experiment with different products and methods until you find what works best for you. As you become more comfortable, you can begin to layer coverage according to your desired look-be it a subtle glow for daytime or a flawless finish for a special evening out. Embrace your individual beauty as you master the art of foundation application.
Mastering Eye Makeup: Techniques for Beginners
Building captivating eye makeup can be an exhilarating journey, one that opens a world of creativity while highlighting your unique features. To achieve stunning results, understanding some essential techniques is key. Whether you are preparing for a casual day out or a night on the town, mastering eye makeup can elevate your overall look and empower you with confidence.
Preparing the eyes is crucial. Start with a clean canvas by applying an eyeshadow primer, which not only enhances the longevity of your makeup but also helps colors to appear more vibrant. Consider neutral shades for a base to ensure a smooth blend, and experiment with colors that enhance your eye color. For beginners, it’s often effective to choose three complementary shades: a light base color, a medium transition shade, and a darker shade for depth.
When applying eyeshadow, use a fluffy brush for the transition shade, sweeping it across your crease to create dimension. For the lid color, a flat brush is ideal to pack on pigment, while a smaller, detailed brush works wonders for applying darker shades along the lash line or on the outer corner for added definition. Blend seamlessly between these colors using circular motions, which are key to avoiding harsh lines.
When it comes to eyeliner, the choice between liquid, gel, or pencil can define your look. For beginners, a pencil liner is a great way to gain control and precision. Start with a thin line close to your lashes, and gradually build up thickness if desired. For a more dramatic look, consider a flick at the outer corner. Remember to not shy away from experimenting with techniques like tight-lining or a classic winged look; practice will refine your skills.
Lastly, enhance your lashes with mascara. Consider warming the wand gently between your fingers for smooth application. Wiggle the wand at the base of your lashes, then sweep upwards. If you’re feeling adventurous, try false lashes for added glamour on special occasions. Just be sure to practice applying and removing them, as confidence will grow with each application.
This foundational knowledge sets the stage for your eye makeup prowess to flourish. By embracing experimentation and practice, you’ll soon find your signature style that turns heads wherever you go. Given the diversity of eye shapes and personal styles, exploring various techniques will not only refine your skills but also allow you to express your individuality boldly through makeup.
Achieving Beautiful Brows: Shaping and Filling Basics
Achieving the perfect brows may seem daunting, but with the right techniques and tools, anyone can master the art of shaping and filling. Well-defined brows can frame the face beautifully, enhancing your natural features and elevating any makeup look. The key to this is understanding your brow shape and finding the best products that complement your hair color and skin tone.
Start by determining your brow shape. The natural arch of your eyebrows typically defines your face shape and can enhance your overall appearance. Use a brow pencil or a clear ruler to measure the following points: start at the inner corner of your eye for where your brow should begin, the highest point of your arch should ideally align with a diagonal line drawn from the nose to the outer edge of the iris, and finally, extend the tail to the outer corner of your eye. This will give you a guideline for shaping.
For shaping, whether you opt for tweezing, waxing, or threading, precision is crucial. Clean up stray hairs outside your desired shape, and avoid over-plucking to maintain a natural look. After shaping, it’s time to fill in your brows. Use a brow pencil, pomade, or powder-choose a color that matches your hair or is one shade lighter for a softer look. When applying, use light, feathery strokes to mimic real hair and achieve a natural finish.
To give your brows extra definition, finish with a clear or tinted brow gel to set them in place. This additional step not only holds your brows all day but can also help to create more volume, making them look fuller. Remember, practice is key; over time, you will develop a technique that works best for your unique features. By enhancing your brows, you not only define your eyes but also boost your overall confidence and style.
Tips for Contouring and Highlighting Like a Pro
Contouring and highlighting are powerful techniques that can transform your face and enhance your natural features. When done correctly, they create dimension and a balanced look that can elevate any makeup routine. The key to success lies in knowing your face shape and selecting the right products, as well as mastering the application techniques that work best for you.
To start, choose a contour product that is a few shades darker than your foundation. Creams and sticks offer a softer, more blendable appearance, while powders provide a matte finish. Highlighting, on the other hand, should be lighter than your foundation and have a luminous quality-a liquid highlighter can add a dewy glow, while a powder can provide a more dramatic shine. For beginners, stick to matte contours and soft highlighters to avoid overpowering your look.
Application Techniques
Apply contour to the areas of your face that you want to appear less prominent, such as the sides of your nose, under your cheekbones, and along your jawline. Blend upwards to avoid any harsh lines. Use a makeup sponge or contour brush for a more airbrushed effect. To highlight, focus on the tops of your cheekbones, the bridge of your nose, the center of your forehead, and your cupid’s bow. These areas catch the light and create a radiant glow, which contrasts beautifully with the shadowed areas.
Blending is Key
The most important step in contouring and highlighting is blending. Whether applying with a brush or sponge, ensure that the contour and highlight meld into your skin for a seamless look. A good tip is to layer thin amounts of product and build up gradually; this prevents the makeup from becoming too heavy. Additionally, setting your makeup with a translucent powder can help keep everything in place and prevent it from wearing off throughout the day.
With practice and patience, you can master these techniques and create a sculpted face that feels as good as it looks. Remember, the goal is to enhance your natural beauty and create a look that feels comfortable and authentic to you. Don’t be afraid to experiment and find what works best for your unique features!
Creating Stunning Lip Looks: From Balm to Bold
The lips often serve as the focal point of any makeup look, making them a canvas ripe for creativity and expression. Whether you’re going for a natural sheen or a bold statement, mastering how to create stunning lip looks can elevate your overall makeup game. It’s essential to understand that different lip products offer various effects, so having a diverse collection at your disposal can help you achieve the perfect lip look for any occasion.
When starting out, prep your lips for a flawless finish. Begin with a gentle exfoliation to remove any dead skin, followed by a moisturizing lip balm to ensure a smooth application of any lip color. This routine not only promotes hydration but also enhances the wear and appearance of colors. Consider using products like a tinted lip balm for a pop of color while keeping it simple during the day; brands such as Ilia and ELF offer great options that are both nourishing and pigmented.
To transition from a soft look to something bolder, you can play with different formulations. Liquid lipsticks provide long-lasting wear and matte finishes, while creamy lipsticks give a touch of sheen and comfort. When applying, use a lip liner to define the shape and prevent feathering. For a polished appearance, fill in your lips completely with the liner that matches your lipstick. This technique not only helps your lipstick last longer but also enhances your lip shape, ensuring your look is crisp and defined.
Creating Dimension
For those who want to take their lip looks to the next level, consider layering products. Start with a base of lipstick or stain, then add a gloss in the center of your lips for a fuller appearance. Using lighter shades in the middle of the lip and darker shades on the outer edges can create an illusion of more dimension and volume, making your lips a captivating feature of your makeup ensemble.
By experimenting with colors and textures, you can discover your unique style and find what works best for you. Don’t shy away from bold colors like deep reds or vibrant corals; these can be stunning and empower you to express your personality. With practice and the right techniques, crafting lip looks that range from subtle to striking becomes an enjoyable part of your daily beauty routine.
Makeup Removal: Importance of Cleansing Routine
Achieving that perfect makeup look is just one part of a beauty routine; equally important is knowing how to remove it effectively. Cleansing your skin post-makeup application is not merely a recommendation-it’s a crucial step for maintaining healthy skin, preventing breakouts, and promoting a radiant complexion. Many beginners overlook the significance of proper makeup removal, sometimes simply using wipes or not cleansing at all, which can lead to clogged pores and skin irritations.
To ensure a thorough cleanse, consider a two-step removal process. Start with an oil-based cleanser or micellar water to break down makeup, especially waterproof formulations that can be stubborn. Unlike traditional makeup wipes, these products dissolve makeup without tugging at the skin. After this first step, follow up with a gentle foaming or cream cleanser suitable for your skin type, whether oily, dry, or sensitive. This second cleanse will remove any leftover residue and impurities, leaving your skin fresh and balanced.
Additionally, never underestimate the importance of hydration in your cleansing routine. After removing makeup, it’s essential to apply a toner and moisturizer to restore moisture and prepare the skin for whatever products you want to apply next. Look for hydrating toners with ingredients like hyaluronic acid or rose water, which can help refresh and nourish your skin. Remember, a clean canvas is vital for flawless makeup application in the future.
To establish a solid cleansing routine, practice consistency. Make it a habit to remove makeup every night, regardless of how tired you may feel. Not only will your skin thank you, but it will also enhance your overall makeup experience, allowing products to apply more smoothly and effectively. By prioritizing your skin health, you empower yourself to continue exploring new makeup techniques and enjoying your beauty journey!
Common Makeup Mistakes and How to Avoid Them
Starting your makeup journey can be both exciting and overwhelming. With endless options and techniques, it’s easy to make a few common missteps along the way. Understanding these mistakes and how to avoid them not only builds a solid foundation for your beauty routine but also boosts your confidence in applying makeup effectively.
One frequent pitfall is skipping skincare prior to makeup application. A well-prepped canvas is essential for any successful look. Neglecting to cleanse, moisturize, and prime can lead to uneven application and adherence issues. To avoid this, always cleanse your face to remove any impurities, hydrate your skin with a suitable moisturizer, and apply a primer that suits your skin type-whether it’s mattifying for oily skin or hydrating for dry skin. This step not only enhances makeup longevity but also ensures a smoother finish.
Another common mistake involves using the incorrect shade of foundation. Many beginners either go too dark or too light, resulting in an unnatural look. To choose the right shade, swatch foundation on your jawline rather than your wrist, and test it in natural light. A good foundation should seamlessly blend into your skin tone. It’s also important to remember to blend thoroughly, particularly around jawlines and hairlines, to avoid harsh lines that disrupt the overall look.
Lastly, the use of too much product is a typical error that can lead to cakiness and an artificial appearance. Beginners often feel that applying more will enhance their look, but this can backfire. Instead, utilize a light hand and build up products gradually. Start with a small amount of foundation, and add layers as desired. The same goes for blush, eyeshadow, and other products-less truly can be more.
By being aware of these mistakes and taking proactive steps to prevent them, you can cultivate a more enjoyable and successful makeup application experience. Confidently armed with these tips, you’re on your way to mastering the art of makeup!
Building Your Makeup Kit: Budget-Friendly Tips
Building a makeup kit on a budget doesn’t require sacrificing quality for price; rather, it’s about making smart choices and investing in versatile products. A thoughtfully curated collection can empower beginners to explore their creativity and hone their skills without breaking the bank. Start by focusing on essential items that provide multiple uses and longevity, ensuring every purchase counts.
Essential Makeup Products
When selecting products, prioritize multi-functional items. For instance, a cream blush can double as a lip tint, and a neutral eyeshadow palette offers flexibility for both day and night looks. Focus on the following key items:
- Foundation/BB Cream: Choose a formula that evens out your skin tone while still allowing your natural texture to shine through.
- Eyeshadow Palette: A versatile palette with a mix of mattes and shimmers can be used for various occasions.
- Blush & Highlighter: Cream formulas often blend seamlessly into the skin and can be layered for a natural glow.
- Lip Color: A lip stain or balm provides hydration and a pop of color without the need for constant touch-ups.
- Setting Spray or Powder: Keep your makeup in place throughout the day with a budget-friendly setting product.
Smart Shopping Techniques
To maximize your budget, take advantage of sales, promotions, and loyalty programs. Many beauty retailers, like Sephora, offer discounts, and becoming a Beauty Insider can earn you points on every purchase that lead to further savings. Look for travel sizes or mini versions of high-end products; they provide the opportunity to test quality items without the typical price tag.
DIY Solutions
Don’t overlook the power of DIY. For instance, creating your makeup remover or mixing your own tinted moisturizer with existing skincare can save costs while giving a personalized touch. Researching recipes and exploring natural ingredients ensures your beauty routine aligns perfectly with your skin’s needs while keeping expenses low.
By curating a makeup kit thoughtfully and strategically, beginners can lay the groundwork for a fulfilling beauty journey. Stay mindful of both functionality and cost, ensuring every product serves its purpose while allowing you to experiment and grow in your makeup mastery.
Inspiration: Makeup Looks for Every Occasion
Making the right impression begins with choosing the perfect makeup looks for various occasions. Whether you’re headed to a casual brunch, a formal event, or a night out with friends, understanding how to adjust your makeup can elevate your overall style and ensure you feel confident and beautiful. For everyday wear, consider a fresh-faced look that enhances your natural features-think light foundation or BB cream, a hint of blush, and a swipe of tinted lip balm. This approach keeps things simple while allowing your personality to shine through.
For evening gatherings or special events, transitioning to a more glamorous look can be both fun and rewarding. Opt for a bold eyeliner and a well-defined brow to frame your face. A smokey eye paired with a classic red lipstick makes a timeless statement that’s universally chic. Keep in mind that balance is key; if you choose to go bold on the eyes, consider pairing it with a nude or soft gloss on the lips to avoid overwhelming your features.
Seasonal events also provide an excellent opportunity to get creative with color and texture. For instance, during the summer, try vibrant eyeshadow hues like corals or turquoise that reflect the cheerful atmosphere. In contrast, fall events call for deeper shades, such as burgundy or plum, which can beautifully complement seasonal attire. Don’t shy away from experimenting with textures-add glitter or shimmer for holidays, or switch it up with matte finishes for a more sophisticated vibe.
Finally, remembering to tailor your look to your outfit and personal style is essential. Whether it’s chic and sophisticated or playful and colorful, your makeup should align with who you are. Consider creating a mood board with looks that inspire you for each occasion, so you have a reference point to return to as you build your skills and grow your confidence in makeup application. By doing so, you can create stunning looks that not only suit the occasion but also reflect your unique beauty.
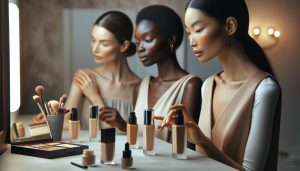
Understanding Skin Types and How They Affect Application
Understanding your skin type is crucial for a successful makeup application, especially for beginners who are just starting to explore the world of cosmetics. Each skin type has unique characteristics that influence how products perform and wear throughout the day. By recognizing your skin type, you can select the right products and tailor your application techniques to achieve a flawless finish that enhances your natural beauty.
- Dry Skin: If your skin feels tight, flaky, or rough, it’s likely dry. Use hydrating primers and dewy foundations to add moisture. Cream blushes and highlighters can also help create a luminous finish.
- Oily Skin: Characterized by excess shine, particularly in the T-zone (forehead, nose, chin), oily skin benefits from mattifying products. Opt for oil-free or mattifying foundations and set with powder to combat shine throughout the day.
- Combination Skin: This type features a mix of dry and oily patches. Use lighter formulas in oilier areas and more hydrating products where the skin is dry. A versatile foundation that adjusts to different areas can be beneficial.
- Sensitive Skin: Prone to redness, irritation, and breakouts, sensitive skin needs gentle, hypoallergenic products. Look for mineral foundations or formulated cosmetics that are free from fragrances and harsh chemicals.
- Normal Skin: A balanced skin type that isn’t overly oily or dry. Most makeup products will work well, but sticking to lightweight foundations and natural finishes can keep the skin looking fresh.
Recognizing these skin types helps in curating a personalized makeup kit that enhances how products perform. For instance, if you have dry skin, incorporating a hydrating setting spray can ensure your makeup doesn’t flake off or settle into fine lines. Conversely, oily skin types might find that a translucent setting powder can be their best ally in achieving a long-lasting and shine-free look.
Lastly, always keep in mind that skin can be affected by factors such as climate, diet, and overall health. What may work well today could change in different seasons or scenarios, so keeping your skincare routine adaptable enables you to maintain a beautiful canvas for your makeup application. Understanding your skin type is an empowering step towards mastering makeup, ensuring you not only look good but feel confident in your own skin.
Frequently Asked Questions
Q: How do I start applying makeup as a beginner?
A: To start applying makeup, begin with skincare to prep your skin. Use a primer, followed by foundation for an even base. Focus on one area at a time, such as eyes or lips, and practice applying with essential tools like brushes and sponges to build your confidence.
Q: What are the best tips for beginners to avoid makeup mistakes?
A: Common mistakes include applying too much product and neglecting skin prep. Start with light layers, blend well, and use quality brushes. Regularly clean your tools and practice different techniques to improve your skills and avoid mishaps.
Q: What makeup products should I buy first?
A: Beginners should invest in a few essential products: foundation, concealer, mascara, and a versatile eyeshadow palette. Also, consider a neutral lip color and a good setting spray to help makeup last. Refer to the section on choosing the right products for more details.
Q: How can I make my makeup last all day?
A: To make makeup last, start with a primer tailored to your skin type. Set your makeup with a translucent powder and finish with a setting spray. Avoid touching your face and use oil-blotting sheets throughout the day if your skin tends to get oily.
Q: What is the proper way to apply eyeshadow for beginners?
A: For beginners, start with a neutral base eyeshadow. Use a flat brush to apply the base color on the lid, and a blending brush for the crease. Layer deeper shades gradually and blend well for a seamless look. Techniques on mastering eye makeup are covered in-depth in the article.
Q: How do I choose the right makeup shade for my skin tone?
A: To choose the right shade, test foundation on your jawline in natural light. For other products, consider your undertone-cool, warm, or neutral. Swatch products on your wrist to find shades that blend with your natural complexion.
Q: Should I use a primer before makeup? Why?
A: Yes, using a primer is essential as it creates a smooth canvas for makeup application, minimizes the appearance of pores, and helps makeup last longer. Choose a primer based on your skin type-hydrating for dry skin and mattifying for oily skin.
Q: How often should I clean my makeup brushes?
A: Clean your makeup brushes once a week to prevent the buildup of bacteria, which can cause breakouts. Use gentle soap or a brush cleanser, and allow them to air dry to maintain their shape and longevity. For more makeup tool tips, check the article’s essential tools section.
In Retrospect
Now that you have mastered the essential techniques for applying makeup, it’s time to put your skills to the test! Remember, practice makes perfect, and the more you experiment, the more confident you’ll become in your application. Don’t hesitate to explore further-check out our in-depth guides on product reviews for brands like Seint, Thrive, Ilia, and ELF to help you choose the best tools and products for your beauty routine.
If you’re eager to elevate your skills, consider our advanced tutorials on makeup application strategies, or dive into our resources on professional grooming techniques to support your personal style development. Stay inspired and keep learning-your journey in beauty is just beginning! Share your progress with us in the comments, and be sure to subscribe for the latest beauty tips and product recommendations. Every step you take brings you closer to mastering the art of makeup!