Contouring has become an essential step in makeup artistry, allowing individuals to accentuate their best features and achieve a sculpted look that enhances their natural beauty. Whether you’re getting ready for a special event or simply wish to elevate your daily routine, mastering contouring can transform the way you approach your makeup. Many people struggle with finding the right techniques and shades suitable for their unique face shape, leading to confusion and frustration. In this guide, we’ll explore easy, step-by-step methods that empower you to contour like a professional, ensuring you feel confident and radiant. Prepare to unlock the secrets of successful contouring and discover how you can perfect your makeup game!
How Contouring Works: The Science of Sculpting
Contouring is an art form that hinges on the understanding of light and shadow, allowing you to enhance and redefine your facial features with practice and the right techniques. At its core, contouring works by tricking the eye into perceiving certain areas as highlighted while others appear more shadowed, effectively sculpting the face without surgical procedures. The science behind contouring lies in the reflection of light: light areas catch the eye, while darker areas recede. This principle is the basis for creating an illusion of a more sculpted face, adding dimension and emphasizing your best features.
When contouring, focusing on the anatomy of your face is essential. Different face shapes-oval, round, square, heart, and more-each have unique structural characteristics that can be accentuated or softened through applied product placement. For instance, a round face might benefit from contouring the sides of the forehead and the edges of the cheeks to create the appearance of length, while an oval face may highlight a broader cheekbone structure. Understanding these nuances allows for a personalized approach to your makeup routine, enhancing not only your features but also your confidence.
The tools you choose play a crucial role in successful contouring. Products vary from cream to powder formulas, each with its benefits depending on your skin type and the look you aim to achieve. Cream contours offer a dewy finish, ideal for dry skin and a natural glow, while powder contours provide a matte finish that can be perfect for oily skin types. Additionally, makeup brushes and sponges designed specifically for contouring can facilitate the application and blending process, ensuring that your sculpted look is seamless and refined.
Incorporating contour into your makeup routine can significantly change how you present yourself daily. By mastering the science of sculpting through contouring, you build a toolkit for enhancing your natural beauty, creating a foundation for an expressive and confident appearance.
Understanding Face Shapes: Tailoring Technique to Structure

Mastering the art of contouring begins with understanding the unique architecture of your face. Just as a sculptor studies their clay, recognizing your face shape paves the way for effective contouring. Whether your face is oval, round, square, heart, or diamond-shaped, the contouring techniques you choose should enhance your natural features rather than mask them. For example, a round face can benefit from contouring along the sides of the forehead and beneath the cheekbones to create an illusion of length, making the face appear slimmer. Meanwhile, those with square faces might focus on softening the jawline, applying contour beneath the chin and along the jaw to achieve a more delicate silhouette.
Tailoring Techniques for Each Face Shape
- Oval Face: Typically considered the ideal face shape, an oval face can be enhanced with contouring along the forehead and chin. Highlighting the cheekbones and temples can elevate the natural symmetry.
- Round Face: To elongate a round face, apply contour along the sides of the forehead and under the cheekbones. Softening the jawline with contouring can also add depth.
- Square Face: For a square face, aim to contour the jawline and temples to soften the sharp angles. Highlighter on the center of the forehead and cheekbones can create a balanced look.
- Heart Shape: Focus on contouring the forehead’s edges and under the cheekbones while highlighting the chin to draw attention downward and elongate the face.
- Diamond Shape: Contour the forehead and jawline while highlighting the cheekbones, drawing attention to the center of the face and enhancing its natural beauty.
Recognizing the nuances of your face shape not only informs the placement of contour and highlight but also significantly boosts your confidence. By tailoring your techniques accordingly, you enhance your features with an expert touch, transforming daily makeup from a routine into a personalized art form. As you refine your approach, you’ll find that the ability to sculpt and define your face becomes a valuable skill, allowing for expressive and beautiful results tailored just for you.
Essential Makeup Tools for Perfect Contouring

Achieving the perfect contour is not just about the technique; it’s also significantly influenced by the tools you choose to wield. Having the appropriate makeup instruments can make a world of difference in how seamlessly you sculpt and define your features. From brushes to sponges, the right tools can elevate your contouring game, ensuring you achieve that professional finish at home. Here’s a rundown of essential makeup tools that will empower you to master the art of contouring with confidence.
Key Contouring Tools
- Contouring Brushes: Invest in a variety of brushes to help you achieve different levels of definition. An angled brush is excellent for applying contour along the cheekbones, while a smaller, denser brush works wonders for precise application in the nose and forehead areas.
- Blending Sponges: A high-quality makeup sponge is indispensable for achieving a flawless blend. Opt for a damp sponge to press products into the skin, creating a seamless transition between your contour and foundation.
- Fan Brush: This tool is ideal for adding highlight to specific areas like the cheekbones and brow bones. Its unique shape ensures an even application with minimal product waste.
- Foundation Brush: Using a flat foundation brush, you can initially lay down your base color before moving to your contour. This helps to create a smooth, even canvas for your makeup.
- Stippling Brush: This dual-fiber brush is perfect for applying cream contours, allowing for a light application that builds easily without caking.
- Mirror: A good-quality mirror with daylight settings is crucial for checking your work from different angles and lighting conditions. Good lighting can prevent over-application and ensure your contours look natural.
Ultimately, the tools you use can enhance your sculpting skills and help you achieve the desired outcome effortlessly. Whether you’re a makeup novice or a seasoned artist, investing in quality tools can elevate your beauty routine and inspire you to explore creative looks. Remember, practice makes perfect, and with the right brushes and sponges in hand, you’re well on your way to mastering contouring like a pro.
Step-by-Step Guide to Basic Contouring
When it comes to contouring, getting the technique right can feel like both an art and a science. The primary goal is to enhance your natural features by creating shadows and highlights that define your face shape beautifully. Let’s delve into a step-by-step approach that makes basic contouring straightforward and accessible, regardless of your experience level or face shape.
To begin, a well-prepped canvas is vital. Start with a clean, moisturized face, followed by a foundation that matches your skin tone. This base will create an even backdrop for your contouring, allowing the shadows and highlights to blend seamlessly. Once your foundation is applied, follow these steps to sculpt your features:
Step-by-Step Guide
- Identify Your Face Shape: Tailor the contouring approach based on whether you have an oval, round, square, or heart-shaped face. This awareness helps in knowing where to apply contour and highlighter.
- Apply Contour: Using a contour product that is 1-2 shades darker than your foundation, use an angled brush to apply it to the hollows of your cheeks, the sides of your nose, and along your jawline. For a round face, create angular shapes on the sides to elongate, while for an oval face, the focus should be on softening any sharpness.
- Blend Well: The key to contouring is blending. Use your damp blending sponge or a brush to seamlessly merge the contour lines into your foundation, ensuring there are no harsh lines.
- Add Highlights: Choose a highlighter 1-2 shades lighter than your foundation. Apply it to the high points of your face: the tops of your cheekbones, bridge of your nose, brow bones, and the center of your forehead. This step is critical as it brings light to the areas you want to emphasize.
- Final Touches: Once your contour and highlight are blended, set your makeup with a light dusting of translucent powder. This ensures longevity and keeps your look fresh throughout the day.
Using high-quality tools, such as a stippling brush for cream products and a fan brush for precise highlighting, will enhance your results. Remember, practice is key; the more you practice these steps, the more naturally they will come to you. Contouring enhances your facial structure in a way that feels flattering and authentic, so don’t hesitate to experiment and find what works best for your unique beauty.
Advanced Contouring Techniques for Flawless Definition
To elevate your contouring game beyond the basics, mastering advanced techniques can truly define your facial structure in a stunning and professional way. One fundamental principle is understanding the effects of light and shadow on various regions of your face. By employing these techniques effectively, you can sculpt, slim, and highlight with precision, giving a polished effect that’s both chic and natural.
Creating a faux bone structure is a powerful method. Begin by contouring not just the traditional areas, but also along the sides of your forehead and temples. This technique can help create the illusion of a more oval face. Use a cream contour for a seamless finish, and apply it just above the brow bone, blending into the hairline. For those with a wider forehead, apply contour at the edges, which helps to visually narrow this area.
Highlighting the inner corner of the eyes and the brow bone is another advanced tactic that can open up your eyes and enhance their shape. Choose a glowy, luminous highlighter to apply here, as well as on the tops of your cheekbones and the bridge of your nose. For a more dramatic effect, consider ‘baking’ the highlight under your eyes-apply a heavy layer of translucent powder beneath your cheekbone highlight and allow it to set for a few minutes before dusting off. This not only brightens but also locks in the contour for lasting power.
For advanced definition, try contouring the jawline and chin specifically. A well-defined jawline can be achieved by applying a contour shade along the jawline and blending downwards, which contrasts nicely with carefully placed highlights just above the jaw. Use a small, precise brush to work the contour into the natural shadows of your face to avoid any harsh lines.
Lastly, integrating color theory into your contouring can really up your game. Depending on your skin undertone, choose contour and highlight shades that complement your natural tones-cool tones for pink or neutral undertones, and warmer tones for golden undertones. This attention to detail ensures a more harmonious look that celebrates your individual beauty.
By implementing these advanced techniques and tools, such as a contour stick for precise application and a beauty sponge for blending, you’ll transform your makeup routine into an art form. Remember, practice is crucial; experimentation will lead to discovering what best enhances your unique features.
Highlighting vs. Contouring: Mastering Light and Shadow
Understanding the difference between highlighting and contouring is essential for achieving a balanced and sophisticated makeup look. Each technique plays a distinctive role in enhancing your facial features, and mastering the interplay of light and shadow can transform your natural beauty into a flawless canvas. While contouring focuses on creating shadows to define your structure, highlighting brings attention to the areas you want to accentuate, adding dimension and radiance.
To effectively implement these techniques, consider the specific areas of your face and how light interacts with them. Generally, contour is applied to the sides of your nose, the hollows of your cheeks, and along your jawline using a matte product that’s a few shades darker than your base. In contrast, highlights should be placed on the tops of your cheekbones, the bridge of your nose, the cupid’s bow, and the inner corners of your eyes. A shimmering or glowy product works best for these areas to reflect light and create that sought-after luminosity.
Key Techniques for Mastery
- Contour Application: Use a cream or powder contour formula with a cool undertone for a natural shadow effect. Apply it in the hollows of your cheeks and blend up towards the ear.
- Highlighting Tips: Opt for a highlighter that complements your skin tone. For a subtle glow, swap creamy formulas with powder highlights that provide a sheer finish.
- Blending Techniques: The success of both methods depends heavily on blending. Use a damp beauty sponge or a fluffy brush for seamless transitions between areas, ensuring no harsh lines are left behind.
Finding the perfect balance between these two techniques involves practice and experimentation. Begin with a light hand and build up the intensity, adjusting the placement according to your face shape and desired outcome. The key is to enhance your natural features without overwhelming them, allowing your unique beauty to shine through with every stroke. By understanding and mastering the contrast of light and shadow, you can go beyond basic makeup application and create a refined look that is both timeless and chic.
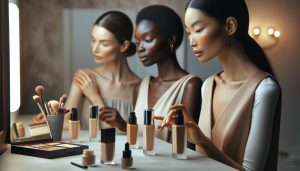
Choosing the Right Contour Products for Your Skin Type
Choosing the right contour products for your individual skin type is essential for achieving a natural look. With an array of formulas available-such as creams, powders, and sticks-understanding which product complements your skin can significantly enhance the contouring process.
For those with oily skin, opting for a matte powder contour can help absorb excess shine and set your makeup effectively. Look for products with a fine texture to avoid cakiness; brands like Thrive and ELF offer great options that provide buildable coverage without feeling heavy. Cream contours can work too, but ensure they are specifically designed for oily skin to prevent sliding throughout the day. Additionally, setting your makeup with a translucent powder can lock everything in place, ensuring your contour remains defined.
Dry skin, on the other hand, benefits greatly from creamy or liquid formulas. These products hydrate the skin while providing a seamless blend that’s essential for a dewy finish. Consider using a contour stick from Seint or a liquid formula from Ilia, which offer moisture-rich ingredients. Always remember to prep your skin adequately with a good moisturizer or hydrating primer, as this will create a smoother canvas for application.
Combination skin types can go either way, but a hybrid approach may be most effective. Start with a lightweight cream or liquid for areas that need hydration, then layer a powder contour over oily areas to prolong wear. This technique ensures your makeup adapts to your skin’s needs throughout the day while maintaining a cohesive look.
Lastly, always consider your skin tone when selecting shades. Choose contour products that are one or two shades darker than your skin tone with cool undertones to mimic natural shadows. Warmer shades can look overly orange and unnatural, particularly in harsh lighting. Testing shades on your jawline can help ensure the most flattering selection.
Ultimately, the right contour products not only elevate your makeup but also reflect your unique beauty, empowering you to express your individuality confidently.
Common Contouring Mistakes and How to Avoid Them
Contouring has become an essential skill in makeup artistry, but many find themselves making common mistakes that can lead to less-than-flattering results. One significant misstep is choosing the wrong contour shade. Selecting a shade too dark can create stark, unnatural lines. Aim for contour products that are one or two shades darker than your skin tone with cool undertones. Avoid overly warm shades that can look orange and unnatural, particularly under bright lighting. A simple way to test the shade is to apply it on your jawline, allowing you to see how it melds with your natural skin tone.
Another frequent error is applying contour in the wrong areas or using improper blending techniques. Contouring is meant to accentuate your natural features, so map out the areas you want to define, such as the cheekbones, jawline, and nose. After applying the contour, flawless blending is crucial; harsh lines can break the illusion of depth and dimension. Utilize tools such as damp beauty sponges or tapered brushes to achieve a seamless finish. Emphasizing a quick buffing motion will soften the lines, giving your contour a sculpted yet natural look.
Many makeup enthusiasts also overlook the importance of setting their contour. Without a good setting powder or spray, your hard work can fade throughout the day, turning into unflattering smudges. For oily skin types, a matte setting powder helps to absorb excess shine, while those with dry skin should focus on a hydrating mist to maintain a dewy finish. A product like the ELF translucent setting powder can work wonders for locking in your contour while ensuring no powderiness remains visible.
Lastly, consider the overall balance of your makeup. Contouring should complement your entire look, not overpower it. If you’re going for dramatic eye makeup, a softer contour may be more appropriate to avoid looking overdone. Conversely, for a natural, everyday look, a light contour will help enhance your features without feeling heavy. Tailoring your contour intensity to the occasion will not only provide harmony in your makeup application but also build your confidence as you master the art of sculpting.
Before and After: Transformative Contouring Examples
A stunning transformation through contouring can elevate a makeup look from ordinary to extraordinary, providing a sculpted appearance that beautifully enhances the natural structure of the face. The effectiveness of contouring can be observed through impactful before-and-after photography which highlights how strategically placed hues and expertly blended products can reshape and redefine features. For instance, a basic side-by-side comparison may reveal the same face illuminated by light and shadow techniques, showcasing how contouring can carve cheekbones, sharpen jaws, and elongate the nose effortlessly.
In many cases, the simplest contour techniques can result in the most dramatic transformations. Consider a model with a round face who applies contour beneath the cheekbones and along the sides of the forehead. The after image often displays a more oval visage, achieved by creating shadows that subtly reshape the face. This delicate balancing act of highlighting and contouring can draw the eye upward, creating a visually appealing lift. A review of such transformations often emphasizes not just the products used, but also the technique: precision in application can mean the difference between a flawless enhancement and an overly dramatic shift.
Lighting also plays a critical role in how contouring appears in the final look. A model photographed in soft, natural light showcases the effectiveness of using a matte contour with a light shimmer highlight on the high points of the face. This technique not only defines features but also celebrates a radiant finish, resulting in an effect that looks polished yet accessible. Observing transformative examples, one understands that contouring is less about masking flaws and more about enhancing what is already there, inspiring both novices and seasoned artists alike to embrace their unique beauty through tailored makeup techniques.
When seeking inspiration, look for images that show the entire process-from the initial application of contour and highlight to the completion of the makeup look. Not only does this present a visual representation of the effectiveness of contouring, but it also offers practical insights into placement and blending techniques that are essential to mastering the craft. By analyzing these transformations, aspiring makeup enthusiasts can gain confidence in their ability to sculpt their features beautifully, leading to personalized styles that reflect their individuality.
Special Occasion Contouring: Glam for Events
Creating a captivating makeup look for special occasions often hinges on the art of contouring. The aim is to enhance your features under varying lighting conditions, ensuring you radiate confidence during every moment of the event-from the initial arrival to the final farewell. Understanding how to sculpt your face flawlessly is essential, as it not only emphasizes your best features but also complements your overall look, ensuring you stand out in photos and in person.
To achieve a glamorous effect, start by preparing your skin with a good primer to create a smooth canvas. This step helps your makeup last longer, especially through the excitement of an event. When choosing your contour products, opt for cream formulas for a more dramatic effect, as they blend seamlessly into the skin. Select shades that are one to two tones darker than your natural skin tone for contouring and a few shades lighter for highlighting. For a stunning, well-defined look, focus on applying contour to key areas such as the hollows of your cheeks, your jawline, and the sides of your nose. This strategic placement shapes the face and provides depth where needed.
Blending is essential in special occasion contouring to avoid harsh lines and achieve a more natural finish. Use a damp makeup sponge or a dense brush to gently blend your contour and highlight into the skin. Once you’ve achieved the desired definition, set your look with a translucent powder to ensure your hard work remains intact throughout the event. A setting spray can also help lock everything in place, offering an additional layer of longevity.
Don’t forget to adjust your makeup application based on the lighting of the venue. For instance, if you’re attending a formal evening event, slightly more product might be necessary as dim lighting can wash out your features. Conversely, for daytime occasions, a softer approach to contouring can create a fresh, radiant appearance. Ultimately, the goal of contouring for special occasions is to enhance your natural beauty while providing the confidence you need to shine.
Everyday Contouring: Quick Techniques for Busy Mornings
In a fast-paced world, finding efficient ways to enhance your natural beauty can feel challenging, especially when time is limited. Everyday contouring is designed to be quick and effective, offering subtle sculpting that works harmoniously with your busy routine. Utilizing a few essential techniques can help you achieve a fresh, polished look in mere minutes, allowing you to step out with confidence regardless of the day’s demands.
One of the simplest yet impactful methods is to establish a clear routine to streamline the contouring process. Begin by applying a lightweight foundation or tinted moisturizer to create an even base. This not only preps your skin but also allows any additional makeup to blend effortlessly. The key areas to target for contouring in your daily routine are the hollows of your cheeks, the sides of your nose, and your jawline. Using a cream or stick contour product that’s just a shade or two darker than your skin tone, apply the contour in a diagonal line from the ear towards the mouth to sculpt the cheeks. This technique helps enhance your natural structure without demanding too much time or product.
For a quick transition to a more radiant look, pair your contour with a complementary highlighter. A cream or liquid highlighter applied to the tops of your cheekbones, the bridge of your nose, and the brow bones can bring a healthy glow to your complexion. Not only does this duo of contour and highlight define your features, but it also adds dimension, allowing you to project an effortless glow throughout your day. Blending is crucial here; a makeup sponge or your fingers can achieve a soft, natural look without any harsh lines.
Finally, always remember to set your makeup to ensure it lasts through the day, especially if you’re on the go. A lightweight setting spray or a translucent powder can help lock in your look without feeling heavy. With these simple techniques, you will not only save time but also master the art of everyday contouring, leaving you looking effortlessly chic and ready for whatever the day holds.
Tips for Blending: Achieving a Seamless Finish
To achieve a flawless contour, mastering the blend is paramount. The magic of makeup lies in its ability to create depth and dimension, and this is best expressed through seamless transitions between highlighted and contoured areas. Using the right techniques and tools can elevate your contour game from noticeable lines to a natural-looking sculpted effect that enhances your features beautifully.
Begin with a quality makeup sponge, which should be dampened before use. This not only softens the sponge but also ensures a more even application. When it comes to blending, start by using the pointed tip of the sponge to gently dab over your contour lines. This will soften harsh edges, creating a smooth finish. Remember to use a light hand; instead of dragging the product downwards, tap gently to push the product into your skin. Blending should be an upward motion, which helps lift the facial features and maintains that natural contour.
In addition to sponges, a dual-ended brush can be an excellent tool for those who find sponges challenging. Use the dense side to apply the contour shape, then flip to the fluffy side to diffuse and blend. This brush-to-skin method allows for maximum control and accuracy, guiding the product where you want it without overloading any area.
It’s also critical to consider the types of products used in contouring. Cream formulas often require a different blending approach than powders. For cream contours, long, sweeping motions with your brush or sponge are essential to avoid streaks. Conversely, powder contours benefit from a circular blending action to diffuse the pigments softly across the skin.
Lastly, don’t underestimate the power of setting. A light dusting of translucent powder over your blended contour will lock the makeup in place while ensuring that it doesn’t move throughout the day. Additionally, finishing with a setting spray can provide an extra layer of moisture and help meld the layers of makeup into one cohesive look.
By focusing on these blending techniques and tools, you’ll achieve that coveted natural appearance, allowing your unique beauty to shine through effortlessly. Embrace the process, as every blend gets you closer to mastering the art of contouring.
Faq
Q: What are the best contouring techniques for round faces?
A: For round faces, focus on contouring the sides of the forehead, beneath the cheekbones, and along the jawline to create a more elongated look. Highlight the center of the forehead, the tops of the cheeks, and the chin to bring attention to these areas. For more details, check out the section on “Understanding Face Shapes” in the article.
Q: How can I contour without looking heavy or cakey?
A: To avoid a heavy look, opt for cream or liquid contours instead of powders, which blend more seamlessly into the skin. Start with a light application, building up layers as necessary, and remember to blend well for a natural finish. Refer to the “Tips for Blending” section for techniques.
Q: When should I apply contour makeup during my routine?
A: Contour makeup is best applied after foundation and concealer but before setting powders. This layering helps ensure a smooth finish and allows the contour to blend seamlessly into your base. See “Step-by-Step Guide to Basic Contouring” for a comprehensive routine.
Q: Can I contour if I have dry skin?
A: Yes, individuals with dry skin can contour by using hydrating products like cream contours and moisturizing highlighters. Always prep your skin with a good moisturizer to create a smooth surface. For product suggestions, check the “Choosing the Right Contour Products for Your Skin Type” section.
Q: How do I choose the right contour shades for my skin tone?
A: Select contour shades that are 1-2 shades darker than your natural skin tone for shadows and a highlighter that is 1-2 shades lighter. Cool tones work well for fair skin, while warm tones suit medium to dark skin tones. Visit the section on “Choosing the Right Contour Products” for more tips.
Q: What common mistakes should I avoid when contouring?
A: Common mistakes include using the wrong shade, not blending enough, or applying too much product. Always start with a light hand and build coverage. Detailed guidance can be found in the “Common Contouring Mistakes and How to Avoid Them” section.
Q: How do I make my contour last all day?
A: To ensure long-lasting contouring, set your makeup with a translucent setting powder and use a setting spray after finishing your look. This helps lock in your makeup and reduce shine throughout the day. For more tips, refer to the “Before and After: Transformative Contouring Examples” section.
Q: What tools do I need for effective contouring?
A: Essential tools for contouring include a good quality contour brush or sponge for blending, a highlighting brush, and a stippling brush for precise application. For a complete list, check the “Essential Makeup Tools for Perfect Contouring” section.
Wrapping Up
Now that you’ve mastered contouring techniques tailored for any face shape, it’s time to put your skills to the test! Remember, practice makes perfect, and your new look can truly elevate your makeup game. If you found these tips helpful, explore our detailed guides on makeup essentials like the best tools for contouring or a product review on top brands like Seint and Ilia. Don’t miss out on our step-by-step application techniques that will enhance your artistry!
Ready to dive deeper? Subscribe to our newsletter for exclusive tips delivered straight to your inbox and join our growing community of beauty enthusiasts! We’d love to hear how your contouring journey is going-share your thoughts in the comments below! Embrace the art of makeup and continue exploring new styles that reflect your unique beauty. Your confidence is just a contour away!