Covering pimples with makeup is a skill that can transform a day from ordinary to extraordinary. Did you know that nearly 85% of people experience acne at some point? This common skin concern can impact confidence, making effective concealing techniques essential. In “How to Cover Pimples with Makeup: Spot Concealing Like a Pro,” we’ll explore expert tips and tricks to expertly mask imperfections with grace. Whether you’re a makeup novice or a seasoned pro, mastering the art of spot concealing not only elevates your beauty routine but also empowers you to face the world with renewed self-assurance. Get ready to discover the techniques that will help you achieve a flawless complexion, leaving you feeling beautiful and confident.
Understanding Your Skin Type and Its Impact on Concealing
Understanding your skin type is crucial for effective concealing, especially when combating blemishes like pimples. Skin types vary significantly-ranging from oily and dry to combination or sensitive-and each type responds differently to various makeup formulations. For instance, oily skin types often produce excess sebum, which can cause makeup to slide off. Thus, using a matte concealer paired with a setting powder can help achieve longevity and control shine, ensuring that the coverage remains intact throughout the day. On the other hand, dry skin necessitates a more hydrating concealer to avoid the dreaded flakiness that thick products can exacerbate.
See how texture plays a fundamental role in your choice of concealer. People with dry skin might benefit from cream-based concealers that provide a nourishing finish, as opposed to the powdery formulas better suited for oily skin. Likewise, for combination skin, a hybrid approach is effective-using a thicker product for problem areas while opting for lighter formulas where the skin is less prone to breakouts. Understanding the nuances of your skin type allows you to select the appropriate products and techniques that solve specific challenges, such as ensuring even coverage without emphasizing flaws.
Moreover, considering factors like environmental conditions and hormonal changes can enhance your concealing strategies. Seasonal shifts can alter how your skin behaves-winter often brings dryness, while summer can lead to unwanted shine. Adjusting your makeup routine accordingly, such as incorporating moisturizers during colder months or opting for oil-free formulas in the heat, ensures you achieve that flawless look you desire. Remember, the key to mastering the art of concealing lies not just in the right products, but in tailoring your approach to your skin’s unique characteristics. By honing in on your skin type and its impact on makeup application, you’re setting a solid foundation for achieving pro-level concealing results.
Essential Tools for Spot Concealing Like a Pro
To achieve flawless coverage when dealing with blemishes, having the right tools at your disposal is crucial. Mastering the art of spot concealing isn’t just about technique; it also hinges on using the appropriate instruments that can help you achieve professional results. Whether you’re a makeup novice or an industry pro, investing in a few essential tools can elevate your concealing game and help you tackle those pesky pimples with ease.
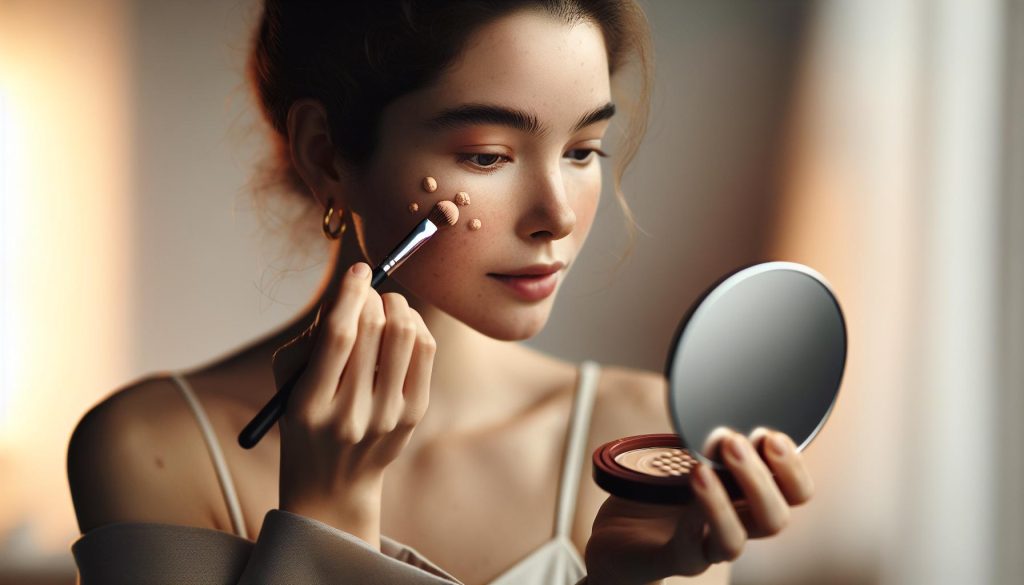
One of the standout tools for spot concealing is the fine-tip concealer brush. This allows for precise application, letting you carefully dab concealer right onto blemishes without spreading it to surrounding areas. A brush gives you the control needed for targeted spots, ensuring that the product blends seamlessly into your skin. If you prefer a more natural finish, a clean fingertip can also work wonders; the warmth from your skin helps to melt the product for a smoother application that looks more like your skin and less like makeup.
On the other hand, having a good selection of concealers is fundamental. Choose a creamy formula for hydration, especially for dry skin, while matte options work well for oily complexions. Consider shades that are closest to your natural skin tone for a seamless blend, and don’t be afraid to keep a couple of different shades on hand. This flexibility will allow you to mix and match, adapting to changes in your skin tone or under different lighting conditions.
For those stubborn spots that just won’t budge, a setting powder can be your best friend. After applying your concealer, simply tap on a light dusting of translucent powder to set it in place. This not only helps to lock in your makeup but also diminishes shine, helping your concealer to stay put for hours. Pair this with a setting spray for additional longevity, especially on warmer days when skin might get oily.
Lastly, ensure that your tools are properly maintained. Regularly cleaning your brushes and sponges not only ensures hygiene but also promotes seamless application, preventing product buildup that can lead to streaks or uneven textures. By incorporating these essential tools into your makeup routine, you will pave the way to achieving a polished, flawless complexion, making those blemishes a thing of the past.
Choosing the Right Concealer Formula for Your Needs
Choosing the right concealer formula can make all the difference when it comes to achieving a flawless complexion, especially when tackling pesky pimples. With an array of options available, understanding the unique benefits of each formula allows you to select one that not only covers blemishes effectively but also harmonizes with your skin type and lifestyle.
Start by considering your skin’s condition. If you have dry or combination skin, a creamy or liquid concealer enriched with hydrating ingredients, such as hyaluronic acid or aloe vera, works wonders to provide moisture without caking. These formulas not only ensure that your skin feels comfortable but also offer a natural finish. On the flip side, if you struggle with oily skin or are prone to breakouts, a matte or oil-free concealer can help achieve long-lasting coverage without exacerbating shine. Look for formulas that include mattifying agents to control excess oil while still delivering the coverage needed to hide imperfections.
The color and texture of your concealer are equally important. A thick, full-coverage formula may be appealing for covering stubborn pimples, but it can often lead to a more noticeable finish if not applied correctly. For blemishes, a medium-coverage formula is often ideal. It provides ample coverage while allowing for a more natural appearance. Additionally, consider the undertones of your concealers. A green-tinted concealer is excellent for neutralizing redness, while peach or orange shades can combat dark spots or under-eye circles. Having a palette of concealers on hand in different shades can prepare you for any skin concern you encounter.
When it comes to tools and application, selecting a concealer that works well with your preferred method is essential. For example, if you enjoy using a sponge for blending, opt for a liquid formula that sits well on the skin and pairs easily with this tool. Alternatively, for a more precise application directly onto blemishes, a thicker pencil or pot concealer could be the right match, allowing for more targeted coverage without moving the product around unnecessarily.
In , you’re not just looking to cover imperfections but to create a seamless and confident canvas for your makeup. Take the time to explore different formulas, textures, and colors, and find what resonates best with your skin’s unique qualities and your personal style. This thoughtful approach will elevate your concealment game and empower you with the skills to tackle any skin issue with confidence.
Step-by-Step Application Techniques for Flawless Coverage
To master the art of covering pimples with makeup and achieve that coveted flawless finish, it’s essential to follow a methodical approach during application. This step-by-step guide will help you apply concealer effectively, ensuring your blemishes are expertly concealed without looking cakey or overly obvious.
Start by prepping your skin. Cleanse your face thoroughly to remove any excess oil or dirt that could interfere with makeup application. Following cleansing, apply a lightweight, hydrating moisturizer that suits your skin type to create a smooth base. For those with oily skin, consider a mattifying primer that will help control shine throughout the day.
Next, gather your tools. A small, pointed brush or a clean fingertip are excellent for precise application. Begin by selecting the right shade of concealer. Use a shade that matches your foundation for the best results. For red spots, opt for a green-toned concealer to neutralize the redness before applying your skin-tone concealer on top. Dab the product onto the blemish gently-instead of swiping-using a patting motion to build coverage without disturbing the surrounding skin.
After the initial application, utilize a clean makeup sponge to blend the edges seamlessly into your foundation. It’s crucial to avoid dragging the sponge across the blemish; instead, use a stippling motion to diffuse any harsh lines. If you desire a bit more coverage, let the first layer settle for a minute, then apply another thin layer of concealer using the same patting technique.
To finish, set the concealer with a translucent powder to help it stay in place and reduce shine, particularly if you’re prone to oiliness. Use a fluffy brush to lightly dust the powder over the concealed area without disturbing the coverage you’ve just achieved.
By implementing these techniques, you’ll greatly enhance your ability to conceal imperfections effectively, creating a smooth, confident canvas for the rest of your makeup routine. Remember, practice makes perfect-don’t be afraid to experiment with different techniques to find the ones that work best for you!
Color Theory: Selecting the Perfect Concealer Shade
Choosing the right concealer shade can transform your makeup application from ordinary to flawless, especially when it comes to spot concealing blemishes. Understanding color theory is crucial in achieving that perfect balance, allowing your concealer to blend effortlessly with your skin tone while effectively neutralizing imperfections.
To start, identify your primary skin tone. Skin tones are typically categorized into three main undertones: warm, cool, and neutral. Warm undertones have a yellow, peach, or golden hue, while cool undertones lean toward pink, red, or blue. Neutral undertones are a mix of both, presenting a balanced hue. Once you’ve determined your undertone, selecting a concealer becomes easier. For warm undertones, look for concealers with golden or yellow bases. For cool undertones, choose those with pink or beige bases. Neutral undertones can often wear a wide range of shades, though exploring different brands can help pinpoint the perfect match.
Complementary Color Theory
Another essential aspect of selecting the perfect concealer shade lies in complementary colors. For instances like covering redness from pimples, a green-toned concealer can neutralize the red hue before applying a concealer that matches your skin tone directly over it. Conversely, for dark circles, which often exhibit bluish or purple undertones, using a concealer with a peach or orange base can brighten the area effectively. This technique harnesses the power of color theory to diminish the appearance of specific blemishes and brings life back to dull areas.
When shopping for concealers, swatching is non-negotiable. Always test various shades along your jawline or wrist in natural light to see how it interacts with your skin’s undertones. Alternatively, many brands now offer online shade matching tools, making it easier to find your match from the comfort of home. Consider a shade one to two shades lighter for brightening concealment under the eyes and one that matches your foundation for blemishes.
Choosing the right shade isn’t just about aesthetics; it also builds confidence in how you present yourself. Embracing your unique beauty and knowing how to enhance it with the right products encourages not only personal style development but also a sense of professionalism for those in the beauty industry. Trust the process, experiment with different shades, and don’t hesitate to seek advice when unsure; mastering this element of your makeup routine can lead to stunning, natural-looking results every time.
Preparing Your Skin: Pre-Makeup Cleansing Tips
Every successful makeup application begins with a clean canvas. Preparing your skin adequately through a thoughtful cleansing routine not only enhances the appearance of your makeup but also ensures that you’re putting your best face forward when spot concealing blemishes or imperfections. Proper cleansing is essential, especially for those with acne-prone skin, as it helps to remove impurities and oils that could interfere with makeup adhesion and longevity.
Start your cleansing routine by using a gentle cleanser that effectively removes dirt, oil, and any residual makeup from the skin’s surface. Look for products containing salicylic acid or tea tree oil, which can help to unclog pores and prevent breakouts without over-drying your skin. A foaming or gel cleanser works well for oily skin types, while creamy cleansers can provide hydration for those with dry or sensitive skin. After cleansing, pat your skin dry with a clean towel-rubbing can irritate the skin and exacerbate any blemishes.
Incorporating a toning step can also be highly beneficial. Toners help to balance your skin’s pH level after cleansing and provide an extra layer of moisture while minimizing the appearance of pores. Opt for alcohol-free toners to avoid stripping your skin of essential oils. Ingredients like witch hazel, rose water, or glycolic acid can be excellent choices for pH balance and extra clarity on the skin.
Following cleansing and toning, it’s crucial to moisturize your skin-even if you have oily skin. Choosing a lightweight, non-comedogenic moisturizer ensures hydration without clogging pores. Look for formulas that contain hyaluronic acid or glycerin, which draw moisture into the skin, keeping it plump and ready for makeup application. For makeup wearers, a good primer can also prep the skin, smoothing out uneven textures and extending the wear of your concealer.
By establishing this pre-makeup cleansing routine, not only will your makeup sit better, but your skin will also feel healthier over time, making spot concealing less of a chore and more of a joy. Regular cleansing and proper hydration build the foundation for beautiful skin, allowing you to embrace a flawless, confident look every day.
Setting Your Makeup: Techniques for Long-Lasting Results
To achieve a flawless finish that withstands the test of time, mastering the art of setting makeup is essential. The right setting techniques ensure that your concealer does not budge, especially when concealing pesky pimples or other blemishes. The goal is to lock in your hard work, creating a barrier against moisture, sweat, and everyday wear while maintaining a fresh look throughout the day.
One effective method to set your makeup is to use a translucent setting powder. A light dusting will help absorb excess oil and shine while providing a soft-focus effect, making imperfections less noticeable. To apply, use a fluffy brush to sweep the powder lightly over the areas where concealer has been applied, focusing on the T-zone and any spots that tend to become oily. Avoid packing it on; instead, aim for a sheer veil to prevent caking. An alternative for those who prefer a mist, setting sprays can also be a game-changer. They not only add a layer of protection but can also hydrate and refresh your face, ensuring your makeup stays locked in without looking dry.
Extra Techniques for Longevity
In addition to powders and sprays, consider “baking” your concealer for enhanced staying power. This technique involves applying a heavier layer of setting powder over your concealer, letting it sit for several minutes before brushing off the excess. This method holds the concealer in place while controlling oil over time, making it more effective against unwanted shine and movement.
For those prone to breakouts, using products infused with skincare benefits can make a difference. Look for setting powders that contain mattifying agents or even skincare ingredients like chamomile or green tea extract that can soothe irritated skin while providing that essential hold. Remember, the right combination of products is critical-align your setting techniques with your skin type and the specific needs of your makeup look to enhance your results.
Finishing with a spritz of makeup setting spray after your face has been powdered can also create a lasting, polished appearance. Opt for a formula without alcohol to prevent over-drying, ensuring your skin maintains its natural moisture balance. This final touch not only melds all layers of makeup together but also gives an airbrushed finish that helps diminish any fine lines or texture while keeping your concealing endeavors intact. The confidence of a well-set makeup look can pave the way for a radiant day, empowering you to embrace your beauty boldly and with assurance.
Fixing Common Concealing Mistakes
When it comes to concealing blemishes, even the most seasoned makeup artists can make common mistakes that compromise their flawless look. One prevalent error is over-applying product, leading to a cakey appearance and drawing attention rather than disguising imperfections. To avoid this, it’s crucial to start with a small amount of concealer, using a clean brush or your fingertip to gently dab it only on the blemish. Build coverage gradually rather than slathering on a thick layer-this not only looks more natural but also reduces the chance of it settling into fine lines.
Another frequent pitfall is using the wrong concealer shade. A concealer that is the same or lighter than your foundation can fail to mask blemishes effectively. Instead, opt for a concealer that is slightly darker than your skin tone to neutralize redness from pimples. Remember, color theory is your best friend: green-tinted concealers can counteract redness, while peach shades work wonders for dark circles. Finding the right hue will significantly enhance your concealing efforts, making blemishes less noticeable.
It’s also essential to consider your application technique. Many people apply concealer directly after foundation, which is fine, but if you’re struggling with particularly stubborn spots, try applying it before foundation instead. This allows for more control and precision. Use tapping motions to blend the concealer into the surrounding skin seamlessly-this encourages the product to mesh well with your skin’s natural texture rather than sitting on top.
Lastly, don’t underestimate the importance of setting your concealer properly. Failing to do so can lead to unwanted shine and movement throughout the day. A finely milled translucent powder or a setting spray can lock in your hard work, enhancing longevity. A light dusting of powder over the concealed areas, or a spritz from a setting spray, serves as a protective layer that maintains the smooth finish you’ve achieved. By addressing these common mistakes with thoughtful strategies, you can master the art of spot concealing and feel confident in your makeup application.
Advanced Tips for Stubborn Pimples and Scarring
To successfully conceal stubborn pimples and scarring, understanding the interplay of product choice, technique, and the right set of tools is crucial. These skin imperfections can be daunting, but with the right approach, you can achieve a smooth and even complexion that boosts your confidence. Start with high-quality products formulated to provide optimal coverage without feeling heavy. Look for full-coverage concealers that include an element of skin care, such as the Seint Cream Concealer, which hydrates while it conceals. The combination of heavy pigment and nourishing ingredients can help camouflage discoloration without compromising skin health.
When tackling particularly stubborn blemishes, a solid technique can make all the difference. Consider the “dot and press” method: apply a tiny amount of concealer directly onto the pimple, then gently press it in with your fingertip or a clean makeup sponge. Avoid sweeping motions; instead, use tapping motions to blend seamlessly into the surrounding skin. This technique allows for precision, ensuring that the product adheres effectively without moving the concealer away from the target area. For very deep scars or pimples, layering may be necessary. Allow each layer to set before applying the next for enhanced coverage.
Additionally, utilizing color-correcting products can elevate your concealing game significantly. Green-tinted concealers are excellent for neutralizing redness caused by active breakouts, while peach or orange hues can mask dark spots or scars. Before applying your foundation, dab these color correctors on problem areas, blend them out, and then follow up with a full-coverage concealer on top. This two-step approach ensures that the underlying discoloration is well-hidden and provides a more balanced foundation for the rest of your makeup.
After you’ve perfected the coverage, don’t forget to set your work to ensure longevity throughout the day. Lightly dusting a translucent powder over the concealed areas helps absorb excess oils and maintain the appearance of a smooth finish. Alternatively, a makeup setting spray, like those from Ilia or ELF, can lock in your look without the powdery finish. This two-step finalization helps in preventing your makeup from breaking down, especially crucial when dealing with troublesome spots that require extended wear. With dedication and the right techniques, overcoming the challenge of blemishes and scars becomes achievable, allowing you to shine brightly with confidence.
Makeup Products That Enhance Your Concealing Skills
To excel in concealing blemishes and achieving a flawless finish, utilizing the right makeup products is essential. High-quality concealers and complementary tools can make a remarkable difference in how effectively you hide imperfections. For those struggling with stubborn pimples or scarring, the market offers a plethora of choices that enhance your concealing prowess.
A top recommendation is the Seint Cream Concealer, which not only delivers full coverage but also hydrates the skin, ensuring that your concealed areas don’t become dry or cakey as the day wears on. This dual-action formula allows you to achieve a beautiful finish without sacrificing skin health. For extra precision, consider pairing it with a flat concealer brush or a makeup sponge. The sponge provides a soft, natural blending effect, while a brush allows for targeted application on the most problematic areas.
In addition to the foundational concealer, color-correcting products can further elevate your concealing techniques. Green-tinted concealers are fantastic for neutralizing redness from active breakouts, while peach or orange correctors can effectively counteract dark spots or purplish blemishes. Applying these products before your concealer creates a neutral canvas that allows for even better coverage. When looking for reliability, brands like Thrive Causemetics and ILIA Beauty offer address-specific products that match various skin tones while emphasizing skin care within their formulations.
Finally, to lock in the coverage and ensure it lasts throughout the day, don’t overlook setting sprays or translucent powders. Products like ELF’s Setting Spray can provide a lightweight finish while securing your makeup against humidity and wear. Meanwhile, a finely milled translucent powder dusted lightly over the concealed areas will help absorb excess oil and maintain a seamless appearance. The combination of these carefully chosen products turns the task of concealing into a manageable craft, allowing everyone-from makeup novices to professionals-to achieve a polished look effortlessly.
Seasonal Adjustments: Adapting Your Routine for Weather Changes
Adapting your makeup routine to seasonal changes can greatly enhance your ability to cover pimples and achieve a flawless complexion. As the weather shifts, so do your skin’s needs and how makeup interacts with it. During warmer months, for instance, heat and humidity can lead to excess oil production, making it crucial to choose lightweight, matte products that won’t clog pores or slide off your face. In contrast, colder months often bring dry air, necessitating the use of hydrating primers and creams that will ensure your makeup adheres well and your skin looks plump.
Warm Weather Adjustments
As temperatures rise, opt for waterproof or long-wearing concealers that resist sweat and oil. Products like Thrive Causemetics’ Buildable Blur CC Cream formulate moisture retention while controlling shine, creating an even base for spot concealing. Pairing it with a matte setting powder will help absorb excess oil. Additionally, before applying concealer, a light application of a gel-based primer can create a smooth, oil-free surface. This will make it easier to apply concealer on problem areas without the risk of it melting away as the day progresses.
Cold Weather Strategies
When winter arrives, the cold can leave your skin dry and flaky, which poses a challenge for effective concealing. Here, hydration is your best friend. Start with a nourishing moisturizer before your makeup application, using products like the ILIA Beauty Super Serum Skin Tint that provides both hydration and coverage, ensuring that your concealer doesn’t settle into dry patches. It’s also wise to choose a creamy concealer formula, such as the Seint Cream Concealer, which not only offers good coverage but won’t exacerbate dryness. Remember to hydrate from the inside out; drinking plenty of water helps maintain skin moisture levels throughout the day.
Ultimately, understanding how seasonal changes affect your skin will empower you to select the right products and techniques. Transitioning your concealment strategy with the seasons will not only enhance your overall look but also build your confidence in tackling those pesky imperfections head-on. Embrace these adjustments as part of your beauty routine, allowing your makeup to work harmoniously with the environment rather than against it.
Building Confidence: Makeup Mindset Tips for Every User
Confidence in makeup application, especially when it comes to concealing imperfections like pimples, is often a psychological barrier as much as a technical challenge. Embracing your unique beauty begins with a positive mindset. Remember that makeup is a tool for enhancement, not a mask. When you view products as an extension of your personality and a form of self-expression, your confidence naturally elevates. Fighting against the societal pressures to have flawless skin can be daunting, but acknowledging that everyone has imperfections can make a significant difference in how you perceive yourself and your makeup skills.
Educate yourself on the products that best suit your needs, as knowledge can foster confidence. Familiarize yourself with the benefits of various formulas such as creamy concealers for dry skin or matte options for oily skin. Try out different brands-perhaps the hydrating properties of the ILIA Beauty Super Serum Skin Tint for a light, breathable coverage or the robust concealment of Seint Cream Concealer for more persistent blemishes-and see what works best for your unique skin type. By experimenting, you not only enhance your technical skills but also discover what makes you feel your best.
To build a confident approach to spot concealing, practice is paramount. Start with small applications and gradually build up if needed. Use techniques like tapping with a sponge or your fingertip, which can help you gain better control over your application and avoid overwhelming your skin with excess product. It can also be helpful to practice in a relaxed environment where you can take your time without the pressure of a social setting, allowing for a more enjoyable learning experience.
Lastly, embrace self-compassion. It’s essential to approach your makeup journey with kindness, accepting that nobody is perfect, and even experts have off days. Remind yourself that makeup looks best when it’s a reflection of your personality and style, so let your unique attributes shine. Building confidence takes time, but with the right mindset, practice, and acceptance, you’ll find that your ability to conceal imperfections will not only improve but also empower you as a makeup user.
Q&A
Q: How can I make my concealer last all day over pimples?
A: To ensure your concealer lasts all day over pimples, start with a setting powder after application. Choose a long-wear concealer formula, and consider using a setting spray afterward for extra stay-power. Refer to the “Setting Your Makeup” section in the article for more tips.
Q: What type of concealer is best for covering active acne?
A: A full-coverage, matte-finish concealer is ideal for covering active acne. Look for products labeled as non-comedogenic to avoid clogging pores. The article’s section on “Choosing the Right Concealer Formula” provides further insights.
Q: Should I use a color corrector before concealer for redness?
A: Yes, using a green color corrector can neutralize redness before applying concealer. This technique creates a smoother canvas for your foundation, which is discussed in-depth under “Color Theory: Selecting the Perfect Concealer Shade” in the article.
Q: How should I apply concealer specifically on pimples?
A: To apply concealer on pimples, use a small, precise brush or a clean fingertip to dab the concealer directly onto the blemish. Pat gently to blend it, ensuring not to disturb the surrounding makeup. Check the “Step-by-Step Application Techniques” for a detailed guide.
Q: Can I use regular foundation to cover pimples?
A: While regular foundation can provide some coverage, it may not be enough for stubborn pimples. It’s best to use a dedicated concealer for targeted coverage and blending. For more on application techniques, see the “Fixing Common Concealing Mistakes” section.
Q: What should I avoid when concealing pimples?
A: Avoid using overly thick or oily products, as they can exacerbate acne. Also, steer clear of heavy, shimmery products that can draw attention to blemishes. The “Advanced Tips for Stubborn Pimples and Scarring” section offers additional insights on this.
Q: How can I cover scars and pitted acne with makeup?
A: To effectively cover scars and pitted acne, use silicone-based primers to fill in the texture, followed by a high-coverage concealer. Finish with a setting powder to lock in the coverage. More tips can be found in the “Advanced Tips for Stubborn Pimples and Scarring” section.
Q: What tools can help achieve a flawless finish when concealing?
A: Tools like a damp beauty sponge for blending and a small brush for precision application are essential for a flawless finish when concealing. Explore the “Essential Tools for Spot Concealing Like a Pro” section for an in-depth look at product recommendations.
Final Thoughts
Now that you’re equipped with pro tips on how to cover pimples with makeup effortlessly, it’s time to put your skills into action! Remember, mastering spot concealing not only boosts your confidence but enhances your overall beauty routine. If you’re curious about the best products for flawless skin or want to explore advanced techniques, check out our guides on makeup applications and product reviews for top brands.
Don’t forget to join our community by signing up for our newsletter, where you’ll receive the latest beauty tips and exclusive discounts straight to your inbox! Share your journey in the comments below or tag us on social media-your experience could inspire someone else. Keep experimenting and refining your techniques; every application is a step toward becoming the makeup artist you aspire to be!