Have you ever considered how much you could save by making your own makeup at home? Creating DIY beauty products not only allows you to customize formulas to suit your unique skin type but also gives you complete control over the ingredients you apply to your face. With a rise in awareness about harmful chemicals in commercial cosmetics, more individuals are seeking natural alternatives that can boost their beauty routines without compromise. This guide on “How to Make Makeup: DIY Beauty Products at Home” invites you to explore the empowering and creative world of homemade cosmetics. Whether you’re a makeup novice looking to experiment or a professional seeking to offer personalized treatments, the beauty of DIY makeup lies in its versatility and accessibility. Join us on this journey to unlock your creativity, enhance your beauty regimen, and embrace a more sustainable approach to self-care. Your perfect shade or blend is just a few ingredients away!
Essential Ingredients for DIY Makeup Products
In the world of DIY makeup, the right ingredients can transform basic formulations into beauty essentials, offering personalized touches that store-bought products rarely match. By understanding the essential components needed for homemade cosmetics, enthusiasts can craft formulas that are not only effective but also safe and potentially more affordable. The magic of DIY makeup lies in the ability to tailor ingredients to suit individual skin types and preferences, allowing for a truly bespoke beauty experience.
Key Ingredients to Consider
- Base Ingredients: For foundations and powders, natural bases like cornstarch, arrowroot powder, and kaolin clay are vital. These work to provide coverage while maintaining a lightweight feel on the skin.
- Colorants: Natural pigments such as beetroot powder, cocoa powder, or activated charcoal can impart beautiful hues for blushes, bronzers, and eyeshadows. These colorants not only beautify but also maintain a non-toxic profile.
- Emollients: Oils like jojoba, coconut, and sweet almond oil serve as moisturizers while enhancing blendability in lip balms and creams. They can also provide a nourishing base for other makeup products.
- Preservatives: While DIY products lack the longevity of commercial cosmetics, natural preservatives like vitamin E, rosemary extract, or using anhydrous formulas can extend shelf life without harmful chemicals.
- Essential Oils: For fragrance and added skin benefits, essential oils like lavender or tea tree can be added sparingly, keeping in mind the potential for skin sensitivity.
Experimenting with these ingredients offers not just the opportunity for creativity but also the rewarding knowledge that you know exactly what you’re applying to your skin. For those worried about allergies or sensitivities, being able to customize each ingredient provides peace of mind that is often unattainable with conventional products. By selecting quality ingredients sourced sustainably, DIY enthusiasts can further enhance the ethical aspect of their beauty routine, aligning personal values with their grooming choices.
Choosing the Right Tools for Makeup Making
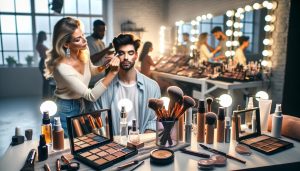
When delving into the realm of DIY makeup, investing in the right tools can significantly impact the quality and ease of your creations. Just like a painter needs a diverse set of brushes, makeup makers require specific implements to achieve their desired results. Utilizing the correct tools not only enhances the precision and outcome of your formulations but also elevates the entire DIY experience, turning it into a creative and enjoyable endeavor.
Essential tools for makeup making include a variety of mixing bowls, spatulas, and blending brushes. Mixing bowls are crucial for combining your base ingredients, allowing you to control the consistency and texture of your makeup products. Opt for glass or stainless steel options to ensure easy cleaning and to prevent any chemical reactions. Meanwhile, spatulas are perfect for scraping down the sides of your mixing bowls, ensuring that you make the most of your ingredients without waste. For blending your colorants and bases into a smooth consistency, having a set of blending brushes is indispensable; they help achieve that professional finish that mimics store-bought products.
Consider investing in a digital scale for precise measurements, especially when dealing with pigments or essential oils where a small deviation can alter your final product. A good quality measuring spoon set and graduated cylinder also come in handy, particularly if you’re experimenting with different formulations or scents. Always remember to include a pH test kit to ensure your creations are skin-safe, especially when working with various natural ingredients that can yield unpredictable results.
Lastly, don’t overlook packaging as an essential aspect of your DIY makeup journey. High-quality containers not only keep your products sanitary but can also enhance your brand if you plan to sell your creations. Opt for airtight jars, bottles, and compacts that suit the product type, and consider labels that reflect your unique style. Choosing the right tools can transform your DIY makeup from a simple hobby into a successful venture. Your confidence in the quality and safety of your products will flourish as you master the art of makeup making.
Step-by-Step Guide to Homemade Foundations
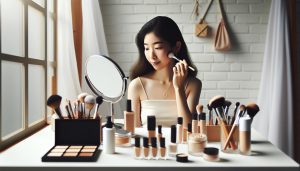
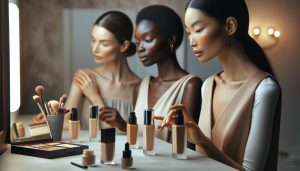
Creating your own foundation at home not only allows you to customize the shade to perfectly match your skin tone but also ensures you know exactly what ingredients are touching your skin. To make homemade foundation, you’ll need a few key components that provide coverage while still being gentle on your skin. Let’s delve into the step-by-step process that will empower you to craft a foundation that suits your unique needs.
To begin, gather your essential ingredients. You will need:
- Base: Choose a base that works for your skin type. Common options include tinted oils (like jojoba or argan oil), aloe vera gel for hydration, or a simple mixture of cornstarch and cocoa powder for a powder foundation.
- Colorants: Natural colorants can be sourced from ingredients such as cocoa powder for warmer shades, turmeric for a yellow undertone, and beetroot powder for pink or rosy hues.
- Thickeners and binders: Arrowroot powder or kaolin clay can help achieve the right consistency and provide a matte finish.
- Essential oils: Adding drops of essential oils can enhance the foundation with beneficial properties, such as lavender for soothing or tea tree oil for acne-fighting benefits.
Next, measure your ingredients carefully-precision is key! For a liquid foundation, start with a base of 2 tablespoons of your chosen oil or gel, then gradually add your colorants, testing frequently until you reach your desired shade. If you’re going for a powder foundation, mix 1 tablespoon of cornstarch with 1/2 tablespoon of cocoa powder, slowly incorporating colorants until you’re happy with the tint.
Mixing It All Together
Now that you have your ingredients ready, it’s time to mix. Use a small mixing bowl to combine your base and colorants until you achieve a smooth consistency. For liquid foundations, you might need a small whisk or a hand mixer to incorporate everything evenly. If you are making a powder product, a fine sifter can help blend the pigments uniformly, reducing clumps.
For liquid foundations, consider adding a few drops of a natural preservative, like vitamin E oil, which can help prolong its shelf life. Once mixed, transfer the foundation into an airtight container, like a small pump bottle or a jar for easy application.
Testing and Application
It’s essential to conduct a patch test before applying your homemade foundation to your entire face. Apply a small amount to your jawline and wait 24 hours to check for any reactions. Once you’re all set, apply with a clean brush, sponge, or your fingers, blending thoroughly for a seamless finish.
Creating your own foundation is not only a fun and rewarding process but also provides the opportunity to create a product that truly complements your skin. Explore various formulations and don’t hesitate to adjust based on your preferences-remember, the art of makeup is all about expression. Enjoy crafting your custom blend while cherishing the knowledge that your foundation is as unique as you are!
Creating Custom Lip Products at Home
Creating your own lip products is an exciting venture that not only enhances your beauty routine but also lets you experiment with colors and textures that suit your personality. The allure of custom lip balms, glosses, or even lipsticks is that you can control the ingredients, ensuring they align with your preferences and skin sensitivities. With a few key ingredients and some creativity, you can develop fabulous lip products right in the comfort of your home.
To start crafting your custom lip products, you’ll need a selection of essential ingredients. The base is crucial; common choices include natural oils like coconut, olive, or sweet almond oil, which provide hydration and a smooth application. For a thicker consistency, try beeswax or candelilla wax, which also helps to seal in moisture. When it comes to color, feel free to explore options like mica powders or beetroot powder, both of which can introduce vibrant shades without harsh chemicals. If you’re adding flavor or additional benefits, consider essential oils like peppermint or lavender to enhance your product’s appeal.
Step-by-Step to Lip Balm
Creating a simple lip balm can be a great introduction to DIY cosmetics. Begin by melting your chosen base in a double boiler. A typical recipe might use 2 tablespoons of oil and 1 tablespoon of wax. Once melted, remove from heat and blend in your colorants slowly until you achieve the desired hue. Essential oils can be added at this stage-start with a few drops and adjust according to your taste. Pour the mixture into small containers or tubes and allow it to set at room temperature. Voila! You now have a personalized lip balm ready for everyday use.
Experimenting with Lip Gloss
If a shiny finish is what you crave, DIY lip gloss is an excellent option. Combine equal parts of a base oil and a thickener such as vegetable glycerin in a mixing bowl. For color, experiment with liquid lip dyes or natural pigments, ensuring they are well blended. Store your gloss in a small tube or pot, and remember that the gloss will thicken slightly as it cools, so adjust your recipe accordingly.
Crafting your lip products offers endless possibilities for customization and creativity. Embrace the fun of mixing different colors and flavors to develop products that are uniquely yours. Not only will you enjoy the satisfaction of a homemade beauty product, but you’ll also have the opportunity to explore natural alternatives that respect both your beauty and health needs. Whether for personal use or thoughtful gifts, the journey to create custom lip products is both fulfilling and empowering.
How to Formulate Natural Eyeshadows
Crafting your own natural eyeshadows allows for a personalized color palette while ensuring your products are free from harmful additives. With a few simple ingredients, you can create stunning shades that reflect your unique style. The key to successful DIY eyeshadows lies in the balance of color, texture, and staying power. Whether you prefer soft pastels or bold jewel tones, the process can be as joyful as it is rewarding.
To begin formulating your eyeshadow, you’ll need a base that provides smooth application and adhesion. Talc is commonly used in commercial formulations, but you can substitute it with finely milled ingredients like cornstarch, arrowroot powder, or kaolin clay. These alternatives offer similar texture and help your shadows glide on effortlessly. For pigmentation, consider natural colorants such as mica powders, iron oxides, and activated charcoal. Micas can provide shimmer or matte finishes, while iron oxides allow for more earthy tones.
Basic Recipe for Natural Eyeshadow
To create your customized eyeshadow, follow this simple recipe:
- 1 teaspoon of base powder (choose from cornstarch, arrowroot, or kaolin clay)
- 1-2 teaspoons of colorant (adjust based on your desired intensity using micas or iron oxides)
- A few drops of natural oil (like jojoba or fractionated coconut oil) to enhance adherence
- Optional: A pinch of essential oils for fragrance (ensure they are skin-safe)
Combine the base powder and colorant in a small bowl, mixing well to avoid clumps. Gradually add the oil until the mixture reaches a fine, blendable consistency. Once you’re satisfied with the color and texture, transfer it into a small container or jar for storage.
Packaging your new creation can be just as fun as making it. Consider using small pots or tins with screw-top lids to keep your shadows secure and portable. Not only does this enhance usability, but presenting your products in aesthetically pleasing containers makes them ideal for gifting or resale.
The world of DIY eyeshadows is vast, and experimentation is part of the beauty. Test different combinations of colorants and bases to discover what works best for your skin tone and desired finish. With practice, you’ll not only develop your signature shades but also enhance your confidence in formulating other makeup products!
DIY Blush and Bronzer: Color Creation Techniques
Creating your own blush and bronzer at home is not only a creative endeavor, but it also empowers you to customize shades that complement your unique skin tone. The beauty of DIY makeup lies in the limitless possibilities you have to experiment and create products that express your personal style. With just a handful of natural ingredients, you can craft blushes and bronzers that add dimension and warmth to your complexion while avoiding harmful additives commonly found in commercial products.
To formulate a personalized blush, start by selecting your base. Options like cornstarch, arrowroot powder, or kaolin clay provide excellent texture and help the product adhere to your skin. For color, consider using natural pigments such as beetroot powder for a soft, rosy hue, or cocoa powder for a deeper, earthy tone. The key is to experiment with proportions, starting with small amounts of colorant and gradually adding more until you achieve your desired shade. Blush often contains a hint of shimmer, which you can achieve by incorporating mica powder for a luminous finish.
Recipe for DIY Blush
To get started, here’s a simple recipe for crafting your own blush:
- 2 teaspoons of base powder (cornstarch or arrowroot)
- 1 teaspoon of natural colorant (beetroot powder or cocoa powder)
- 1 teaspoon of mica powder (for shimmer, optional)
- A few drops of essential oil (like lavender for fragrance, optional)
Mix the base powder and colorant in a bowl, adjusting the colorants until you reach the perfect shade. If you’re including mica, fold it in last and test it on your skin to ensure the desired effect. Transfer your mixture into a small container and enjoy the satisfaction of using a product you’ve created!
Crafting Custom Bronzer
For bronzer, similar principles apply. Start with a base of cornstarch or arrowroot powder. Then, blend in darker pigments like cocoa powder or even turmeric for a warm glow that mimics that sun-kissed look. Just like with blush, achieving the right shade is crucial, so start small and work your way up. You can even add a touch of cinnamon for a deeper, richer hue if the skin tone and desired finish merit it.
When blending your bronzer, consider balancing the warm tones with a pinch of cooler colors like spirulina powder, which adds depth without overshadowing the warmth. Once mixed, apply the bronzer to your face to ensure the color translates well on your skin. If you’re making bronzer for a specific occasion or season, think of how the sunlight affects your skin’s appearance: typically, bronzer should enhance, not overpower.
Through these DIY methods, you not only gain insight into the ingredients that enhance your beauty routine but also promote a more sustainable approach by customizing and controlling what you apply on your skin. As you dive into the world of blush and bronzer creation, let your creativity shine, and remember that experimentation is part of the process-your confidence will grow with each new creation!
Essential Tips for Safe Cosmetic Chemistry
Creating your own beauty products can be a thrilling journey, but it also requires a thoughtful approach to safety. Understanding cosmetic chemistry is crucial to ensuring that your formulations are not only effective but also safe for your skin. Here are some essential tips to help you navigate DIY cosmetic creation with confidence.
First and foremost, always prioritize cleanliness. Before you start mixing ingredients, make sure your workstation and tools are thoroughly cleaned and sanitized. This prevents contamination that could lead to adverse skin reactions. Use glass, ceramic, or stainless-steel containers, as they are less reactive than plastic, ensuring that your ingredients remain pure. Additionally, invest in high-quality tools such as measuring spoons, mixing spoons, and small whisks, which can help achieve the proper consistency and blend.
When selecting ingredients, pay careful attention to their origins. Choose natural and organic components whenever possible, as they tend to be gentler on the skin. Conduct a patch test when trying out a new ingredient to check for any allergic reactions or irritation. For example, if you’re experimenting with essential oils, apply a small amount diluted in a carrier oil on a discreet patch of skin and observe for 24 hours. Document your formulations meticulously, noting ratios and sourcing, which can be invaluable for reproducing or adjusting recipes.
Another critical aspect of safe cosmetic chemistry is understanding the shelf life of your products. Homemade cosmetics often lack preservatives, making them more susceptible to spoilage. Use ingredients like Vitamin E oil and essential oils known for their antimicrobial properties to prolong the life of your products. Store your creations in cool, dark places, and clearly label them with the date of production and expected expiration. Remember to discard any products that show signs of mold, unusual scents, or texture changes.
Lastly, staying informed about both the benefits and limitations of your chosen ingredients is essential. Some natural ingredients may react differently when combined, so researching compatibility is key. For instance, oil and water-based components typically do not blend well without emulsifiers. Investing time in learning about basic cosmetic chemistry will significantly empower your DIY endeavors, making you not only a maker but also a knowledgeable creator of beauty products that suit both your style and safety standards.
Exploring Organic vs. Synthetic Ingredients
Choosing between organic and synthetic ingredients in makeup formulations can greatly influence not only the benefits of your products but also their safety and overall effectiveness. The allure of organic ingredients lies in their natural origins, which many believe are gentler on the skin and free from harmful chemicals. Common organic components, such as coconut oil, shea butter, and beeswax, often confer moisturizing and soothing properties, making them ideal for formulations targeting sensitive or dry skin. Moreover, organic ingredients are less likely to cause allergic reactions, appealing to consumers seeking purity in their beauty ritual.
On the other hand, synthetic ingredients can offer unique benefits that organic components might not replicate. Ingredients like silicones and preservatives derived from synthetic processes can enhance texture, stability, and shelf life of your products, ensuring that they perform reliably over time. The use of synthetics can also facilitate advanced formulations that deliver superior results, such as long-wear foundations or bold pigments in lip products. For instance, synthetic colorants provide vibrant shades that can be difficult to achieve with solely natural sources.
When crafting your own makeup, consider the specific needs of your skin and the desired outcome of your products. For everyday use, creating a lightweight foundation with a blend of organic oils may be sufficient and enjoyable. However, for special occasions or longevity, incorporating synthetic elements could enhance performance. This understanding enables you to strike a balance in your formulations, leveraging both organic and synthetic components to achieve the best of both worlds.
Ultimately, embracing the diversity of ingredients allows you to cater to various skin types and personal preferences while maintaining safety and efficacy. It’s important to educate yourself about the benefits and potential drawbacks of each ingredient type, conducting ample research before committing to a formulation. By doing so, you can create makeup products that not only align with your personal values but also deliver the quality results you and your customers deserve.
Packaging Your Homemade Beauty Products
When it comes to homemade beauty products, the importance of packaging extends far beyond mere aesthetics. Thoughtful packaging not only enhances the visual appeal of your creations but also plays a crucial role in preserving product integrity, ensuring safety, and creating an enjoyable user experience. Whether you’re pouring a silky foundation into a sleek container or stuffing organic lip balm into tiny jars, the choices you make in packaging can speak volumes about your brand and product quality.
To start, consider the material of your containers. Glass bottles and jars lend a touch of luxury and are perfect for serums and creams, while recyclable plastic options are more lightweight and ideal for travel-friendly products like sprays or lotions. Additionally, using eco-friendly materials not only resonates with today’s environmentally conscious consumers but also elevates your brand’s credibility. Selecting containers with airtight seals can also help maintain the efficacy of natural ingredients, preventing oxidation and degradation over time.
Furthermore, labeling is an essential component of your packaging strategy. Labels should be clear and informative, featuring not only the product name but also a list of ingredients, usage instructions, and any safety precautions. This transparency builds trust with consumers and caters to growing awareness around ingredients, especially among those who prefer organic or hypoallergenic products. A well-designed label can act as a canvas for your creativity, allowing you to convey your brand’s identity through color schemes, fonts, and imagery that resonate with your target audience.
Lastly, never underestimate the power of user-friendly design. Features such as pumps for liquid products or twist-off lids for balms can make a significant difference in the application process and overall customer satisfaction. Including thoughtful additions like spatulas for creams or roll-on applicators for serums can enhance usability and create a more enjoyable self-care ritual. Ultimately, packaging is not just the final step in your DIY journey-it’s an integral part of how your homemade beauty products will be perceived, used, and cherished by your customers.
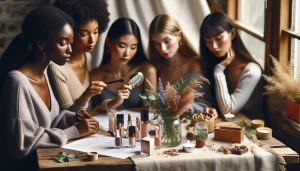
Upcycling Ingredients: How to Use What You Have
One of the most empowering aspects of creating your own makeup products at home is the ability to upcycle ingredients you already have. Not only does this approach promote sustainability, but it also allows you to experiment with various textures, colors, and finishes that you might not have considered before. From repurposing old cosmetics to using kitchen staples, you can easily create makeup that is both innovative and economical.
To start, consider your existing cosmetics. If you have any eyeshadow palettes that have seen better days, instead of tossing them, try converting those colors into a custom lip scrub or a creamy blush. Simply scrape some of the powder into a bowl, mix it with a little coconut oil or shea butter, and you’ll have a beautiful, tinted lip balm or cheek cream. This not only prevents waste but also breathes new life into products that would otherwise be discarded.
Kitchen ingredients offer another treasure trove of possibilities. For instance, beetroot powder can be an excellent natural dye for both lips and cheeks, lending a lovely hue while being safe and edible. Cocoa powder serves dual purposes as a natural bronzer or eyebrow filler. Combine these with a base of natural oils or butters for customizable formulations that cater to your unique skin tone and preferences.
Another creative way to upcycle is through using empty containers. Old jars or bottles can serve as perfect storage for your new DIY products. A clean, repurposed lip balm tin can house your homemade lip treatments, while used spray bottles can be filled with DIY setting sprays or face mists. This not only saves money but also reduces your environmental footprint.
Incorporating upcycled ingredients into your makeup routine not only allows for creativity but also serves as a sustainable practice that resonates with today’s eco-conscious trends. By being resourceful and innovative, you can pioneer your unique beauty standards while making a positive impact on the environment. So dive into that beauty drawer and let your imagination lead the way-there’s no limit to what you can create with what you already have!
Troubleshooting Common DIY Makeup Issues
Creating your own makeup at home can be an exhilarating journey, filled with creativity and personal expression; however, it’s not uncommon to encounter occasional hiccups along the way. Whether your homemade foundation appears too thick, your lipstick breaks apart, or your eyeshadow lacks the vibrancy you wanted, troubleshooting these common issues can help enhance your DIY experience, ensuring your beauty creations achieve professional results.
- Problem: Foundation is too thick or cakey.
- Solution: Mix in a few drops of oil to lighten texture.
- Problem: Product is too runny.
- Solution: Incorporate thickening agents gradually.
- Problem: Inconsistent color application.
- Solution: Use binding agents to improve adhesion.
- Problem: Colors fade quickly.
- Solution: Layer with a lip liner or set with powder.
- Problem: Lipstick or eyeshadow cracks.
- Solution: Mix well and consider adding glycerin for moisture.
- Problem: Products melt or become too soft.
- Solution: Store in a cool, dry area.
By approaching each problem with patience and a willingness to experiment, you can refine your DIY makeup skills and achieve the perfect products tailored to your preferences. Embrace the learning curve-each misstep is an opportunity to discover unique formulations that resonate with your personal beauty!
Marketing Your DIY Beauty Creations
As you embark on the exciting journey of crafting your own DIY beauty products, understanding how to effectively market these unique creations can elevate your passion project into a successful venture. In today’s digital landscape, where consumers increasingly seek personalized and sustainable beauty options, showcasing your homemade makeup can resonate with a plethora of buyers looking for authenticity and creativity.
Start by identifying your target audience. Are you crafting vegan formulations for the environmentally-conscious consumer? Or perhaps luxurious, organic ingredients will appeal to eco-friendly beauty enthusiasts. Crafting a clear brand identity that reflects the unique qualities of your products will help you connect with potential customers. Once you’ve defined your niche, consider using social media platforms like Instagram or TikTok to share your DIY beauty journey. Posting tutorials, before-and-after comparisons, or engaging content that highlights the benefits of your products not only fosters community engagement but also builds trust among potential buyers.
Building Your Brand
To create a distinct brand, consider the following elements:
- Product Differentiation: Highlight what sets your products apart-be it ingredient sourcing, bespoke formulation, or eco-friendly packaging.
- Visual Aesthetics: Develop a cohesive visual style through logos, packaging, and color schemes that reflect your brand’s personality.
- Storytelling: Share your personal journey-how you began creating makeup at home and the inspiration behind your formulations. Engage your audience with authentic storytelling that invites them to be a part of your brand.
Utilizing Online Platforms
E-commerce options today are abundant. Consider platforms such as Etsy, where handmade goods thrive, or create your own website using tools like Shopify to establish a more personalized shopping experience. When formulating product descriptions, use engaging language that captures the essence of your creations, emphasizing the care and ethical considerations taken during the formulation process.
Moreover, don’t underestimate the power of collaborations with influencers who align with your values. A thoughtful partnership can expose your products to a broader audience and lend credibility to your brand. You might also consider creating sample products or promotional kits for social media giveaways; this encourages user-generated content and positive word-of-mouth, both of which can exponentially grow your brand awareness.
With the right strategies in place, your DIY beauty products can not only express your creativity but also become a part of others’ beauty routines, fostering a sense of community centered around shared values of sustainability and individuality.
Q&A
Q: How can I safely make DIY makeup at home?
A: Safely making DIY makeup involves using high-quality, skin-safe ingredients, and maintaining hygiene while preparing products. Always conduct a patch test before applying new products, and store them in clean, sterilized containers. For detailed safety tips, refer to the section on essential safety measures in your article.
Q: What ingredients do I need to make natural mascara?
A: To make natural mascara, you typically need ingredients like aloe vera gel, activated charcoal, and coconut oil. These ingredients provide color and moisture while being gentle on the eyes. Experiment with these to find your ideal formula, and consult your article on essential ingredients for more options.
Q: Can I make foundation that matches my skin tone?
A: Yes, you can create foundation to match your skin tone by blending various pigments or powders, such as cocoa powder, arrowroot powder, and pigment from beetroot or turmeric. Adjust the ratios until you achieve the desired shade; more details can be found in the step-by-step guide section of your article.
Q: How do I make my own lip balm?
A: To make DIY lip balm, melt together beeswax, coconut oil, and essential oils of your choice. Pour the mixture into small containers and allow it to cool to solidify. This process is simple and can be found in greater detail in the section about creating custom lip products.
Q: What are the best natural ingredients for DIY eyeshadow?
A: The best natural ingredients for DIY eyeshadow include mica powders, cocoa powder, or beetroot powder for color, and arrowroot powder as a base. Mix these materials until you achieve the desired hue and texture. For a thorough formulation guide, refer to your article on formulating natural eyeshadows.
Q: How can I package my homemade beauty products creatively?
A: Creative packaging for homemade beauty products can be achieved using reusable containers, upcycled jars, or custom labels. Use eco-friendly materials and personalize them with natural themes. For more innovative packaging ideas, check out the packaging section in your article.
Q: Is it possible to create custom blush at home?
A: Yes, you can create custom blush by mixing natural colorants like beetroot powder with a skin-safe base such as cornstarch. Adjust the ratio to reach your desired pigment intensity. Additional tips can be found in the DIY blush and bronzer section of your article.
Q: What are common mistakes to avoid in DIY makeup making?
A: Common mistakes include using non-skin-safe ingredients, neglecting cleanliness in preparation, and skipping patch tests. Always follow trusted recipes and guidelines to prevent skin irritation and ensure product efficacy, as discussed in your troubleshooting common issues section.
The Conclusion
Thank you for exploring the art of DIY beauty with us! By creating your own makeup products at home, you not only save money but also gain full control over the ingredients and shades that best suit your unique style. Whether you’re a beginner or looking to refine your skills, experimenting with these homemade beauty recipes opens up endless possibilities for personal expression. Don’t hesitate to share your creations in the comments-your insights could inspire others!
Ready to dive deeper? Check out our articles on essential makeup tools for flawless application and trending product reviews on top brands like Seint and Thrive. For those passionate about beauty and grooming, our section on professional barbering techniques will also elevate your skills. Remember, the journey to beauty excellence is ongoing, so subscribe to our newsletter for tips, tutorials, and exclusive updates direct to your inbox. Embrace your creativity, and let’s continue this beautiful adventure together!