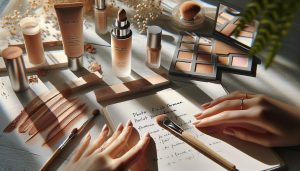
Makeup can be an empowering tool, enhancing your natural beauty and boosting your confidence. Whether you’re preparing for a big event or just want to feel your best every day, knowing how to apply makeup correctly is essential. This step-by-step visual guide is designed to demystify the process, making it accessible for everyone, from beginners experimenting with their first lipstick to seasoned enthusiasts looking to refine their technique. Each section features clear pictures and detailed instructions to help you navigate the makeup world with ease. By the end of this guide, you’ll not only master the art of application but also discover how the right products can elevate your everyday look. So, grab your brushes and let’s bring your beauty vision to life!
How to Choose the Right Makeup Products for Your Skin Type

Choosing the right makeup products for your skin type is crucial in achieving a flawless look that enhances your natural beauty. Understanding your skin’s unique characteristics-be it oily, dry, combination, or sensitive-will guide you in selecting formulas and textures that not only complement your skin tone but also promote its health. For instance, those with oily skin might benefit from oil-free foundations and matte finishes, while individuals with dry skin should look for hydrating formulas enriched with emollients.
When evaluating products, consider engaging with brands that align with your skin type. Brands like Seint and Ilia focus on clean ingredients, offering foundations that provide great coverage without clogging pores. Make sure to read reviews and conduct patch tests to check how your skin reacts before committing to a full application. Utilizing tools like a color wheel can also assist in finding the perfect shades that complement your undertone, ensuring your makeup looks harmonious and enhances your natural glow.
Always remember to assess not just the makeup itself, but its application and longevity on your specific skin type. For example, using a setting spray for oily skin or a hydrating mist for dry skin can dramatically alter how makeup wears throughout the day. By choosing products that meet your skin’s needs, you lay a strong foundation for a look that lasts and impresses. Stay confident and adventurous in your makeup journey, and don’t hesitate to experiment with different styles and techniques that resonate with your individual essence.
Essential Tools for a Flawless Makeup Application

To achieve a flawless makeup application, the tools you use are just as essential as the makeup products themselves. Investing in quality tools not only enhances the effectiveness of your makeup but also elevates your overall experience. Whether you’re a makeup novice or a seasoned pro, having an array of reliable tools at your disposal can transform your beauty routine.
First and foremost, a good set of brushes is indispensable. Different brushes serve various purposes, ensuring that application is seamless and precise. For example, a fluffy powder brush is perfect for setting your foundation with loose powder, while a tapered crease brush is essential for blending eyeshadows seamlessly. Real Techniques and Sigma Beauty are well-respected brands that offer a variety of brushes to meet all your needs.
In addition to brushes, beauty sponges like the Beautyblender are fantastic for applying foundation and concealer. They provide a smooth, airbrushed finish when dampened and can be used for both liquid and cream products. Remember to clean your sponges regularly to maintain hygiene and prevent bacteria buildup, which can affect your skin.
For eye and lip makeup, having the right applicator tools can be a game-changer. Precision tools like angled brushes for eyeliner application and lip brushes for applying lipstick can help create clean lines and well-defined shapes. A great pair of tweezers is also essential for those pesky stray hairs, ensuring your brows look perfectly groomed.
Lastly, a proper makeup organizer is vital for keeping your tools and products accessible and in good condition. Look for organizers that provide compartments to prevent brushes from becoming misshaped and makeup from being damaged. By using the right tools and taking care of them properly, you’ll not only streamline your application process, but also create stunning looks that reflect your unique style.
Step-by-Step Makeup Application for Beginners

Starting your makeup journey can be both exciting and overwhelming, but with a structured approach, anyone can master the art of application. A step-by-step method is not only effective but also empowers you to enhance your features while expressing your personal style. Begin with a clean, moisturized face; this sets the stage for an even canvas.
Gather Your Essentials
Make sure you have the following basic products and tools at hand:
- Foundation: Choose one that suits your skin type.
- Concealer: For covering blemishes and dark circles.
- Translucent Powder: To set your foundation and minimize shine.
- Eyeshadow Palette: Select shades that complement your eye color.
- Eyeliner: Pencil or liquid depends on your preference.
- Mascaras: For voluminous lashes.
- Brow products: Pencils or powders to define your brows.
- Blush: A cream or powder to add color to your cheeks.
- Lip color: Choose a shade that enhances your lips.
- Brushes and Sponges: A mixture of brushes for application and a beauty sponge for blending.
The Application Process
Start with foundation: using a damp beauty sponge, apply your foundation in a stippling motion for a seamless finish. Be sure to blend well into the neck for a natural look. Next, dab concealer under the eyes and on any blemishes using your ring finger or a small brush; this gentle touch will avoid tugging the delicate skin.
Once your base is set, lightly dust translucent powder to lock in your foundation, focusing on areas that tend to get oily. Move on to the eyes; apply an eyeshadow primer to ensure longevity, then sweep your chosen eyeshadow across your lids. Use a clean brush to blend out any harsh lines for a soft look.
Next, define your eyes with eyeliner along the lash line, adjusting the thickness based on your desired style. Follow this with mascara-apply in a zig-zag motion to lift and separate your lashes. Don’t forget to fill and shape your brows, as they frame your face. For a natural look, use short, hair-like strokes.
Bring life to your complexion by sweeping blush onto the apples of your cheeks, blending back towards your temples. Finally, enhance your lips with your selected lip color, using a lip brush for precision.
With practice and patience, each step will become second nature, leading you closer to accomplishing your desired makeup looks. Remember that makeup is an art-experiment, have fun, and don’t shy away from making it uniquely yours!
Mastering the Art of Foundation: Tips and Techniques
Achieving a flawless foundation application can dramatically enhance your overall makeup look, making it essential for both beginners and seasoned makeup enthusiasts. It’s more than just laying down a base; it’s about creating a smooth canvas that evens skin tone, hides imperfections, and enhances your natural beauty. Choosing the right type of foundation based on your skin type-be it oily, dry, or combination-is crucial. For instance, a matte finish foundation is ideal for oily skin, whereas a hydrating formula works wonders for dry skin.
To start, prep your skin properly to ensure your foundation glides on smoothly. Begin with a clean face, followed by applying a moisturizer suited for your skin type. This not only hydrates but also creates a barrier between your skin and the makeup, which can help in prolonging wear. Use a primer tailored for your specific needs, like a pore-filling primer for a smoother finish or a radiant primer for a dewy look. This step can make a significant difference in the appearance and longevity of your makeup.
When it comes to applying foundation, tools play a key role. You can use a brush, a beauty sponge, or your fingers depending on the finish you desire. A damp beauty sponge can provide a seamless, airbrushed look by bouncing the product onto the skin, while a foundation brush can offer more coverage for blemished areas. The stippling technique-where you gently pat the foundation onto your face-works exceptionally well to achieve a natural finish. Always start from the center of your face and blend outwards to avoid harsh lines.
Once the foundation is applied, don’t forget to set it with a translucent powder, especially in areas prone to oiliness. This helps minimize shine and improves the wear time of your makeup throughout the day. Finally, remember that practice makes perfect; experimenting with different products and techniques will help you discover what works best for you. By mastering these foundation tips and techniques, you will not only enhance your makeup skills but also boost your confidence in your beauty journey.
Eye Makeup Essentials: From Shadow to Liner
Creating captivating eye makeup is crucial for expressing your creativity and enhancing your overall look. Whether you’re preparing for a special occasion or simply want to elevate your everyday style, understanding the essentials-from shadows to liner-can make a significant difference. Knowing the right products and techniques will empower you to create stunning eye looks that suit your preferences and eye shape.
Choosing the Right Eyeshadow
When selecting eyeshadow, consider the formula that works best for you. Powder eyeshadows offer versatility and easy blending, while cream formulations can provide vibrant color and long-lasting wear. Popular brands like Seint and Thrive offer high-quality formulations that cater to beginners and pros alike. When starting, a neutral palette is a great investment, as it allows for various looks from natural to smoky without overwhelming your application skills.
Blending Techniques and Tools
Blending is the key to professional-looking eye makeup. Start by applying a transition shade into the crease using a fluffy blending brush; this helps to create depth and dimension. Once you have defined the crease, layer on darker shades closer to the lash line for added intensity. A smaller brush will give you more control when working with darker colors. Remember, the mantra of makeup is to “blend, blend, blend.”
Mastering Eyeliner Application
The right eyeliner can truly define your eyes. Liquid liners provide a dramatic look, while pencil liners offer more control for precise application. Consider trying gel liners for a flexible option that combines both. When applying, start from the inner corner of the eye and draw along the lash line, gradually thickening towards the outer corner for a winged effect if desired. A simple trick for beginners is to use short, dotted lines and then connect them to create a smooth line.
Finishing Touches
Don’t underestimate the power of mascara to finish off your eye makeup. Mascara elongates and volumizes lashes, making your eyes pop. For added drama, consider using false lashes; they come in various styles to fit different occasions. Remember to take the time to curl your lashes before applying the mascara for the best lift and enhancement.
With these eye makeup essentials, you can experiment confidently, tailoring your look to your unique style. Embrace the journey of mastering eye makeup, exploring various products, and discovering techniques that work best for you. The beauty of makeup lies in its ability to evolve and adapt, allowing you to express yourself every day.
Creating the Perfect Eyebrow Shape
Achieving the ideal eyebrow shape can dramatically enhance your facial features and elevate your entire makeup look. Well-groomed brows not only frame your eyes but also contribute to your overall expression and style. Whether you prefer a bold arch or a soft, natural shape, understanding your face shape and brow type is essential for crafting the perfect look.
To begin shaping your brows, identify your natural brow structure and bone structure. Use a clean spoolie brush to comb them into place. Then, grab a pencil or a brush and hold it vertically alongside your nose. This will mark where your brow should start. Next, angle the pencil towards your outer iris to determine the arch’s peak. Finally, extend the pencil towards your temple to find where your brow should end. Drawing these imaginary lines helps maintain symmetry, which is key to a polished look.
When it comes to tools and products, having the right ones is crucial for achieving precision. Brow pencils, gels, and powders can accentuate your natural brow shape. For thicker brows, a pomade can add definition and texture. Popular options such as the Seint Brow Wax and Thrive Brow Gel allow for both shaping and filling in sparse areas. Use a fine tip pencil to create hair-like strokes for a more natural finish and blend with a spoolie brush.
After filling in and shaping, set your brows with a clear or tinted brow gel to keep them in place throughout the day. Remember to remove excess product and avoid over-filling to prevent an unnatural appearance. Practice makes perfect, so take your time as you explore various shapes and styles that resonate with your personal preference. The perfect eyebrow shape is versatile and can transform your entire look, giving you the confidence to express yourself through makeup.
Luscious Lips: Choosing the Right Color and Finish
Choosing the right lip color and finish can transform your look and elevate your confidence. With countless options available, the key is to find shades that complement your skin tone, suit the occasion, and align with your personal style. Start by identifying your undertones: warm, cool, or neutral. Warm undertones typically shine with shades like peach, orange, or coral, while cool undertones are enhanced by pinks, berry, and blue-based reds. Neutrals can often carry a wide range, from soft nudes to bold statements.
When it comes to finish, understanding the difference is crucial. Matte lipsticks provide a bold, long-lasting impact but can sometimes feel drying. For a more comfortable option, consider satin or cream finishes that combine opacity with moisture. Gloss offers a high-shine look, perfect for adding dimension and a youthful glow, but might require more frequent touch-ups. Experimenting with lip liners can further define your shape and prevent feathering, especially with richer colors. A well-defined lip can enhance your application and create a more polished finish.
As you explore different products, consider brands that cater to diverse skin tones and textures. For example, Ilia Beauty offers clean formulations in a spectrum of colors, while Thrive Causemetics focuses on nourishing ingredients without compromising on pigment. Additionally, ELF Cosmetics provides budget-friendly options that allow experimentation without the guilt of overspending. Whether you prefer a bold statement or a soft, natural look, the perfect lip product exists for every makeup lover.
Lastly, don’t shy away from mixing textures and colors. Layering a matte lipstick with a glossy topper can create a stunning effect, while experimenting with bold hues can enhance your creativity. Always remember that the key to great lip color is not just the shade but also the application technique. Start from the center of the lips and blend outward for a smooth finish. With practice, you’ll be able to create looks that not only express your individuality but also make a lasting impression.
Blush and Bronzer Techniques for a Natural Glow
Achieving a natural glow with blush and bronzer can elevate your makeup game, giving your face life and dimension. The secret lies not only in the products you choose but also in how you apply them. To start, select blush and bronzer shades that complement your skin tone. Typically, warmer tones-think peachy blushes and golden bronzers-suit those with warm undertones, while cooler tones like pinks and taupes enhance cooler complexions. If you are unsure, testers at beauty stores can give you a firsthand look at how different shades interact with your skin.
For application, consider your face shape and where the sun naturally kisses your skin. A fluffy brush works wonders for applying bronzer. Smile gently to find the apples of your cheeks, then sweep bronzer in a ‘3’ shape starting from your temples, through your cheekbones, and down to your jawline, blending as you go. This technique creates an illusion of cheekbones while enhancing the natural contours of your face. Follow with blush by applying it to the apples of your cheeks and blending it backward towards the temples. This not only adds a fresh pop of color but also keeps the look cohesive.
It’s important to remember that less is more when it comes to blush and bronzer. Start with a light hand, gradually building up color for a natural finish without overwhelming your features. If you’re using cream products, they can be especially seamless for achieving that coveted dewy finish. Here’s a perfect tool combination: use a stippling brush for cream blush that offers a lightweight application without harsh lines and a soft bronzer brush for the powder formula.
Finally, to set everything in place and lock in your glowing look, consider a lightweight setting spray. This not only ensures longevity but can also bring a sheer, luminous finish to your makeup. By mastering these blush and bronzer techniques, you’ll illuminate your skin while building confidence in your makeup skills, transforming a simple look into a radiant canvas that reflects your unique beauty.
How to Set Your Makeup for All-Day Wear
To ensure your makeup remains flawless from morning to night, setting it properly is essential. A well-set face not only enhances the longevity of your products but also controls shine and prevents smudging or fading. Here are effective strategies and techniques to achieve that all-day wear.
First, consider using a setting powder or translucent powder to lock in foundation and concealer. After applying your base makeup, gently dust a light layer over your t-zone (forehead, nose, chin) and under the eyes using a fluffy brush. This helps absorb excess oil while reducing shine. For those with dry skin, applying powder lightly in these areas can be effective; however, avoid over-powdering to maintain a dewy finish.
Next, a setting spray is your best friend for an all-day hold. Once you have completed your makeup application, spritz a fine mist of setting spray over your face. Hold the spray about 8-10 inches away and apply in an ‘X’ and ‘T’ motion to ensure even coverage. This versatile product not only secures makeup but can also refresh your skin throughout the day. Look for formulas that offer a matte finish if you’re prone to oiliness or hydrating sprays if your skin tends to dry out.
To provide an added layer of durability, consider using a primer specifically designed for longevity before application. Choose a mattifying primer for oily skin or a hydrating one for dry skin types. A quality primer creates a smooth canvas, helping makeup adhere better and minimizing the appearance of pores.
Further enhance your makeup’s staying power with strategically placed blotting papers or powder puffs. Keep these handy in your bag for quick touch-ups to absorb excess oil and refresh your look without caking on additional layers of makeup. This not only helps in maintaining a polished appearance but also allows you to manage shine effectively.
Lastly, remember that proper skincare prep is vital. Begin with a clean face and follow up with a moisturizer that suits your skin type. The moisture acts as a foundation for your makeup, helping it adhere better and last longer throughout the day. By combining these techniques, you can confidently rock your makeup look from dawn to dusk, celebrating your beauty with ease and flair.
Makeup Mistakes to Avoid: Common Pitfalls and Fixes
Makeup can be a powerful tool for self-expression and enhancement, but even the most seasoned artists can fall prey to common pitfalls that can derail an otherwise flawless look. By identifying and addressing these mistakes, anyone can elevate their makeup game from mediocre to radiant. Here are key errors to watch for, along with essential fixes to help you achieve that polished appearance.
One notorious blunder is applying the wrong shade of foundation. Many people choose products that are too light or too dark, leading to a stark contrast with their neck and décolletage. To avoid this, always test foundations in natural light and blend shades down your jawline to check for a seamless match. Remember, foundation should enhance your natural skin tone, not mask it.
Another frequent issue is the over-application of products, particularly in the areas of concealer and blush. Using too much concealer can create a cakey effect, while excessive blush can lead to a clownish appearance. Less is often more; start with a small amount and build up gradually, blending well to avoid harsh lines. Employ lightweight formulas that can be layered for a more natural finish, and consider using tools like beauty blenders for even application.
Poor Eye Makeup Techniques
Improper eye makeup techniques can also hinder your desired look. For instance, applying eyeliner in a single, harsh line can make the eyes appear smaller and less inviting. Instead, try blending your eyeliner with a smudge brush or using an eyeshadow to soften the line, creating a sultry, smoky effect. Similarly, forgetfulness in curling your lashes can result in a less dramatic eye. A good eyelash curler can make a significant difference in opening up your eyes, ensuring your mascara has a perfect base to work with.
Lastly, neglecting the importance of skincare prep before makeup application can lead to uneven textures and patchy finishes. Skipping this vital step can cause makeup to cling to dry patches or slide off oily areas. Develop a consistent skincare routine that includes cleansing, exfoliating, and moisturizing based on your skin type. Investing in a well-matched primer can also help to fill in uneven areas, creating a smooth canvas for your makeup.
Being aware of these common pitfalls and implementing the fixes not only boosts your confidence but also elevates your overall makeup experience. Embrace the learning curve and enjoy the journey of discovering the best techniques and products that celebrate your unique beauty.
Advanced Makeup Techniques: Contouring and Highlighting
To achieve a sculpted and radiant look, mastering contouring and highlighting is essential. These advanced makeup techniques can enhance your natural features and create a beautiful dimensional effect on your face. At its core, contouring involves the use of matte products to define and sculpt areas like the jawline, cheekbones, and nose, while highlighting aims to bring attention to the high points of your face such as the cheekbones, brow bones, and the bridge of the nose with luminous products.
To get started, select contour and highlight products that suit your skin tone. Cream formulas are ideal for beginners due to their blendability, while powder products can create a more dramatic effect. Remember, the key to successful contouring and highlighting is blending. Always use a good makeup sponge or a stippling brush to seamlessly blend the products into your skin. The goal is to ensure there are no obvious lines between the shades, creating a natural look that brings depth to your facial structure.
Steps for Contouring
- Identifying Areas to Contour: Apply contour in the hollows of your cheeks, the sides of your nose, along the jawline, and on the sides of your forehead.
- Application Technique: Use a small angled brush for precise application on the nose and a larger, fluffy brush for the cheeks and forehead. Blend well to avoid harsh lines.
Steps for Highlighting
- Select Highlighting Points: Focus on the tops of your cheekbones, the bridge of your nose, the center of your forehead, and your cupid’s bow.
- Application Technique: Use your fingers or a small brush to apply the highlighter, and gently tap to blend for a glowing finish.
For a truly flawless finish, consider the products you use: a flexible contour stick, such as one from Ilia or a powder highlighter from Thrive, can provide excellent results. Additionally, setting your makeup with a translucent powder can help maintain the look throughout the day. A light spritz of setting spray can further enhance that dewy glow and keep everything in place.
Contouring and highlighting may seem daunting, but these techniques empower you to express your unique beauty confidently. Practice is key; experiment with different products and methods to discover what techniques work best for your face shape and skin type. Ultimately, it’s about enhancing your features in a way that feels authentic to you.
Skincare Prep: The Secret to a Smooth Canvas
Achieving a flawless makeup look begins long before the brush touches your skin; it starts with proper skincare. A well-prepared canvas is essential for makeup longevity and presentation. The condition of your skin directly influences how makeup appears, so investing time in a solid skincare routine can lead to better results. Hydration, exfoliation, and targeted treatments for your skin type form the foundation of your prep work, creating an environment where makeup can effortlessly adhere and look radiant.
To lay the groundwork for a smooth application, consider adopting a multi-step skincare regimen. Start with a gentle cleanser to remove dirt and impurities, followed by an exfoliator to slough off dead skin cells, ensuring optimal texture. Incorporating serums tailored to your skin’s needs-such as hyaluronic acid for hydration or niacinamide for oil control-can help bring out your skin’s natural glow. Next, don’t underestimate the importance of moisturizers; they provide the hydration necessary to create a dewy finish. Opt for a lightweight, non-comedogenic product if you’re oily or a richer cream if your skin leans dry.
As a finishing touch, always apply a quality primer before foundation. A primer can enhance your makeup’s durability and minimize the appearance of pores or fine lines, forming an effective barrier between your skin and makeup. Different formulations address varied concerns: a mattifying primer can control excess oil, while a luminous primer can impart a subtle glow. Choosing the right products based on your skin type not only improves makeup performance but also contributes to healthier skin over time.
For those seeking to excel in both personal beauty and professional grooming, remember that the secret to a smooth canvas lies in consistency. By establishing a dedicated skincare routine tailored to your unique needs, you empower yourself to flaunt confidence and elegance every time you apply makeup. Engage in this routine faithfully, and the payoff will be reflected in the stunning results of your makeup application.
Frequently Asked Questions
Q: What are the best makeup products for beginners?
A: The best makeup products for beginners include a lightweight foundation, neutral eyeshadow palette, brow pencil, and a versatile lip color. Look for user-friendly tools like a good-quality beauty sponge for application. Check the section on choosing products based on skin type for more tailored recommendations.
Q: How can I practice applying makeup?
A: To practice applying makeup, start with a flawless skincare routine to ensure a smooth canvas. Use step-by-step guides with pictures, and allocate time to experiment with different looks in natural light. Consider following along with video tutorials to enhance your learning experience.
Q: What steps to follow for a daytime makeup look?
A: A daytime makeup look typically involves prepping your skin with a moisturizer and primer, applying a light foundation, and using soft, natural hues for eyeshadow. Finish with a hint of blush and a nude lip color. Explore our steps for beginners for a detailed approach.
Q: How do I choose the right foundation shade?
A: To choose the right foundation shade, test the product on your jawline in natural light. The color should blend seamlessly into your skin. Refer to our guide on mastering foundation techniques for more tips on application for a flawless finish.
Q: What should I avoid while applying makeup?
A: Avoid using overly heavy products that don’t match your skin type, applying too much product at once, and neglecting skincare prep. For more detailed pitfalls and tips, check our section on common makeup mistakes to achieve a polished look.
Q: How do I remove makeup effectively?
A: Start by using an oil-based makeup remover to break down products. Then, follow up with a gentle cleanser suited for your skin type to ensure all traces are gone. Regularly remove makeup before bed to protect your skin and consider incorporating a double cleansing routine for thoroughness.
Q: Why is skincare important before makeup application?
A: Skincare is crucial because it provides a smooth base for makeup application, helping products to glide on more evenly and last longer. Clean, hydrated skin minimizes flaws, allowing your makeup to look radiant and flawless. Don’t skip the skincare prep for optimal results.
Q: How often should I clean my makeup brushes?
A: Clean your makeup brushes at least once a week to prevent bacteria buildup and ensure a smooth application. Use gentle soap or specialized brush cleanser, and allow them to dry flat to maintain their shape. For more tips on tools, check the essential tools section of our guide.
In Summary
Congratulations on completing your journey through our “How to Put on Makeup Step by Step with Pictures: Visual Guide”! By mastering these essential techniques, you’re well on your way to achieving a flawless look that enhances your unique beauty. Remember, practice makes perfect, so don’t hesitate to revisit this guide as you refine your skills. For more tips, be sure to check out our in-depth makeup tutorials and product reviews on Seint, Thrive, Ilia, and ELF to find the best tools and products that suit your personal style.
Feeling inspired? Dive deeper into your beauty routine by exploring our expert advice on skincare and makeup application at Sephora and discover personalized services to elevate your look. Don’t forget to sign up for our newsletter for exclusive tips and updates that keep you ahead in your beauty game. Your next beauty adventure awaits, and we can’t wait to see what you create! Share your experiences in the comments, and let’s keep the conversation going.