Have you ever wondered how some makeup looks flawless all day long, even under bright lights or in high-stakes environments? The secret often lies in a technique called “baking.” This professional setting method enhances makeup longevity and ensures a smooth, perfected finish. Baking involves applying a generous amount of setting powder to areas prone to creasing, allowing the heat from your skin to set makeup in place. By mastering this technique, you can achieve a polished, enduring look that withstands the demands of your day, whether you’re a makeup novice or aspiring professional. Curious about how to make baking work for you? Let’s dive into the nuances of this transformative technique and unlock your makeup’s fullest potential.
What Is Baking in Makeup? Understanding the Basics
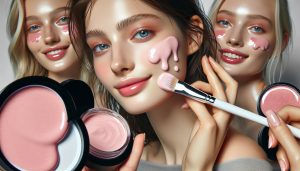
Baking makeup is a transformative technique that has taken the beauty world by storm, adding a new level of sophistication and staying power to makeup applications. By utilizing heat to set makeup, baking enhances the skin’s natural texture, providing a flawless finish that can withstand the rigors of daily wear. At its core, the baking process involves applying a generous amount of setting powder over areas where makeup needs to be intensified and locked in, allowing it to sit for an extended period before it is brushed away. This method not only brightens the under-eye area but also helps to blur imperfections, making it a go-to strategy for both casual and professional makeup looks.
The beauty of baking lies in its simplicity and effectiveness. This technique works by using the body’s natural warmth to “bake” the products into the skin-essentially melting the ingredients for an ultra-melting finish. When done correctly, the results can yield a radiant and airbrushed appearance, ensuring makeup is both vibrant and long-lasting. Whether you’re preparing for a special occasion or simply want to elevate your everyday look, mastering the art of baking can revolutionize your makeup routine.
For optimal results, it is essential to choose the right products. Formulas that are finely milled and designed for baking will adhere better to your makeup, providing that coveted soft-focus effect. Lights out on insecurity-once you grasp the fundamentals of this technique, you can experiment with various products to find the perfect combination for your skin type and desired look. Whether you’re a makeup novice or an aspiring professional, understanding the ins and outs of baking will significantly enhance your application skills and confidence in achieving a polished finish.
The Science Behind the Baking Technique
Applying makeup can often feel like an art form, but there’s science at play beneath the surface, particularly with the baking technique. This method uses the body’s natural heat to achieve a flawless finish, transforming how makeup interacts with the skin. When the generous layer of setting powder is applied and allowed to sit, the heat emitted from the skin causes the product to melt into the makeup underneath. This process not only enhances opacity but also helps create a seamless blend, which is essential for that airbrushed look many aspire to achieve.
At a molecular level, baking utilizes the properties of certain products designed for high adherence and absorption. Fine, silky powders are often employed in this technique because they trap moisture and warmth, allowing the pigments to meld into the skin. As the powder sits, it interacts with the oil and moisture on the skin’s surface, which helps to blur imperfections and create a more uniform finish. The result is a beautifully brightened under-eye area along with a smoothed skin texture that withstands the daily rigors of wear, from humidity to natural skin oils.
To further enhance the baking experience, it’s important to consider the type of powder used. Look for finely milled powders that are specifically formulated for baking; the performance of the final look hinges significantly on this choice. When selecting products, pay attention to their ingredients: talc-based formulas can provide a light, translucent finish, while silica-based powders absorb excess oil and shine without adding weight.
In practice, the timing of how long you allow the powder to “bake” is crucial. Traditionally, this can range anywhere from 5 minutes to 15 minutes, depending on your desired effect and the specific products used. The longer the baking time, the more prominent the look will be, but it’s vital to brush away excess powder effectively to prevent a cakey appearance. Mastering this technique involves understanding both the science behind the products and developing a feel for the application method that works best for your individual skin type and the look you want to achieve.
Essential Tools for Perfect Makeup Baking
To achieve the flawless finish that baking promises, having the right tools is essential. Each brush, sponge, and powder plays a vital role in the baking process, ensuring that the makeup adheres properly and the final look meets your expectations. With the right tools, you not only simplify your application process but also enhance the overall effectiveness of the products used.
For the perfect bake, start with a high-quality translucent setting powder specifically designed for baking. Look for options that are finely milled to avoid a heavy or cakey appearance. Products like Laura Mercier Translucent Loose Setting Powder or the RCMA No-Color Powder are favorites among professionals for their lightweight finish and longevity.
Next, invest in a good makeup sponge. A dampened beauty sponge, such as the Beautyblender or the Real Techniques Miracle Complexion Sponge, allows for precise application of your setting powder. The sponge aids in evenly dispersing the powder while allowing for better adherence to the skin as it “melts” into the makeup below. It’s crucial to press the powder into the skin instead of simply laying it on top-this technique promotes a seamless finish.
When it comes to brushes, a fluffy, tapered brush is ideal for sweeping away excess powder. Look for soft bristles that will not disturb the underneath makeup, like the e.l.f. Makeup Mist & Set brush. Its design allows for easy dusting of the area, providing you with control and precision.
Lastly, setting spray is a game-changer to lock everything in place after the baking process. A lightweight mist, like Urban Decay All Nighter Setting Spray, ensures that your look stays fresh throughout the day, preventing any excess shine and enhancing makeup longevity.
With these essential tools at your disposal, you’ll not only master the baking technique but also elevate your makeup game, achieving that coveted airbrushed luminosity. Equipped with the right products, your baking experience will be seamless and rewarding, whether you’re preparing for a big event or perfecting your daily routine.
Step-by-Step Guide to Baking Your Makeup
To achieve a picture-perfect finish that lasts all day, mastering the baking technique in makeup can be a game changer. This method not only sets your foundation flawlessly but also brightens and highlights specific areas of your face. Here’s a clear step-by-step guide to help you navigate the art of baking like a pro.
Start by applying your foundation and concealer as you normally would. This step lays the foundation of your look, providing a smooth canvas. Choose a lightweight, buildable foundation that allows your natural skin to shine through, and opt for a creamy concealer one or two shades lighter than your skin tone to highlight areas under the eyes and the center of your face.
Applying Setting Powder
Once your base is set, it’s time to let the baking magic begin. Using a damp beauty sponge, pick up a generous amount of your chosen setting powder, then press it firmly onto the highlighted areas. Key areas to focus on include:
- Under the eyes
- Along the bridge of the nose
- Forehead
- Chin
### The Waiting Game
Allow the setting powder to “bake” for approximately 10-15 minutes. This waiting period is crucial because it lets the heat from your skin absorb the powder, resulting in a flawless finish. During this time, you can finish other makeup steps, such as applying blush or eyeshadow.
Dusting Off the Excess
After letting the powder sit, it’s time to liberate your face from the excess. Using a fluffy, tapered brush, gently sweep away the setting powder. Be gentle to avoid disturbing the makeup beneath; your goal is to remove the powder while maintaining that airbrushed look.
### Locking It In
To complete the baking process and ensure your makeup stays in place, finish with a light mist of setting spray. This final touch not only locks in your look but also helps to meld the layers of makeup for a more natural finish. Products like the Urban Decay All Nighter Setting Spray are perfect for this, ensuring your bake withstands the test of time.
By following these straightforward steps, you’ll not only excel in the baking technique but also enhance your overall makeup application skills, achieving that coveted runway-ready look with ease. Embrace your style and don’t be afraid to practice-the results will boost your confidence and elevate your beauty routine!
Common Mistakes to Avoid When Baking
Baking can elevate your makeup game, creating a long-lasting, camera-ready finish, but it does come with its pitfalls. Many makeup enthusiasts, from beginners to seasoned artists, often make mistakes that can derail their efforts. One common error is applying too much setting powder. While a generous application may seem beneficial, too much can lead to a cakey finish, particularly in flash photography. A light, even layer is key-your goal is to absorb excess moisture without overwhelming your skin with product.
Another frequent misstep is rushing the baking process. Allowing the setting powder to sit for 10-15 minutes is essential as it gives your skin the opportunity to warm up the product, which results in that sought-after flawless finish. Skipping this waiting time can lead to uneven application; the powder won’t adhere properly and can settle into fine lines or pores. Instead, use this waiting period to perfect other parts of your makeup look.
Applying the wrong type of setting powder is also a significant error. Not all powders are created equal, and selecting a powder that doesn’t suit your skin type or tone can yield disappointing results. For example, a powder that’s too matte may accentuate dryness in mature skin, while a shimmery powder may be unsuitable for oily skin types. Always test a small amount of product to ensure it complements your unique complexion.
Finally, neglecting to set your bake can leave your makeup vulnerable to fading throughout the day. Finishing with a setting spray is crucial, as it helps meld the layers of makeup together, creating a seamless finish. Skipping this step means you might lose the benefits of the baking process after just a few hours of wear. In summary, by avoiding these common pitfalls-excessive powder, inadequate wait times, unsuitable products, and neglecting to set your bake-you can achieve a stunningly polished look that enhances your natural beauty and boosts your confidence.
Baking for Different Skin Types: Tips and Tricks
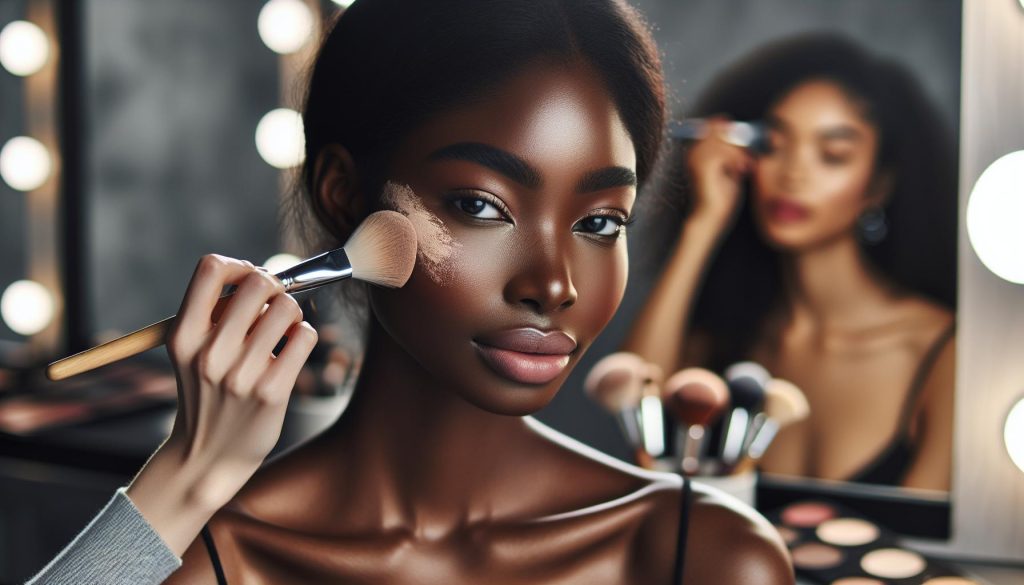
To master the baking technique in makeup, understanding how it interacts with different skin types is crucial. Each complexion has unique challenges and benefits that can influence the results of your baked look. For those with oily skin, selecting the right products is key. Using a mattifying primer followed by a finely milled translucent setting powder will help absorb excess oil without appearing heavy or cakey. A popular choice is the RCMA No Color Powder, which blends seamlessly and controls shine, ensuring a polished finish that lasts.
For dry or mature skin, the approach requires a bit more finesse. Opt for a hydrating primer to create a smooth canvas and avoid powders that are too matte or heavy. Instead, choose a lightweight, luminous setting powder like the Ilia Soft Focus Finishing Powder, which offers both hydration and a subtle glow. Limit the baking time to just 5-10 minutes to prevent the skin from looking too dry or accentuating fine lines. A light mist of setting spray can also provide added hydration and help meld the products together for a more natural finish.
Combination and Sensitive Skin Strategies
For combination skin, balancing the T-zone while maintaining moisture in other areas can be challenging. Apply a mattifying primer only to the oilier areas, then follow up with a light application of baking powder, primarily in the center of the face where shine tends to occur most. Products like Thrive Causemetics’ Setting Powder can be beneficial, as they deliver a matte finish without compromising hydration.
Sensitive skin may react poorly to certain powders, so it’s important to opt for hypoallergenic and fragrance-free options. Look for setting powders that contain soothing ingredients such as aloe vera or chamomile. Testing on a small area first will ensure compatibility. Adapting the baking technique by reducing the amount of time the powder sits or using it strictly for touch-ups rather than extensive wear can also reduce the risk of irritation.
Ultimately, the key to effective baking lies in understanding your skin’s specific needs. Regularly reassessing your makeup products and techniques will pave the way for a flawless look that enhances your unique beauty.
The Best Setting Powders for Baking Makeup
Mastering the art of makeup baking heavily relies on the choice of setting powder, which is crucial for achieving that flawless, long-lasting look. The best setting powders not only ensure that your makeup stays put, but they also contribute to the overall appearance and texture of your skin. A finely milled powder blends seamlessly into the complexion without looking heavy or caking, allowing for a smooth finish that enhances your natural beauty.
When it comes to selecting the ideal setting powder for baking, consider these top picks:
- RCMA No Color Powder: This cult favorite is known for its versatility and ability to work with all skin tones. It absorbs excess oil without altering your makeup’s color, making it perfect for long wear.
- Laura Mercier Translucent Loose Setting Powder: Renowned for its lightweight formula, this powder sets makeup beautifully while providing a soft-focus effect, blurring imperfections and minimizing shine.
- Thrive Causemetics’ Setting Powder: Ideal for combination skin, this powder offers a matte finish without stripping moisture from dry areas, providing the perfect balance.
- Ilia Soft Focus Finishing Powder: For those with dry or mature skin, this hydrating powder helps create a luminous finish, ensuring that skin looks fresh without settling into fine lines.
An essential factor in achieving the best results with these powders is the application technique. A damp beauty sponge works wonders for baking, allowing the powder to adhere well to the skin and set your foundation perfectly. After letting the powder sit for a few minutes, gently dust off the excess with a fluffy brush, which helps to maintain a natural and polished look.
Understanding the unique formulation of each product is key. For instance, powders enriched with ingredients like hyaluronic acid or vitamin E can provide added skin benefits, making them perfect for long-term wear. Meanwhile, for oily skin types, powders that contain silica help absorb excess oil throughout the day, keeping your makeup intact.
Ultimately, the right setting powder can transform your baking technique and elevate your makeup game. By investing time in selecting the appropriate product for your skin type and mastering your application method, you can achieve that coveted airbrushed finish that lasts all day.
Baking vs. Traditional Setting: Which is Better?
The debate between baking and traditional setting techniques in makeup can spark intense discussions among beauty enthusiasts and professionals alike. Baking, a technique that involves applying a generous amount of setting powder to areas prone to creasing and allowing it to sit for several minutes, is often lauded for its ability to create an airbrushed, flawless finish. In contrast, traditional setting typically involves lightly dusting powder over the entire face, often using a brush to achieve a subtle, more natural look.
Baking excels in longevity, especially for events that demand makeup to look pristine for hours on end. The heat from the skin warms the product, allowing it to meld with foundation and concealer, thus locking everything in place while creating an impressive matte effect. This technique is particularly beneficial for individuals with oily skin or for those who prefer a full-glam look. However, it requires careful execution; if overdone, it can lead to an unwanted cakey appearance.
On the other hand, traditional setting with a translucent powder can provide a lighter finish and is generally more forgiving for everyday wear. It’s typically preferred by those with drier or mature skin who may want to avoid the buildup of product in fine lines and wrinkles. The key advantage of this method lies in its ease; simply dusting powder can seamlessly set makeup without the need for a prolonged application process. Many find that it yields a natural, skin-like texture, allowing for a fresh look without the heaviness that sometimes accompanies baking.
Ultimately, the choice between baking and traditional setting should depend on personal preferences and skin types. While baking might offer that extra staying power and perfect photographic finish, the traditional method offers versatility and a more comfortable wear for casual days. Combining both techniques could also be a game-changing approach: baking in areas where it counts most-like under the eyes or the T-zone-and employing traditional setting elsewhere for an all-encompassing flawless face. Choosing the right tools, such as a quality beauty sponge for baking and a fluffy brush for traditional setting, can further enhance the effectiveness of either technique, allowing for customizable precision regardless of the endeavor.
Celebrity Baking Techniques: Insider Tips
Mastering the art of baking in makeup isn’t just for everyday enthusiasts; it’s a favorite technique among celebrities who often need their makeup to withstand high-stress environments like red carpets and photo shoots. One insider secret is the layering technique used by famous makeup artists who work with stars. They often apply a damp beauty sponge to press setting powder into strategic areas, such as under the eyes and the T-zone, to enhance coverage and minimize floor lights and flashback in photos. This method not only creates a smooth finish but also adds an extra layer of moisture, which counteracts the drying effects of setting powders.
Another tip straight from the glam squad of Hollywood’s elite is timing. Celebrities often find the sweet spot between applying and dusting off the powder. While some recommend letting it sit for 10-15 minutes to create a seamless matte finish, others believe that a lighter bake of just 5 minutes can provide a less caked appearance while still achieving a fresh glow. A good practice is to set a timer when applying powder, allowing stars to enjoy their beauty routines without sabotaging their flawless look.
Tools play a crucial role in achieving celebrity-level baking as well. High-end artists frequently use custom-made brushes that are softer and designed specifically for baking, enabling precise application without disturbing the foundation underneath. The choice of setting powder also varies; while some artists prefer talc-based powders for maximum oil-absorption and long-wear, others swear by rice powder for its lightness and finish. Notably, brands such as Laura Mercier and Fenty Beauty are often spotted in celebrity kits for their renowned setting products.
Incorporating these techniques can elevate any makeup application. Whether you’re preparing for a special event or just want to feel fabulous on a daily basis, the key to celebrity baking lies in not just the products but also the skills and strategies behind them. Embrace these tips, and you’ll be well on your way to achieving that enviable, camera-ready finish everyone desires.
Baking Hacks for Long-Lasting Makeup
Baking your makeup is more than just a trend; it’s a technique that can make your look last all day-or even longer. By allowing setting powder to sit on your foundation for a period, you create a tailored matte finish that absorbs excess oil and ensures your makeup remains intact through heat and movement. Here are some expert tips and tricks that can elevate your baking game, ensuring a flawless finish.
One essential hack is to keep your skin hydrated before you start baking. Applying a lightweight moisturizer or primer can help create a smooth canvas. The moisture will not only assist the makeup in adhering better but will also prevent the setting powder from looking excessively dry or caked on the skin. Another tip is to apply a makeup setting spray right before your baking process. This additional layer provides extra hydration, creating a glue-like effect that helps the powder adhere more effectively.
Timing is everything in the baking process. If you want a more natural look, consider shorter bake times, around 5-7 minutes. This technique minimizes the potential for an overly matte finish and reduces the risk of your makeup looking heavy. Conversely, for those with oilier skin types or for events that demand extra staying power, a longer bake of 10-15 minutes is ideal. Using a fan can also speed up the process and help set everything in place without adding excess heat, which could disrupt your base makeup.
The tools you use can greatly influence your baking success. Opt for a damp beauty sponge to apply your setting powder; this technique helps to press the powder into the skin, ensuring that it adheres well. For a more precise application, especially around the nose and under the eyes, a small fluffy brush can work wonders. Lastly, always finish with a refreshing makeup setting spray. This final touch not only locks in your hard work but also revitalizes your complexion, ensuring that you look fresh throughout the day.
By embracing these baking hacks, anyone can achieve long-lasting, camera-ready makeup. Whether you’re heading to work or preparing for a special event, the key is to play around with these techniques to discover what works best for your skin type and makeup style. With practice and the right approach, you’ll find yourself confidently sporting a flawless look that lasts from morning meetings to evening outings.
The Role of Baking in Professional Makeup Application
Baking has emerged as a pivotal technique in professional makeup application, transcending mere trends to become a staple in the beauty industry. This method not only enhances the longevity of makeup but also perfects the overall aesthetic by creating a smooth, flawless finish. Professional makeup artists and enthusiasts alike recognize that baking can significantly elevate a look, particularly in high-demand environments such as photo shoots or live performances where makeup must withstand rigorous conditions.
The magic of baking lies in its ability to set and lock in makeup while simultaneously brightening the under-eye area and absorbing excess oils. Makeup artists often employ this technique strategically, focusing on areas that tend to crease or necessitate added durability, such as the under-eye area, forehead, and around the smile lines. By using a generous amount of translucent setting powder and allowing it to ‘bake’ for a specified time, typically 10-15 minutes, the powder adheres to the foundation and concealer, creating a soft-focus effect that minimizes the appearance of imperfections.
Key Considerations for Professionals
For those looking to implement baking effectively, consider these essential elements:
- Skin Preparation: A well-hydrated and primed base is crucial for effective baking. Professionals recommend using a lightweight primer that suits the client’s skin type to ensure optimal adherence of foundation and powder.
- Quality of Products: The choice of setting powder is paramount. Products like Ilia or Thrive Cosmetics, known for their fine textures and breathable formulas, are ideal for achieving that seamless finish without causing dryness or caking.
- Technique: Applying the setting powder with a damp beauty sponge allows for better absorption and adherence, whereas a brush can be used for lighter applications in areas where a less intense effect is desired.
Utilizing a fan during the baking process can aid in faster drying times while preventing excess heat buildup that could disrupt the foundation. Moreover, a professional must remain adaptable, tailoring the baking duration and product choice to the individual skin type and desired look. For example, clients with oily skin may require longer bake times, while those with dry skin might benefit from shorter durations to maintain hydration.
Ultimately, mastering the baking technique empowers makeup artists to create stunning, long-lasting looks that defy the elements and keep clients looking their best from morning until night. By integrating baking into their skill set, professionals enhance their artistry, ensuring that each client leaves with confidence and a flawless, picture-perfect visage.
Aftercare: Removing Baked Makeup Without Damage
Removing baked makeup properly is crucial to maintaining healthy skin while ensuring that your makeup application remains flawless for the next event. The process involves more than simply cleansing your face; it requires a gentle approach to avoid irritating the skin or disrupting the delicate balance of moisture.
When the time comes to remove your makeup, start by selecting an effective makeup remover that caters to your skin type. For those with oily skin, a gel-based cleanser may help break down stubborn products without adding excess moisture. On the other hand, individuals with drier skin types can opt for a creamy cleanser or an oil-based formula, which will hydrate the skin during the removal process. Always apply the remover with soft, circular motions to effectively dissolve the makeup without tugging at the skin, which is vital, especially in areas like the under-eyes sensitive to pressure.
Essential Steps to Remove Baked Makeup
- Start with a Makeup Remover: Choose a dual-phase makeup remover or micellar water infused with nourishing ingredients. Apply it to a cotton pad and gently press it against the baked areas of your face for a few seconds to allow the product to break down the makeup.
- Use a Gentle Cleanser: Follow up with a hydrating cleanser that suits your skin type. This step ensures that any remaining residue from your baking products is effectively washed away, preventing clogged pores.
- Exfoliate (if necessary): Occasionally, baked makeup can leave skin feeling a bit textured. A gentle exfoliation a few times a week helps to remove dead skin cells and maintain a smooth canvas.
- Hydrate After Cleansing: Always follow up your cleansing routine with a toner and a moisturizer. This not only restores moisture levels but also helps to balance the skin’s pH.
An added touch of luxury would be to indulge in a soothing face mask after cleansing. Many masks rich in hydration or antioxidants can replenish the skin’s softness and promote a radiant glow, counteracting any dryness that might arise from the makeup removal process.
By mastering the aftercare routine, you not only preserve the stunning effects of the baking technique but also nurture your skin, setting the stage for your next beautiful application. Embracing this practice can enhance your confidence, ensuring you put your best face forward at all times, whether you’re stepping into professional scenarios or casual outings.
Frequently Asked Questions
Q: What is the purpose of baking in makeup?
A: The purpose of baking in makeup is to set foundation and concealer while preventing creasing and ensuring a long-lasting finish. By applying a generous amount of setting powder over specific areas, your skin’s natural oils will help the product meld, giving a flawless and polished appearance.
Q: How long should I bake my makeup?
A: You should bake your makeup for about 5 to 10 minutes. This allows enough time for the heat from your skin to activate the powder, ensuring it sets your makeup effectively without looking cakey.
Q: Can baking makeup work for oily skin?
A: Yes, baking can work well for oily skin. It helps absorb excess oil while providing a matte finish. Use a mattifying setting powder and ensure to apply a primer to create a smooth base for better results. Check our tips for different skin types for personalized advice.
Q: Is baking makeup suitable for everyday wear?
A: While baking creates a flawless look, it may not be necessary for everyday wear. It’s generally recommended for special occasions or events. For daily use, consider lighter setting techniques that provide a more natural finish.
Q: What ingredients should setting powders have for effective baking?
A: Ideal setting powders for baking should have very fine textures and include ingredients like silica or talc. These components help absorb excess oil, provide a matte finish, and prevent flashback in photos, ensuring your makeup stays intact.
Q: Can you bake makeup without concealer?
A: Yes, you can bake makeup without using concealer. If you prefer a lighter look, simply apply your foundation and setting powder to the areas you want to highlight. Baking without concealer can achieve a fresh and lifted appearance.
Q: Does baking makeup help with fine lines?
A: Baking can help minimize the appearance of fine lines by creating a smooth finish. However, it’s essential to use the right techniques and products, as over-baking can accentuate lines. Always consider your skin type and apply moisturizer before baking for the best results.
Q: Are there alternatives to baking in makeup?
A: Yes, alternatives to baking include lightly dusting setting powder or using setting sprays for a dewy finish. Techniques like “pressing” powder into the skin can also help set makeup without the heaviness of traditional baking. Explore our section on baking vs. traditional setting for more options.
In Summary
Ready to elevate your makeup game with the professional setting technique of baking? Remember, this method not only enhances the longevity of your look but also ensures a flawless finish that can withstand the demands of any occasion. Don’t miss out on trying our recommended tools and products, including the latest from Seint, Thrive, or Ilia, to achieve that perfect, airbrushed effect.
For more insights on makeup application techniques, check out our guides on mastering foundation or the best products for setting your look. And if you’re looking to boost your skills even further, consider subscribing to our newsletter for exclusive tips and expert advice. Join our community of beauty enthusiasts today! Your journey to makeup mastery is just a click away-let’s explore together.