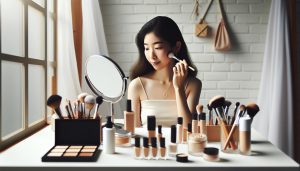
Highlighter can transform your makeup game, but knowing where to place it is key to achieving that radiant, lit-from-within glow. Understanding the art of glow placement not only enhances your features but can also boost your confidence as you step out into the world. Whether you’re getting ready for a special occasion or simply want to elevate your everyday look, the right technique can make all the difference. In this guide, we’ll delve into the optimal areas for highlighter application, addressing common concerns and offering expert tips to help you master the technique like a pro. Get ready to unlock the secrets to achieving a beautifully luminous complexion!
Where to Highlight: Essential Areas for Radiant Skin

To achieve that perfect, radiant glow, knowing the ideal areas to apply highlighter can significantly elevate your makeup look. Highlighting strategically can enhance your facial features and give your skin a luminous, fresh appearance. The key areas for highlighting include the tops of your cheekbones, the bridge of your nose, your brow bones, and the cupid’s bow. Applying highlighter to these points will catch the light beautifully, creating the illusion of higher cheekbones and a more sculpted face.
Another essential area is the inner corners of the eyes. By placing a small amount of highlighter here, you can brighten your eyes and make them appear more awake. Don’t forget about the temples and the center of the forehead – these spots can create a natural, sun-kissed glow. For a more daring approach, consider highlighting your collarbones and shoulders, especially if you’re wearing a sleeveless top; this will add elegance and radiance to your overall look.
When highlighting, it’s not just about placement but also about the technique. A light-handed application using a fan brush or fingers can help you achieve a natural, dewy finish rather than an overpowering shine. Blending is crucial: ensure the highlighter merges seamlessly with your foundation for a cohesive look. By mastering these approaches, you can transform your makeup application into an art form that showcases your best features while maintaining a fresh and radiant appearance.
Understanding Different Highlighter Forms and Textures
Makeup enthusiasts often overlook the vast array of highlighter forms and textures available, yet understanding these options can dramatically impact the final look. Highlighters come not only in different finishes but also in various forms-liquid, cream, stick, and powder-each providing a unique way to achieve that sought-after radiance. Knowing how to navigate these different types can elevate your makeup game to professional levels.
Liquid Highlighters
Liquid highlighters are versatile and can be mixed with foundation for an all-over glow or applied directly to the skin for a more concentrated highlight. They tend to provide a dewy finish that blends beautifully into the skin, making them ideal for achieving a natural look. When working with liquid formulas, it’s beneficial to apply them using a beauty sponge to create an airbrushed effect.
Cream Highlighters
Cream highlighters are another excellent choice, particularly for dry or combination skin types. They offer a creamy texture that hydrates while imparting a luminous glow. Creams can be built up for intensity and are often easier to control than powders, especially for beginners. Use your fingertips or a fluffy brush to gently tap the product onto the desired areas for a seamless finish.
Stick Highlighters
The stick form is favored for its convenience, allowing for easy application on the go. Stick highlighters are typically more pigmented, so a light hand is essential to prevent an over-the-top shine. Their creamy texture also allows for easy blending, making them a popular choice for quick touch-ups throughout the day.
Powder Highlighters
Powder highlighters are a staple in many cosmetic kits, providing a range of finishes from frosted to shimmery. They can be layered over other products for a more defined highlight and are perfect for oily skin types due to their mattifying properties. The key to a beautiful application with powder highlighters is using a soft fan brush to dust the product lightly across the skin for a refined glow.
By experimenting with these different forms and textures, you can find what works best for your skin type and desired effect. Whether aiming for a subtle everyday look or a bold evening statement, mastering the nuances of different highlighter types allows for endless creativity and personalization in your makeup routine.
Beginner’s Guide to Proper Highlighter Application

Achieving a radiant glow can be as simple as mastering the art of highlighter application. Often viewed as the final touch in a makeup routine, highlighters have the power to enhance your features and create that coveted, lit-from-within look. Understanding where and how to apply highlighter can significantly impact your overall appearance, bringing balance and dimension to your makeup.
To begin your journey, it’s essential to focus on the high points of the face where light naturally hits. Common areas to apply highlighter include the tops of the cheekbones, brow bones, the bridge of the nose, the cupid’s bow, and the center of the forehead. Using a small brush or your fingertips, you can gently tap the highlighter onto these areas for a soft blend. It’s important to start with a small amount of product and build up to your desired intensity, as it’s easier to add more than to tone down an overly gleaming finish.
For beginners, how you apply your highlighter is just as crucial as where you place it. Depending on the product form-liquid, cream, stick, or powder-you may prefer different application tools. Liquid and cream highlighters can benefit from sponges for an airbrushed effect, while powder highlighters work beautifully with fan brushes for a delicate application. Always remember to blend well; harsh lines can detract from the natural glow you’re trying to achieve.
Lastly, consider your unique face shape and skin type when highlighting. For instance, if you have a round face, focusing on the cheekbones and the center of the forehead can create a more angular appearance. Meanwhile, those with angular features may want to highlight down the sides of the nose for an elongated effect. Tailoring your application technique to your facial structure will not only enhance your features but also build your confidence as you explore different looks. With these tips, you’ll be well on your way to perfecting the art of highlighter application and embracing your glow.
Advanced Techniques for Professional-Quality Glow
Achieving a professional-quality glow requires not just skill but also a deep understanding of how highlighters interact with light and skin. To elevate your highlighting game, consider experimenting with multi-layering techniques and strategic product combinations. Start with a liquid or cream highlighter as your base for a dewy finish; these formulations offer a seamless application and can be built upon without creating excess texture. Once the base layer has dried, you can apply a powder highlighter on top at critical points, such as the tops of your cheekbones and the bridge of your nose, for enhanced intensity and staying power.
Perfecting Your Technique
To ensure a flawless glow, utilize different brushes and tools tailored to your product type. A damp makeup sponge is ideal for liquids and creams, allowing for an airbrushed effect that melds into your skin effortlessly. For powders, a fan brush or a smaller highlighter brush can offer precision, letting you control where the light-catching pigment lands. Remember to tap off any excess product before application to prevent heavy build-up and achieve a more natural finish.
Strategic Placement
Think beyond the usual highlighting points. For instance, consider applying a touch of highlighter to your collarbone and shoulders-this creates cohesion in your overall look, especially for evening events or when wearing off-shoulder outfits. Additionally, highlighting the inner corners of your eyes can subtly illuminate your entire face, making you appear more awake and vibrant.
Customizing with Color
Understanding your skin tone is key to selecting the right highlighter shade. Those with cooler undertones might lean towards silvery or icy shades, while warm undertones can benefit from gold or peach-based highlighters. Mixing these shades can also create a tailored, custom glow-try combining a liquid golden highlighter with a powder pearl shade, applying them in layers for depth and luminosity.
Incorporating these advanced techniques into your makeup routine not only enhances your application but also empowers you to explore your creativity. Whether you’re preparing for a professional setting or a night out, mastering these skills will ensure you stand out with a radiant, polished glow.
Choosing the Right Shade for Your Skin Tone
Selecting the perfect highlighter shade can transform your makeup routine, enhancing your natural beauty and creating a luminous glow. Understanding your skin’s undertones is essential when navigating the myriad of highlighter options available. This is key to achieving a highlighted look that not only complements your features but also feels harmonious with your overall makeup style.
Individuals with cool undertones typically have a pink, red, or blue hue to their skin. For these skin tones, highlighters in silvery, icy, or lavender shades work wonders. These cooler tones reflect light beautifully without creating an overpowering look, ensuring that your highlight appears refined and elegant. Conversely, those with warm undertones-often exhibiting a golden, yellow, or peachy tint-should gravitate toward gold, peach, or bronze highlighters. These shades warm up the complexion and blend seamlessly, creating a radiant, sun-kissed appearance.
For those blessed with neutral undertones, versatility is your friend. Shades that combine both warm and cool elements, such as soft champagne or rose gold, can provide the best of both worlds. This adaptability allows for an easy transition between different makeup looks, from everyday wear to glam evenings. To truly personalize your highlight, consider mixing products; for instance, layering a liquid golden highlighter underneath a powder pearl finish can amplify depth and dimension in your overall glow.
To aid in selecting the right shade, remember these helpful tips:
- Test highlighters in natural light for the most accurate reflection of how they appear on your skin.
- Swatch multiple shades on your wrist-just above or near your wrist bone-because this area closely resembles your facial undertones.
- Don’t hesitate to consult beauty professionals or engage in online beauty communities to gather insights and advice tailored to your unique skin tone.
Choosing the right shade of highlighter is not just about aesthetics; it’s a powerful way to boost your confidence and express your individuality. Embrace experimentation and enjoy the process of discovering what highlights your natural beauty best.
Layering Highlighter for a Multi-Dimensional Look
Achieving a radiant, multi-dimensional glow is as much about the technique as it is about the products you choose. Layering highlighters correctly can elevate your makeup game, allowing your skin to catch the light in an enchanting way. To begin this process, consider using multiple formulations; for instance, start with a liquid highlighter for a seamless glow and then apply a powder highlighter on top for added radiance and longevity. This method not only enhances the luminosity but also adds texture and depth to your overall look.
When layering, choose different areas of application to achieve maximum impact. For example, apply the liquid highlighter on the high points of your cheeks, down the bridge of your nose, and on your cupid’s bow. Once this base layer is set, apply a powder highlighter-preferably one with fine shimmer-over the same areas or even slightly above the initial application for an intensified glow. This approach not only highlights your features beautifully but also creates an iridescent effect that looks stunning both in photos and in person. Consider experimenting with various shades and tones, such as a champagne liquid highlighter with a corresponding golden powder, to achieve a harmonious blend that complements your skin tone.
To ensure your highlighter stays put and maintains its dazzling effect throughout the day, setting sprays can be your best friend. A light spritz of a dewy setting spray over your layered highlighter can help meld the layers together and keep your glow intact. Additionally, using a high-quality makeup sponge can aid in blending the layers seamlessly, allowing for a more polished finish.
Lastly, be cautious with the amount of product you use; less is often more when it comes to highlighter. Start with small amounts and build as necessary, focusing on creating a natural glow rather than an overly shimmery finish. With practice and experimentation, you’ll discover the perfect layering techniques that create a radiant, multi-dimensional look tailored to your unique features.
Mistakes to Avoid: Common Highlighter Pitfalls
Applying highlighter can transform your makeup look, but common mistakes can hinder your glow. Mastering highlighter is less about the product itself and more about understanding your face shape, skin type, and the techniques that enhance your best features. One prevalent error is applying too much product; highlighter should illuminate, not overwhelm. For a more natural effect, start with a small amount and build gradually, focusing on areas where light naturally hits, such as the tops of your cheekbones, brow bones, and the bridge of your nose.
Another pitfall is neglecting skin preparation. Applying highlighter on dry, textured skin can make imperfections more noticeable. Always prep your skin with a good moisturizer or primer, ensuring a smooth canvas. Additionally, choosing the wrong shade can be detrimental; selecting a highlighter that doesn’t harmonize with your skin tone will lead to a stark contrast that detracts rather than enhances. Warm undertones typically thrive with gold and bronze shades, while cool undertones often shine with silver and pink hues.
Many people also forget about blending. Harsh lines can create an unnatural appearance, so always blend your highlighter properly. Using a beauty sponge or brush can achieve a seamless finish. Moreover, avoid applying highlighter to areas that may appear oily, like the forehead or chin, especially if you’re prone to shine. This can lead to an unflattering look rather than the desired glow.
Finally, consider the occasion and lighting. A highlighter that looks stunning in natural light might appear garish under harsh artificial lighting. Adjust your application based on where you’ll be, opting for subtlety during the day and bolder accents for evening events. By being mindful of these common mistakes, you can elevate your highlighter game, achieving a fresh, luminous appearance that complements your unique style.
Enhancing Features: Face Shapes and Highlighting
Understanding how to highlight different face shapes can elevate your makeup game significantly, providing a tailored glow that enhances your best features. Each face shape has its own unique structure and characteristics, meaning that the placement of highlighter should be customized for optimal impact. By strategically placing highlighter, you can not only enhance your natural beauty but also create the illusion of a more balanced and proportionate face.
For oval faces, the goal is to highlight the forehead and cheekbones for a youthful appearance. Apply highlighter to the tops of your cheekbones and the center of your forehead to accentuate your naturally balanced proportions. For those with a round face, you can elongate the appearance by placing highlighter in the center of the forehead and on the cheekbones, moving slightly towards the temples. This technique draws attention upward and adds definition. Conversely, for a square face, focus on softening the angles by applying highlighter along the cheekbones and on the jawline, providing a contrast that creates a more sculpted look.
If you have a heart-shaped face, you’ll want to add brightness to the center of the forehead and focus on the cheekbones. This draws attention away from a wider forehead while enhancing the overall structure. Meanwhile, long faces benefit from highlighting the temples and cheekbones to create the illusion of width. A dot of highlighter on the chin can also work wonders to balance the elongated look.
To simplify your highlighting approach, consider this:
- Oval Face: Highlighter on cheekbones and forehead.
- Round Face: Focus on cheekbones and upper forehead, blending towards the temples.
- Square Face: Highlight cheekbones and jawline to soften angles.
- Heart-Shaped Face: Brighten forehead and cheekbones.
- Long Face: Highlight temples and cheeks for width.
By adhering to these tailored techniques and understanding your specific face shape, you can master the art of highlighting, achieving a radiant, personalized glow that beautifully complements your unique features. Remember that blending is key; a seamless application will enhance your look and result in a polished, radiant finish.
Long-Lasting Glow: Setting Tips for Your Highlighter
To achieve a stunning, long-lasting glow from your highlighter, it’s essential to set it properly, ensuring that your radiant look endures throughout the day. Factors such as the type of highlighter you choose and the setting techniques you apply can dramatically influence how well your highlight stays in place. In this context, a key component is using the right setting products, which can significantly extend the lifespan of your makeup.
Begin by applying a good-quality primer before any makeup. A mattifying primer can help control oil and create a smooth canvas, enhancing the longevity of your highlighter. After applying your foundation and concealer, opt for a lightweight setting powder, concentrating on areas where you may tend to get oily. This will help to “lock in” the products beneath while preventing your glow from transforming into an unwanted shine. For a dewy finish without compromising your highlighter, consider translucent powders that maintain the luminosity of your skin.
Once you’ve added your highlighter, the next step is crucial to setting it. After your highlighter application, lightly mist your face with a setting spray specifically designed for longevity. Products containing ingredients such as aloe or glycerin offer a hydrating element that keeps your glow fresh without fading. A word of caution-avoid over-spraying; one or two spritzes should suffice, which will also help meld all products seamlessly while providing a protective layer.
Lastly, don’t forget about touch-ups! Carry a compact highlighter or a cream version in your makeup bag to refresh your glow throughout the day. If you notice your highlight has dulled, a light dab with your fingers or a sponge can revive that luminous effect. Implementing these techniques will help maintain a radiant complexion that lasts all day, allowing you to shine with confidence from morning until night.
Experimenting with Highlighter in Unique Areas
To unlock an extraordinary luminosity, think beyond the traditional highlight zones. While most people know to apply highlighter on the cheekbones, the brow bone, and the bridge of the nose, there are unique areas that can elevate your glow to stunning new heights. Experimenting with different regions can create an ethereal glow, adding depth and dimension to your makeup look, while also projecting an overall radiant aura.
One unconventional yet impactful area to highlight is the collarbones. A subtle sheen along the collarbone not only draws attention to this elegant feature but also enhances your overall neckline, especially when wearing off-shoulder tops or dresses. A lightweight cream highlighter can easily be blended for a natural finish that looks effortlessly chic. Simply use your fingertip or a makeup sponge to dab and blend the product onto the bone, ensuring to blend outward for a seamless look.
Highlighting the Inner Corners
Another often-overlooked area is the inner corners of the eyes. Applying a fine shimmer highlighter in this space opens up the eyes and creates a more awake appearance. This technique can be especially beneficial for those with smaller or tired-looking eyes. Using a precise brush, lightly tap the highlighter into the inner corner, ensuring you blend it well with the eyeshadow to avoid harsh lines. The trick is to keep it subtle, enhancing your eyes without overshadowing the rest of your eye makeup.
Illuminating the Cupids Bow
Don’t forget about the Cupid’s bow! Highlighting this area can enhance your lip shape, making them appear fuller and more defined. Choose a highlighter that compliments your lip color for a cohesive look. Use a small brush or your finger to apply a tiny amount right above the center of your upper lip; this creates an illusion of fullness and draws the eye naturally to your smile. Pair this with a hydrating lip gloss to amplify the effect.
Ultimately, the key to successfully experimenting with highlighter is to be adventurous while also practicing restraint. Apply lightly at first; you can always build it up until you’ve achieved your desired glow. By strategically placing highlighter in these unique areas, you can create an enchanting visual interest that will not only elevate your makeup but also enhance your natural beauty, allowing your inner glow to come to life.
The Best Highlighters for Every Budget
When it comes to achieving that coveted glow, having the right highlighter can make all the difference, and it’s possible to find great products across all price points. Whether you’re a makeup novice or a professional artist, there are numerous options that cater to various budgets, each with unique features to enhance your highlighting experience.
For those looking for budget-friendly options, drugstore brands have developed exceptional formulas that deliver impressive results without breaking the bank. Products like ELF’s highlighter offer an affordable way to achieve a luminous finish, boasting a smooth texture and a variety of shades suitable for different skin tones. Another great example is the Seint highlighter, known for its versatility and buildable coverage that allows beginners to experiment with their glow without fear of going overboard.
Stepping up to the mid-range brands doesn’t mean compromising on quality. Products like the Thrive Cosmetics highlighter are perfect for those willing to invest a bit more for a longer-lasting, radiant finish. This highlighter not only provides a striking glow but also incorporates skin-loving ingredients that nourish as you wear it. For a touch of luxury, consider brands like Ilia or KVD Beauty, which offer highlighters that combine chic packaging with sophisticated formulas tailored for professional-quality application.
Finally, for those willing to splurge, high-end highlighters such as the MILK MAKEUP Bionic Glow Illuminating Liquid Highlighter promise to elevate your look with a lightweight, buildable formula enriched with skin-enhancing properties. This type of product is perfect for those seeking a high-impact glow that can seamlessly transition from day to night, providing a radiant shine that lasts.
In sum, the beauty of highlighters lies in their vast array of options that cater to every budget and aesthetic preference. By understanding the characteristics of different brands and formulations, you can confidently choose the perfect highlighter that will complement your style and enhance your makeup routine, ensuring that your glow is as radiant as you desire.
Incorporating Highlighter into Your Overall Makeup Routine
There are few things as transformative in makeup as a well-placed highlighter, capable of elevating a look from ordinary to extraordinary. The key to incorporating highlighter seamlessly into your overall makeup routine lies in understanding not only your skin type and tone but also the products that work best with your existing cosmetics. Highlighters come in various formats-liquids, powders, creams, and sticks-each offering different finishes and application methods. Whether you’re aiming for a natural glow or a bold shine, finding the right highlighter to pair with your foundation, blush, and bronzer can create a cohesive and radiant complexion.
Begin with a solid base. Start with your favorite foundation, ensuring it’s well-blended and provides the coverage you desire. From there, determine the areas of your face that you want to highlight-this typically includes the tops of your cheekbones, the bridge of your nose, your brow bones, and Cupid’s bow. When applying liquid or cream highlighters, for instance, using a damp beauty sponge can create a seamless finish; simply tap the product into the skin for a soft, diffused effect. Powders are best applied with a fluffy brush for a more defined glow.
For those who want to add complexity to their makeup look, layering highlighter is an effective technique. Start with a cream highlighter beneath your foundation to create a lit-from-within glow, then use a powder highlighter on top for a striking shine. This multi-dimensional approach not only enhances your features but also provides longevity, making your glow stay fresh throughout the day. Products like Thrive Cosmetics’ highlighters offer both flexibility and pigmentation, providing the perfect foundation for layering without overwhelming the skin.
Finally, always consider setting your highlighter for long-lasting wear. A light dusting of translucent powder can keep everything in place without dulling your shine. Additionally, a setting spray can enhance your glow, giving you that sought-after dewy finish without compromising the overall look. Incorporating a highlighter into your routine is not just about application; it’s about understanding how it interacts with other products, ensuring that your radiance stays fresh and vibrant throughout the day. Happy highlighting!
Frequently Asked Questions
Q: What is the best way to apply highlighter for a natural glow?
A: For a natural glow, apply highlighter to the high points of your face, like the tops of your cheekbones, the bridge of your nose, and your cupid’s bow. Use a damp makeup sponge for a seamless blend, ensuring it merges well with your foundation.
Q: How do I choose the right highlighter for my skin type?
A: Choosing the right highlighter depends on your skin type. For dry skin, opt for cream or liquid highlighters for hydration. Oily skin benefits from powder formulations that control shine. It’s essential to test shades that complement your skin tone, ensuring a radiant finish.
Q: When should I apply highlighter in my makeup routine?
A: Highlighter should be applied after foundation and concealer but before any setting powder. This technique allows the highlighter to meld into your skin for a more natural glow. Refer to sections that cover incorporating highlighter into your overall makeup routine for optimal techniques.
Q: Can I use highlighter on my body, and if so, where?
A: Yes! Highlighter can be applied to areas such as your collarbones, shoulders, and shins for a beautiful sheen. Use a larger brush for broader areas, ensuring even distribution.
Q: What tools are best for applying highlighter effectively?
A: The best tools for highlighter application include makeup brushes, beauty sponges, and fingers. Each tool provides different finishes – brushes for precision, sponges for blending, and fingers for warmth and ease. Experiment with different tools for your desired look.
Q: How can I make my highlighter last longer?
A: To enhance the longevity of your highlighter, start with a good primer and follow up with a setting spray or powder. Layering highlighter and setting it with translucent powder helps lock in the glow for all-day wear.
Q: What are common mistakes to avoid when using highlighter?
A: Common mistakes include applying too much product, ignoring skin type compatibility, and failing to blend adequately. Always build your highlighter layer by layer, considering your natural skin texture for the best results. Refer to our common highlighter pitfalls section for more insights.
Q: How can I adjust my highlighter application for different lighting?
A: Adjusting your highlighter according to lighting is crucial. For natural light, keep it subtle; for evening or dim lighting, you can afford a more intense application. Test your look in varied light settings to achieve the perfect glow suitable for any occasion.
By integrating these questions and answers into your content, you offer a comprehensive approach to highlighter makeup while addressing common queries effectively. This not only enhances user engagement but also improves search visibility. For more detailed techniques, explore other sections of the article!
Final Thoughts
Ready to illuminate your beauty routine? Remember, mastering the art of highlighter placement can transform your look, accentuating your best features with a radiant glow. Don’t miss out on exploring our detailed guides on makeup tutorials, product reviews, and expert tips to enhance your beauty game even further. Dive deeper into our posts on the best highlighters available or learn step-by-step techniques that ensure you achieve that luminous finish every time!
Join our community by signing up for our newsletter, where you’ll get exclusive insights and updates on beauty trends right in your inbox. Have questions or want to share your own highlighter tips? We’d love to hear from you in the comments below! Together, let’s embrace beauty excellence and inspire each other to shine. Your journey to a flawless glow starts now-let’s make those cheeks sparkle!