Did you know that your makeup sponge can harbor more bacteria than a toilet seat? Regular cleaning of your makeup tools, especially sponges, is crucial for maintaining healthy skin and achieving flawless makeup application. Neglecting to sanitize these essential tools can lead to breakouts, irritation, and uneven application. In this guide, we’ll explore effective methods to clean and sanitize your makeup sponges, ensuring they remain in top condition for ideal performance. Understanding how to properly care for your sponges not only enhances your beauty routine but also supports your skin health. Dive in and discover expert tips that make cleaning sponges simple and rewarding, allowing you to put your best face forward every day!
Understanding the Importance of Cleaning Makeup Sponges
Makeup sponges are essential tools for achieving a flawless complexion, but their effectiveness can be compromised without proper sanitation. Over time, these sponges can harbor a variety of bacteria and fungi, leading not just to a less-than-perfect application, but also to potential skin issues such as breakouts and irritation. Understanding the importance of cleaning your makeup sponges is crucial for maintaining both the integrity of your makeup and the health of your skin.
Regular cleaning of makeup sponges helps eliminate the buildup of product residue, dead skin cells, and harmful bacteria. When sponges are left dirty, they can become breeding grounds for germs, which can easily make their way onto your skin during your beauty routine. A clean sponge not only enhances the application of foundation, concealer, and other products, allowing for a smoother and more even finish, but it also minimizes the risk of skin irritations and infections.
Incorporating a sponge cleaning routine into your beauty regimen is a small yet impactful step towards prioritizing skin health. By investing a few minutes in the proper cleaning of your tools, you cultivate a disciplined approach to skincare while enhancing your overall makeup application process. Whether you’re a makeup novice or a seasoned pro, embracing a consistent sponge cleaning routine will not only improve your results but also empower you with the knowledge that you are taking positive steps for your skin’s wellbeing.
Essential Tools for Effective Sponge Sanitation
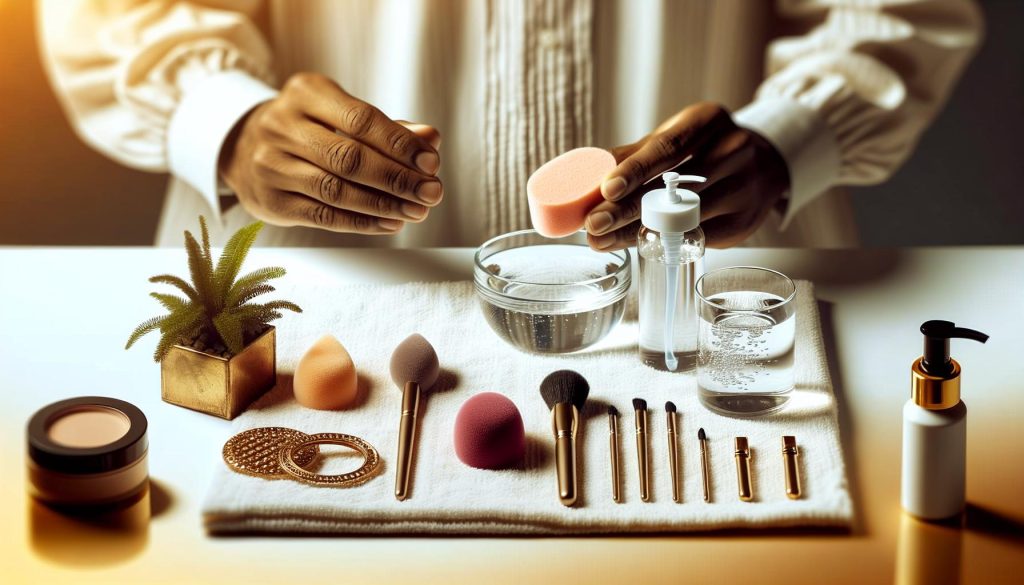
To maintain the efficacy of your makeup sponges, having the right tools for sanitation can make all the difference. A well-equipped cleaning station not only simplifies the process but also elevates the overall health of your makeup application routine. Start by gathering the following essentials:
- Cleanser: Select a gentle, sulfate-free cleanser or a specialized sponge cleaner. Many brands offer biodegradable and skin-friendly options that effectively break down foundation and concealer residues.
- Warm Water: Always use lukewarm water to avoid damaging the sponge material. The warmth helps to loosen up any trapped product and dirt.
- Soft Cloth or Paper Towels: A soft surface is crucial for drying and soaking up excess moisture without causing any damage to the sponge. Avoid rough materials that can wear down the sponge’s texture.
- Small Bowl or Container: Use a shallow bowl to soak your sponges in the cleaning solution. This allows the sponges to fully absorb the cleanser, facilitating easier removal of dirt and bacteria.
- Toothbrush or Sponge Brush: A soft-bristled brush can be very effective for gently scrubbing stubborn stains or buildup without causing tears.
- Mesh Laundry Bag: If you clean multiple sponges at once, a mesh bag keeps them contained in the washing machine while protecting them from damage.
Utilizing these essential tools not only streamlines the sponge cleaning process but also reinforces the importance of proper hygiene in your beauty routine. With just a few products, you can ensure that your sponges remain in optimal condition, significantly enhancing your makeup application while also safeguarding your skin from potential irritations. Regular upkeep of your tools reflects a commitment to both application excellence and personal care, allowing you to arrive at your look with confidence and vigor.
Step-by-Step Guide to Clean Makeup Sponges
To keep your makeup application flawless and hygienic, cleaning your sponges is essential. Sponges can harbor bacteria and product buildup, which not only affects the performance of your makeup but also your skin’s health. A simple and effective cleaning routine will ensure your sponges remain in tip-top shape, enhancing their longevity and guaranteeing that they continue to provide you with that perfect blend.
Start by thoroughly rinsing your sponge under lukewarm water, allowing the water to flow through it. This initial rinse helps remove surface makeup residue. Once your sponge is soaked, apply a few drops of your chosen cleanser directly onto the sponge. If you’re using a dedicated sponge cleaner, make sure it’s designed to break down makeup effectively without being too harsh on the material. Gently rub the sponge between your fingers or use a soft-bristled toothbrush to work the cleanser into the sponge. This motion helps dislodge any embedded makeup and grime.
After cleaning, rinse the sponge under lukewarm water again until the water runs clear. Pay special attention to the crevices and edges where product tends to accumulate. When the sponge is clean, gently squeeze out any excess water-avoid twisting or wringing as this can damage the sponge structure. Place it on a clean, soft cloth or a paper towel to air dry completely. If you’re cleaning multiple sponges, consider storing them in a mesh laundry bag to protect them during cleaning or drying, especially if you plan to machine wash them.
Incorporating this routine into your beauty regimen can significantly enhance your makeup experience. By ensuring your sponges are clean and ready for use, you’ll not only boost your application skills but also protect your skin, keeping it healthy and radiant. Consistency is key; aim to clean your sponges at least once a week, or more often if you use them daily for heavy makeup.
Best Practices for Disinfecting Beauty Blenders
Disinfecting your beauty blender is crucial for maintaining not only the sponge’s longevity but also your skin’s health. Many makeup enthusiasts may not realize that each time you apply makeup, you could be spreading bacteria and oils from the sponge onto your skin if it isn’t properly sanitized. To ensure you’re giving your skin the best chance at being clear and healthy, it’s essential to include effective disinfection practices in your sponge-cleaning routine.
To begin, always choose the right cleanser designed specifically for sponges or makeup brushes. Many beauty brands offer specialized cleaning products that are gentle yet effective enough to eliminate germs. For a thorough disinfection, you can also consider using a diluted mixture of alcohol (at least 70%) which is known for its antimicrobial properties. Once you’ve cleansed your sponge, allow it to sit in the mixture for a few minutes before rinsing it out completely.
Another best practice is to be mindful of the drying process. After disinfecting, avoid placing the sponge in a damp area where bacteria can thrive. Instead, place it in a well-ventilated area away from direct sunlight, as excessive heat can damage the material. Additionally, keeping your beauty blender in a breathable container or a mesh bag will help it dry without soiling and prevent mildew build-up.
Incorporating these best practices not only helps keep your beauty blender hygienic but also supports a flawless makeup application every time. Whether you’re a beginner or an experienced makeup artist, maintaining a consistent and thorough cleaning regimen will empower you to achieve that perfect, radiant complexion while protecting your skin from potential irritants.
Natural Remedies for Homemade Sponge Cleaners
Using natural remedies for cleaning your makeup sponges not only protects your skin from impurities but also offers a budget-friendly approach to beauty maintenance. Many common household items can effectively tackle stubborn makeup residues and bacteria, ensuring your sponges remain fresh and ready for flawless application. Best of all, these DIY cleaners are often free from harsh chemicals, making them gentle on both your sponges and your skin.
One of the simplest and most effective methods is using liquid castile soap. This biodegradable soap is derived from vegetable oils and is known for its versatility and natural cleaning power. Mix a few drops with warm water, soak your sponge, and gently squeeze it to release dirt and makeup. Rinse thoroughly, and you’ll be amazed at how revitalized your sponge looks and feels after using this natural cleanser. For those who love essential oils, adding a few drops of tea tree oil or lavender can provide additional antibacterial benefits, leaving your sponges not only clean but lightly scented.
Another fantastic homemade cleaner can be created using white vinegar and water. Combine equal parts of white vinegar and warm water in a bowl, and let your sponge soak for 10-15 minutes. This solution helps break down makeup residue while the vinegar acts as a natural disinfectant. After soaking, gently squeeze and rinse your sponge under running water. The combination of warmth from the water and the acidity of vinegar works wonders at eliminating bacteria and odors, making it a go-to solution for many beauty enthusiasts.
For those looking for an eco-friendly option, baking soda can be a game changer. Create a paste by mixing baking soda with a small amount of water and massage it into your sponge. Let it sit for a few minutes before rinsing. Not only does baking soda deodorize, but it also gently lifts away stubborn stains, ensuring your sponge remains in top condition.
Encouraging a habit of regular cleaning using these simple and effective natural remedies will not only extend the life of your makeup tools but also enhance your overall skincare routine. With just a bit of effort and some common household ingredients, you’ll ensure a flawless makeup application while promoting healthier skin.
When to Replace Your Makeup Sponges
Replacing makeup sponges is not just about aesthetics; it’s essential for maintaining the health of your skin and the efficiency of your makeup application. Over time, sponges accumulate makeup residue, oils, and bacteria that can lead to breakouts and skin irritation. Understanding when to retire a sponge can enhance your beauty routine and prevent potential skin issues.
It’s advised to replace your makeup sponge every three to six months, depending on usage frequency. If you notice any signs of degradation, such as cracks, tears, or an unpleasant odor, it’s time for a new one. A sponge that looks worn out not only affects application but can introduce bacteria into your makeup products and onto your skin. Regular inspections will help you assess their condition; for instance, if your sponge feels hard or uneven, it might not blend products as efficiently as a fresh sponge.
Signs That It’s Time for a New Sponge
Look for these indicators that signal the need for replacement:
- Visible Wear and Tear: Cracks or holes can trap bacteria and product.
- Persistent Odor: A musty or foul smell indicates bacterial growth.
- Color Changes: Fading color can mean product build-up that cleaning won’t remove.
- Compromised Texture: If the sponge feels hard or lumpy, it can impact blending capabilities.
When you invest in replacements, consider high-quality options from brands like Seint or Thrive, which offer products designed to withstand repetitive use and cleaning. Regularly replacing your sponges not only helps keep your makeup application flawless but also supports your skincare goals, reinforcing the adage that beauty tools are just as important as the makeup itself.
Avoiding Common Mistakes in Sponge Cleaning
While your makeup sponge might seem harmless, improper cleaning can turn it into a breeding ground for bacteria, leading to breakouts and skin irritations. Many makeup enthusiasts unknowingly make mistakes that compromise the cleanliness of their sponges and, by extension, their skin health. Understanding these common pitfalls can significantly enhance your beauty regimen, ensuring both your tools and complexion stay vibrant and healthy.
One of the most prevalent mistakes is neglecting to clean sponges regularly. It’s often easy to forget or postpone cleaning, especially during a busy week. However, a good rule of thumb is to wash your sponge after every use, particularly if you’re applying liquid or cream products. If daily cleaning feels excessive, aim for at least once a week. The build-up of cosmetics not only dulls your application but also increases the risk of bacterial growth.
Another frequent error is utilizing the wrong cleaning products. While many might reach for standard soap or even dish detergent, these can be overly harsh and may not effectively break down makeup residue. Instead, opt for dedicated sponge cleansers or gentle, skin-friendly soaps specifically designed for makeup tools. These products maintain the integrity of the sponge, ensuring it remains soft and effective for blending.
Lastly, not allowing your sponge to dry properly can lead to mold and mildew, compromising both your hygiene and your sponge’s lifespan. Always ensure your sponge is entirely dry before storing it away. Consider air drying it in a well-ventilated area and avoid keeping it in closed containers for extended periods. By avoiding these common mistakes and adopting proper cleaning habits, you can maintain the performance of your makeup tools while ensuring your skin remains healthy and radiant.
Understanding Bacteria Growth on Makeup Tools
The surface of a makeup sponge may appear innocuous, yet it’s a perfect environment for bacteria to flourish. Moisture combined with residue from cosmetics creates a fertile ground for microorganisms, which can lead to various skin issues, including acne, irritation, and infections. According to dermatological studies, an unclean sponge can harbor up to 2 million bacteria per square inch-a startling statistic for anyone who cares about skin health. Understanding how and why bacteria thrive on these beauty tools is crucial for maintaining both your complexion and your sponges.
Hygiene plays a pivotal role in your skincare routine, and cleaning your makeup sponge isn’t just an optional chore; it is a necessary activity to avoid the buildup of harmful bacteria. Many makeup products contain oils, waxes, and preservatives that, when left on sponges, not only degrade the sponge’s material but also create an optimal breeding ground for bacteria. These contaminants can clog pores and trigger breakouts, especially for individuals with sensitive skin. Thus, regular cleaning routines-ideally after every use-are essential to mitigate bacterial growth and keep your skin clear and resilient.
In addition to cleanliness, proper drying of your sponges is vital. Bacteria thrive in dark, damp environments, making it essential to allow sponges to air dry completely after washing. Store sponges in a breathable container rather than a sealed one to avoid moisture retention. This simple habit can significantly reduce the risk of bacterial proliferation, extending the life of your tools while keeping your skin safe.
By adopting proactive cleaning habits and remaining vigilant about your tools, you create an environment for healthy skin. Empowering yourself with this knowledge not only enhances your makeup application experience but also ensures you’re making the best choices for your skin’s long-term wellness. Regularly sanitizing makeup sponges is an investment in both beauty and health, fostering confidence and clarity in your skincare journey.
How Often Should You Clean Makeup Sponges?
When it comes to maintaining your makeup sponges, the frequency of cleaning is just as vital as the cleaning process itself. Ideally, you should clean your makeup sponges after each use, especially if you use them for products like foundation, concealer, or any creams that can easily harbor bacteria. A sponge that has been used to apply liquid products is not only a breeding ground for bacteria but can also compromise the integrity of your makeup application, leading to streaky, uneven finishes.
To keep your sponges in optimal condition and protect your skin, consider these guidelines for regular cleaning:
- Daily Cleaning: For those who apply makeup daily, quick rinsing with warm water and gentle soap can remove excess makeup. This simple step can prevent buildup.
- Weekly Deep Cleaning: At least once a week, perform a thorough cleanse. Soak the sponge in a mixture of warm water and a mild detergent or a specialized sponge cleaner to effectively eliminate any remaining grime and bacteria.
- Monthly Replacement: No matter how diligent you are with cleaning, sponges do have a lifespan. It is advisable to replace them every few months, or sooner if you notice any discoloration, damage, or an unpleasant odor.
By adhering to these cleaning practices, you not only extend the life of your beauty tools but also maintain a clear complexion, allowing your skin to thrive. This commitment to cleanliness ensures that your sponges remain effective for application while safeguarding your skin against potential irritants and infections, ultimately elevating your overall makeup experience.
Signs That Your Makeup Sponge Needs Replacement
Recognizing when it’s time to part ways with your beloved makeup sponge is crucial for maintaining both your makeup application and skin health. While these tools are essential for achieving a flawless finish, they do wear out over time. One of the most telltale signs that your sponge needs replacement is its texture. If it starts to feel hard or less pliable, it’s time to toss it. Sponges are designed to be soft and bouncy; a change in texture indicates that the material is breaking down, which can hinder your makeup application and result in patchy or uneven results.
Another vital indicator is the presence of foul odors. After proper cleaning, your sponge should not emit any unpleasant smells. If you notice any persistent odors, this is a sign that bacteria or mold may have taken residence inside, compromising both your skin’s health and the integrity of your makeup. Discoloration is also a notable red flag; if your sponge has developed dark spots or any other unusual color, it’s likely a breeding ground for bacteria and should be replaced immediately.
It’s essential to keep track of how often you find yourself cleaning your sponges. If you find that no amount of washing is bringing them back to life, or if they begin losing their shape, those are strong signs that it is time for new ones. A good rule of thumb is to replace makeup sponges every 1-3 months, depending on frequency of use and cleaning diligence. By staying attuned to these signs, you can ensure your beauty tools work effectively and help maintain a healthy complexion, ultimately enhancing your overall makeup experience.
Product Recommendations for Sponge Cleaning Solutions
Keeping your makeup sponges clean not only enhances their lifespan but also plays a crucial role in maintaining optimum skin health. With the rise of dedicated sponge cleaning solutions on the market, it’s easier than ever to keep these essential beauty tools sanitized and in top condition. Selecting the right product can save you time and ensure a thorough clean, letting you focus on perfecting your makeup application.
When it comes to effective sponge cleaning solutions, a mix of commercial options and natural remedies can be highly effective. Here are some top recommendations:
- Beauty Blender Liquid Cleanser: Specifically designed for Beauty Blenders, this liquid cleanser effectively lifts makeup and dirt, leaving sponges soft and clean. It’s gentle on materials, ensuring longevity.
- Seint Makeup Brush Cleaner: Ideal for both brushes and sponges, this cleaner removes residue without damaging the material. Plus, it contains nourishing ingredients to keep your tools in great shape.
- ELF Daily Brush Cleaner: Affordable and quick, this spray cleaner is perfect for daily use. Just spritz on your sponge or brush and wipe it clean, making it a great option for those in a hurry.
- DIY Dish Soap & Olive Oil Mixture: For those who prefer a natural option, a mix of gentle dish soap and a few drops of olive oil can effectively break down makeup residue while moisturizing the sponge material.
- Thrive Causemetics Sponge Cleaner: Known for its eco-friendly formulation, this cleaner uses natural ingredients that are tough on dirt but kind to your skin and tools.
Implementing a routine with one of these products can drastically improve the cleanliness of your sponges. To take it a step further, always rinse your sponges thoroughly after using any cleaner to remove any residue that could cause irritation during makeup application. Regularly incorporating these cleaning solutions into your regimen will not only help you achieve flawless results but also promote a healthier complexion, free from the buildup of dirt and bacteria. By investing in proper cleaning solutions and techniques, you’ll maximize the performance of your tools and protect your skin from potential breakouts and irritations.
Expert Tips for Maintaining Healthy Skin with Clean Tools
Keeping your beauty tools clean is a critical element of a successful makeup routine, but it has extensive benefits beyond just flawless application. Regularly sanitizing your makeup sponges is one of the most effective ways to maintain healthy skin. Neglecting this essential step can lead to clogged pores and breakouts, as bacteria thrives in the nooks and crannies of sponge material. Therefore, establishing a solid cleaning routine not only preserves your investment in high-quality tools but also promotes clear, radiant skin.
To maintain the integrity of your sponges and the health of your skin, consider implementing these expert tips:
- Wash Your Sponges After Each Use: Aim to give your sponges a thorough clean after every application, especially if you’ve used them for liquid foundations or creamy products. Use warm water with a gentle cleanser to remove makeup residue and bacteria.
- Store Properly: Ensure your sponges are stored in a dry, clean environment after use. Avoid closed containers that can trap moisture, which promotes bacteria growth. Instead, consider a lightweight mesh bag for circulation.
- Rotate Sponges: If you have multiple sponges, give them time to breathe by rotating their use. This not only allows one sponge to dry completely but also extends their life by reducing wear and tear on any single tool.
- Use a Cleanser with Antibacterial Properties: Consider using cleaners that contain antibacterial agents. This can further reduce the risk of skin issues, creating a protective barrier against harmful bacteria during application.
- Regularly Deep Clean: Aside from your routine wash, set aside time to do a deep clean of your sponges weekly or bi-weekly. This could involve soaking them in a vinegar-water solution or using a specialized cleanser designed for deeper sanitation.
- Dry Completely Before Use: Ensure your sponge is completely dry before using it again. A damp sponge can host bacteria and will not blend makeup as effectively.
- Replace Periodically: Even with excellent care, sponges eventually wear out. Make a habit of checking for discoloration, odor, or tears, as these are signs that it’s time for a fresh replacement.
Adopting these practices will not only optimize the performance of your makeup tools but also enhance your overall skincare regimen. By committing to a cleaner, more organized approach, you can ensure vibrant and healthy skin while enjoying the benefits of professional-quality makeup application at home.
Frequently Asked Questions
Q: How do I deep clean my makeup sponge?
A: To deep clean your makeup sponge, soak it in warm water with a gentle cleanser for 10-15 minutes. Gently squeeze the sponge to release makeup residues, then rinse thoroughly until the water runs clear. This removes bacteria and ensures it’s sanitized for healthy skin.
Q: Can I use dish soap to clean my beauty blender?
A: Yes, you can use mild dish soap to clean your beauty blender, but ensure it’s free of harsh chemicals. Mix a few drops with warm water and soak the sponge, then rinse well. Be sure to follow up with a thorough rinse to avoid skin irritation.
Q: How often should I replace my makeup sponge?
A: You should replace your makeup sponge every 3 to 6 months, depending on usage and wear. If it has an unpleasant smell or is breaking apart, it’s time for a replacement to avoid skin issues.
Q: What are the signs that my makeup sponge is dirty?
A: Signs that your makeup sponge is dirty include a distinct odor, visible makeup buildup, and uneven application of products. If you notice any of these, it’s essential to clean or replace your sponge promptly.
Q: What can I use instead of commercial sponge cleaners?
A: Instead of commercial sponge cleaners, you can use natural alternatives such as a mixture of olive oil and dish soap or a solution of vinegar and water. These are effective in breaking down makeup and sanitizing your sponge.
Q: How do I properly dry my makeup sponge after cleaning?
A: After cleaning, gently squeeze excess water from the sponge and place it on a clean, dry towel. Allow it to air dry in a well-ventilated area. Avoid direct sunlight or heat, as this can damage the sponge’s material.
Q: Should I sanitize my makeup sponge if I haven’t used it in a while?
A: Yes, even if you haven’t used your makeup sponge in a while, it’s best to sanitize it before first use. Dust and bacteria can accumulate over time, so a thorough cleaning is necessary to maintain skin health.
Q: Can I put my makeup sponge in the washing machine?
A: While some sponges are machine washable, it’s best to check the manufacturer’s instructions. If allowed, place it in a mesh laundry bag and wash on a gentle cycle to prevent damage. Always air dry afterward.
The Conclusion
By maintaining clean makeup sponges, you’re taking a vital step towards healthy skin and an effective beauty routine. Remember, regular sanitization reduces the risk of breakouts and improves your makeup application results. If you’re ready to refresh your beauty tools, check out our detailed guides on selecting the right cleansing products and techniques that work best for various types of sponges.
For more insights on beauty routines, consider exploring our articles on makeup hygiene tips or the best tools for flawless application. Don’t forget to subscribe to our newsletter for exclusive tips and the latest product reviews from brands like Seint, Thrive, and Ilia that can elevate your beauty game.
Take action now-clean those sponges, and feel the difference in your skin’s health and your makeup’s finish! Share your experience in the comments below, and let’s keep the conversation going about how to maintain beauty essentials for optimal performance.