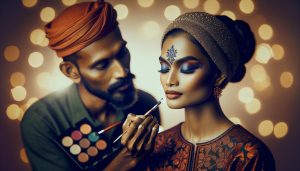
Makeup is an empowering tool that can enhance your natural beauty and boost your confidence, yet many beginners feel overwhelmed by the myriad of products and techniques available. “How to Do Beginner Makeup: Essential Skills in 20 Minutes” is designed specifically for those who want to master the basics quickly and effectively. In just 20 minutes, you will learn essential skills that not only simplify your routine but also make it enjoyable. Whether you’re preparing for a special occasion or just looking to add a little glam to your everyday look, this guide will provide you with the practical tips and tricks you need to create a flawless appearance. Dive in and discover how easy it can be to elevate your makeup game, regardless of your starting point. With the right knowledge and skills, you’ll be ready to express your unique style with confidence.
How to Choose the Right Beginner Makeup Products

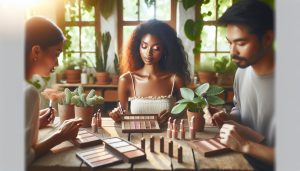
Choosing the right makeup products as a beginner can feel overwhelming, but understanding a few key factors can help simplify the process. The goal is to build a personalized collection that enhances your natural beauty while being easy to use. Start with multipurpose products that provide versatility-these items can save both time and space in your makeup kit. For instance, cream blushes that can double as lip tints offer the benefit of a cohesive look with minimal effort.
When selecting foundation, prioritize formulations that suit your skin type. If you have oily skin, opt for a matte finish or a powder foundation to control shine, while dry skin types may benefit from a hydrating liquid foundation. Always test shades on your jawline in natural light to find your closest match. Don’t forget about concealers-they can work wonders for covering blemishes and dark circles, making them essential for a polished finish.
As you build your makeup kit, lean towards brands that focus on quality and ease of application. Brands like Seint and Thrive Studios are renowned for their user-friendly products designed for those just starting out. Keep your investment practical by purchasing a few key items, such as a neutral eyeshadow palette, a reliable mascara, and a good setting spray. This minimal approach allows you to experiment with various looks without feeling cluttered.
In addition, consider your skin tone and undertone when selecting colors for lipsticks and blushes. Generally, warm undertones pair beautifully with peachy shades, while cool undertones shine with pinks and berries. Lastly, don’t shy away from asking for samples or seeking advice from beauty professionals in-store. A little guidance can go a long way in refining your choices, ensuring you choose products that not only suit your style but also instill confidence in your makeup journey.
Essential Makeup Tools You Need for Beginners

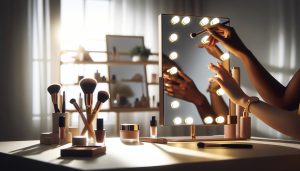
Having the right makeup tools is crucial for beginners who want to achieve stunning looks without the stress. A well-curated toolkit not only simplifies the application process but also fosters creativity. To ensure you start your makeup journey on the right foot, here are the essential tools every beginner should have.
Essential Brushes and Applicators
Quality brushes can make a significant difference in your makeup application. Invest in a basic set that includes:
- Foundation Brush: A flat brush helps achieve an even base, while a beauty sponge is excellent for blending.
- Concealer Brush: A small, precise brush allows targeted application of concealer for blemishes or under-eye circles.
- Blush Brush: A fluffy brush to apply blush helps create a natural flush on the cheeks.
- Eyeshadow Brushes: A flat brush for applying color on the lid and a blending brush to soften edges.
- Eyebrow Brush: An angled brush for precision filling in brows and a spoolie for blending.
Key Makeup Tools
Apart from brushes, some additional tools can enhance your makeup experience:
- Eyebrow Tweezers: For maintaining your brow shape.
- Falsies and Eyelash Curler: To elevate your eye looks if desired.
- Mirrors: A good handheld or tabletop mirror with good lighting can significantly affect your application.
- Makeup Remover Wipes: Essential for quick corrections and end-of-day cleansing.
Storage Solutions
As you accumulate tools, keeping them organized is essential. Consider investing in:
- Makeup Bags or Organizers: These help keep your tools easily accessible and in good condition.
- Brush Holders: Protecting brush bristles maintains their shape and function.
Having the right tools will provide a solid foundation for your makeup skills. Start simple, build your collection over time, and watch as your application techniques improve. Remember, the journey to finding your personal style is as enjoyable as the results!
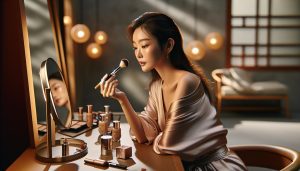
Mastering the Art of Flawless Foundation Application
To achieve a flawless foundation application, it’s essential to understand the significance of starting with a clean and well-moisturized face. Good skin preparation can enhance the look of your makeup significantly, giving you that radiant, picture-perfect finish. Begin by cleansing your skin to remove any excess oils or impurities, followed by applying a moisturizer suited for your skin type. For oily skin, opt for a lightweight, oil-free moisturizer, while dry skin benefits from richer, hydrating products. Allow your skincare to absorb completely before proceeding with makeup to ensure optimal results.
When it comes to selecting foundation, the options can be overwhelming. Choose a formula that matches your skin type and desired coverage. Liquid foundations are versatile and provide a natural finish, while cream foundations offer more coverage and can help smooth out imperfections. You may also consider tinted moisturizers or BB creams for a lighter, more breathable feel. Philip Liakos, a renowned makeup artist, suggests swatching foundations on your jawline in natural light to find the perfect shade that blends seamlessly with your skin tone.
Applying your foundation using the right technique can make all the difference. For a natural finish, using a damp beauty sponge to dab foundation on the skin in a bouncing motion allows for an airbrushed effect that’s hard to achieve with a brush. Alternatively, a foundation brush can be used in circular motions to buff the product into the skin. Always start with a small amount of product and build coverage where necessary, especially in areas needing extra attention like redness or blemishes. Remember to blend foundation into your neck to avoid a stark line, which can give away your makeup secrets.
Setting your foundation is crucial for longevity and reducing shine throughout the day. Lightly dust a setting powder over your face, concentrating on areas that typically get oily. Translucent powders are ideal for this purpose, as they maintain the color integrity of your foundation. If you’re prone to dry skin, consider using a setting spray instead, which can give a dewy finish while locking in your makeup. Mastering flawless foundation application takes practice, but with the right preparation, products, and techniques, you’ll build a stunning base that enhances your natural beauty.
Step-by-Step Guide to Eyeshadow for Beginners

Creating a captivating eyeshadow look can seem daunting to beginners, but with a few simple steps and some practice, it can become one of your favorite aspects of makeup application. First, having the right tools is essential for achieving beautiful eyes. Invest in a basic set of brushes: a flat brush for applying shadow, a blending brush for seamless transitions, and a smaller detail brush for more precise work. Additionally, consider using an eyeshadow primer to enhance color vibrancy and longevity, ensuring that your look lasts throughout the day.
To begin, select a color palette that resonates with you. Neutral shades are perfect for a subtle everyday look, while brighter colors can be fun for special occasions. Start with a light shade as your base, applying it all over the eyelid to create an even canvas. Next, choose a medium shade to add depth to the crease of your eyelid. Use a windshield wiper motion with your blending brush to apply this shade, blending inward from the outer corner to the inner part of your crease. This technique not only adds dimension but also helps your eyes appear more open and expressive.
Once you’ve established the crease color, it’s time to add some drama with darker shades or shimmers. Apply a darker color on the outer corner of your eye, gradually building up the intensity to avoid overwhelming your look. Use small, circular motions to blend the color seamlessly into the crease. If you’d like to incorporate a shimmer, apply it to the center of your lid using your flat brush. For a more impactful shine, lightly spritz your brush with setting spray before dipping into the shimmer shade.
Finally, don’t forget about your lower lash line! This area can pull your entire look together. Use a small detail brush to apply the same medium shade you used in your crease along your lower lashes, and consider adding a touch of the darker shade on the outer corner for added definition. For a more polished look, finish with a bit of eyeliner and your favorite mascara to highlight your eyes beautifully. Remember, practice makes perfect, and every time you experiment with eyeshadow, you’re one step closer to mastering this essential makeup skill.
Creating the Perfect Eyebrow Shape for Your Face
Achieving the right eyebrow shape can dramatically enhance your facial features, creating a polished and expressive look that frames your eyes beautifully. Start by understanding your face shape, as it will guide you toward the most flattering eyebrow style. For instance, those with a round face should opt for high arches to elongate the appearance of their face, while individuals with a square jaw might favor softer, rounded brows to balance their angles.
To get started, gather the necessary tools: a pair of tweezers for precision, a brow brush to groom your hairs, and either a brow pencil or powder to fill in any sparse areas. Here’s a simple step-by-step process to create your perfect shape:
- Determine Your Brow Starting Point: Hold a brush vertically against your nose; this will mark where your brow should begin.
- Find Your Arch: Move the brush diagonally from the outer edge of your nostril through the iris of your eye; this point marks the peak of your arch.
- Establish the Tail: Angle the brush from the nostril to the outer corner of your eye to find where your brow should end.
Once you have mapped out these key points, it’s time to shape. Using your tweezers, pluck any stray hairs below the brow line, making sure to take a conservative approach so you don’t over-pluck. For those who prefer a bolder look or have thinner brows, filling in with a brow pencil or powder can help define and enhance the shape you’ve created. Use short, feather-like strokes to mimic natural hair, and blend well with a clean brow brush.
Remember that your eyebrows are sisters, not twins-slight variations are normal and can add character to your look. Regular maintenance, including trimming and grooming, will help you keep your eyebrows in prime shape. With a little practice, you’ll find that mastering your eyebrow shape adds an effortless sophistication to your makeup routine, elevating your overall appearance.
Beginner Tips for Applying Mascara Like a Pro

Applying mascara can elevate your makeup game instantly, giving your eyes that wide-awake, expressive look. However, for beginners, it can sometimes feel intimidating or tricky. With a few simple tips and techniques, you can master the art of mascara application, transforming your lashes without the stress.
Start by selecting the right mascara for your desired look. Whether you’re aiming for length, volume, or curl, there’s a specific formula for that. For a natural day look, consider a tubing mascara that doesn’t clump and easily washes off. If you prefer bold lashes for an evening out, go for a volumizing mascara that adds thickness while giving you that dramatic flair. Whichever you choose, make sure to purchase a mascara with a wand that suits your lash goals-curved wands can help curl your lashes, while straight wands are great for length.
To achieve perfectly coated lashes, begin by curling your lashes with an eyelash curler. Hold the curler at the base of your lashes and gently squeeze for a few seconds, then release. This small step can make a significant difference, enhancing the overall effect of your mascara. When you start to apply the mascara, hold the wand at the base of your lashes. Use a gentle wriggling motion as you pull the brush through, ensuring that every lash is coated evenly from root to tip. This technique not only ensures coverage but also prevents clumping.
Remember, less is often more when it comes to mascara. Start with a single coat, allowing it to dry, and then assess if you want to layer on more for added drama. If you make a mistake and get some mascara on your eyelids, don’t panic-simply let it dry, then use a cotton swab to gently flake it off without smudging your makeup. Additionally, keep a wand specifically for combing through your lashes to separate them if they look too clumped together.
Finally, accentuate the lower lashes with a light hand. Many beginners overlook this step, but a tad of mascara on the lower lashes can effectively frame your eyes. Use a smaller brush or even the end of the mascara wand to apply just a hint of product, connecting the top and bottom lashes seamlessly. With practice and patience, you’ll find that applying mascara like a pro becomes quick and easy, effortlessly completing your look and adding that perfect finishing touch.
Cheek Colors: How to Choose and Apply Blush
Applying blush can transform your entire look, adding warmth and vibrancy to your face, but getting it right as a beginner can be daunting. Understanding how to choose and apply blush effectively allows you to enhance your natural beauty with just a few strokes. The key is to select a shade that complements your skin tone and to master the application technique so that the blush looks seamless and flattering.
When choosing a blush shade, consider your skin’s undertone. For warmer undertones, shades like peach, coral, or warm pinks work beautifully to create a sun-kissed glow. If you have cooler undertones, opt for rose, berry, or soft plum shades to add a natural flush. It’s beneficial to test different colors on your cheeks in natural light; remember, the goal is to mimic the subtle flush you get after exercising or a warm bath. For blush formulations, beginners often find powder blushes easy to work with, as they layer well and blend smoothly. Cream and liquid blushes can also provide a dewy finish, but may require a bit more practice to achieve the desired look.
Application Techniques
Achieving the perfect blush application involves a few simple steps. Begin with a clean base; if you’ve applied foundation, ensure it is blended and set before moving on to blush. Using a fluffy blush brush, lightly tap it into the blush, and then gently tap off any excess to prevent over-application. Smile and locate the apples of your cheeks-this is where you’ll place the initial color. Apply the blush in an upward motion, starting at the apple and blending it out towards your temples for a natural lift.
If you feel you’ve applied too much, don’t worry! A clean makeup sponge can help diffuse the color, or you can layer some translucent powder over the area to tone down the intensity. For a finishing touch, consider applying highlighter on the tops of your cheekbones to catch the light beautifully, enhancing that youthful glow.
Incorporating blush into your routine not only elevates your look but also boosts your confidence. With practice, applying blush will become a breeze, and you’ll discover how it can dramatically change your overall appearance. Embrace the process, experiment with different shades and techniques, and soon enough, you’ll be a pro at applying blush and enhancing your makeup artistry skills.
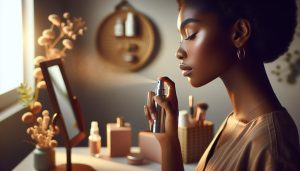
Quick and Easy Lip Makeup Techniques for Beginners
Creating a stunning lip look doesn’t have to be complicated. In fact, with just a few essential techniques, you can achieve beautifully defined lips that enhance your overall makeup aesthetic. Whether you prefer a bold lip or a subtle sheen, mastering these quick and easy techniques will empower you to express your personal style effortlessly.
To start, it’s crucial to prep your lips. A smooth canvas ensures that whatever product you choose goes on evenly. Begin by exfoliating your lips gently with a lip scrub or a soft toothbrush to remove any dry skin. Follow this with a nourishing lip balm to hydrate your lips; this can also help products stay in place longer. Once your lips are prepped, you’ll be ready to move on to color application.
Choosing Your Lip Color
Selecting the right lip color is key to completing your look. Consider your overall makeup choice and the setting. For daytime looks, soft pinks, nudes, or peachy shades work wonderfully; these hues are easy to reapply and maintain a natural look. In contrast, for evening looks, deeper shades like berry, red, or plum can add a sophisticated touch. Don’t hesitate to test the shades directly on your lips or the back of your hand to see how they complement your skin tone and existing makeup.
- Lipstick: Use a classic bullet lipstick for precise application. Start from the center and work your way out, ensuring an even coverage. For longevity, use a lip liner that matches your lipstick to define your lips. This helps prevent the color from feathering.
- Lip Gloss: A glossy finish can enhance any lip look. Apply a layer of lip gloss on top of your lipstick for added shine. Opt for clear gloss for a simple effect or pick a tinted one to boost your lipstick color.
- Tints or Stains: For a more effortless approach, consider lip tints or stains that provide long-lasting color with minimal reapplication. These products often have a lightweight formula and come in various shades.
Application Techniques
When applying, precision makes a huge difference. For lipstick, a lip brush can be your best tool for getting into the corners of your lips and achieving clean edges. Moreover, if you want a softer finish, you can use your fingertip to lightly dab the lipstick onto your lips, providing a more effortless and natural look. Remember to blot your lips with a tissue between layers to build intensity without excess product.
For a more polished result, highlight the cupid’s bow (the peak of your upper lip) with a bit of highlighter or a lighter concealer to make your lips appear fuller and well-defined. Finish with a spritz of setting spray or a light dusting of translucent powder to lock in your look throughout the day.
Ultimately, practicing these lip makeup techniques will help you become more adept and confident in your skills. With just a little time and effort, you can elevate your lip game, personalize your look, and provide a finishing touch that truly shines. Embrace this opportunity to experiment with colors and styles that resonate with you, ensuring your lips are always a remarkable focal point of your makeup artistry.
Essential Makeup Hacks for a Polished Look
To achieve a polished look that exudes confidence and elegance, incorporating a few essential makeup hacks can make all the difference, especially for beginners eager to refine their skills. One foundational tip is to always start with a well-prepped canvas. Cleansing and moisturizing your face ensures that makeup adheres better and lasts longer. Applying a quality primer not only smooths imperfections but also creates a barrier that can prevent makeup from settling into fine lines and pores.
Another key element is understanding the importance of blending. Whether you’re working with foundation, eyeshadow, or blush, seamless blending can convert a basic application into a professional finish. Use tools such as beauty sponges or soft brushes to achieve a more natural look. For instance, when applying foundation, a damp beauty sponge can help distribute the product evenly, giving you that coveted airbrush effect. Additionally, for powder products, a fluffy brush allows for swift, even application without overloading any single area.
Color correction is another often overlooked hack. If you have under-eye circles or redness, a color correcting concealer can neutralize these imperfections before applying your regular concealer. A peach or orange hue works wonders for blue-toned circles, while a green corrector can counter redness. Just remember to blend it out well, as these products are powerful tools but can look heavy if not applied correctly.
Lastly, don’t underestimate the impact of setting your makeup. A light dusting of translucent powder can keep shine at bay, while a makeup setting spray can lock everything in place without looking cakey. This dual approach ensures that your look stays intact throughout the day, allowing you to feel as fresh at 5 PM as you did at 8 AM. By integrating these hacks, beginners can cultivate a chic, polished appearance effortlessly, setting a strong foundation for more advanced techniques in their makeup journey.
Building a Simple Daily Makeup Routine
Building a daily makeup routine can empower beginners to embrace their creativity while streamlining their beauty regimen to fit within busy schedules. A simple, effective routine not only boosts confidence but also enhances one’s natural features effortlessly. With just a few key products, it’s possible to achieve a fresh, polished look in around 20 minutes, making it ideal for anyone transitioning into the world of makeup.
Essential Products for Your Daily Routine
To start, focus on a handful of versatile products that serve multiple purposes. Consider keeping the following in your makeup arsenal:
- Tinted Moisturizer or BB Cream: Provides light coverage while hydrating the skin, perfect for a natural look.
- Concealer: A must-have for covering blemishes, redness, or dark circles. Choose a formula that blends well with your skin tone.
- Blush: A cream blush can double as lip color, giving a cohesive, monochromatic look.
- Neutral Eyeshadow Palette: Select a palette with a range of shades from light to deep tones for versatility in creating everyday looks.
- Mascaras: A single coat can enhance lashes without looking overdone, making your eyes pop.
- Brow Gel: Helps to define and shape eyebrows, framing the face beautifully.
- Setting Spray: A light mist to ensure your look lasts throughout the day.
Step-by-Step Routine
When applying makeup, consider this streamlined process to maximize time and achieve flawless results:
- Prep Your Skin: Begin with a clean, moisturized face. Apply your tinted moisturizer or BB cream using your fingers or a damp sponge to create an even skin tone.
- Conceal Imperfections: Use the concealer to address specific issues, tapping it gently with your ring finger for the most natural finish.
- Add Color: A touch of cream blush on the apples of your cheeks brings life to your complexion. Blend it upwards toward your temples for a lifted effect.
- Define Your Eyes: Sweep a neutral shade across your eyelids and a slightly darker shade in the crease for depth. Finish with a coat of mascara to enhance your lashes.
- Perfect Your Brows: Brush your brows into place with brow gel to achieve a polished look without heavy product.
- Set Your Makeup: Complete your routine with a setting spray to lock in your look and keep excess shine at bay.
By establishing a simple daily makeup routine, beginners can cultivate their skills and enhance their beauty with confidence. As you become more comfortable, feel free to experiment with additional colors and techniques to express your unique personal style. Remember, makeup is not only about looking good-it’s also about feeling good. Embrace the process, and enjoy every moment!
Troubleshooting Common Makeup Mistakes
Makeup can be a beautiful form of self-expression, but even the most seasoned artists can stumble upon common pitfalls. Identifying and troubleshooting these mistakes early on can turn your makeup application from a frustration to a fun, creative endeavor. It’s all about practice and refinement, so let’s tackle some frequent issues that beginners face.
One of the most prevalent mistakes is choosing the wrong foundation shade. Applying a foundation that is too light or too dark can create an unnatural contrast with your skin tone. The solution? Always test foundation shades along your jawline in natural light. For a seamless blend, consider a tinted moisturizer or BB cream that matches your skin tone well, as these options often provide lighter coverage while looking more natural.
Another common hiccup is the dreaded cakey makeup look, usually the result of applying too much product. This is particularly true for concealers and powders. To avoid this, opt for lightweight formulas, and remember that less is more. Apply products sparingly and build up coverage gradually. Using a damp sponge for application can help press product into the skin for a more natural finish, reducing cakiness.
Eyeshadow application can often pose challenges as well. Applying too much or poorly blended eyeshadow can lead to a harsh, unflattering look. Instead, focus on blending as you go. Start with a small amount of product on your brush and build up the intensity slowly. Use a clean blending brush to diffuse harsh lines, ensuring a soft transition between colors. Consider investing in a quality neutral eyeshadow palette that provides versatile options for everyday looks.
Finally, many beginners struggle with mascara application, leading to clumps and spider lashes. To achieve beautifully defined lashes, ensure your mascara is fresh-not too old-and apply it in light layers. Wiggling the wand at the base of your lashes before pulling it through to the tips can help separate and lengthen lashes while preventing the build-up of product. If you notice clumps, consider using a clean spoolie brush to comb through lashes.
By being mindful of these common mistakes and applying these simple solutions, you can elevate your makeup skills and gain confidence in your abilities. Remember, every artist progresses through practice, so embrace the learning process, and enjoy experimenting!
Inspiring Looks: Makeup Tutorials for Beginners
Getting inspired to create fun and versatile makeup looks can turn the process of learning into an exciting journey. Whether you’re preparing for a casual day out or a special occasion, a few simple tutorials can help you build essential skills in the art of makeup application. These looks are designed for beginners, showcasing how to enhance your natural beauty while mastering application techniques in no time.
Everyday Natural Glow
For a fresh, everyday look, start with a lightweight foundation or BB cream for even skin tone. Apply a touch of cream blush on the apples of your cheeks to impart a healthy, dewy finish. Eyes can be kept simple with a swipe of neutral eyeshadow across the lid and a thin line of eyeliner along the top lash line. Finish with a coat of mascara to define the eyes, and a tinted lip balm for a kiss of color. This look is quick, takes about 10-15 minutes, and suits any occasion.
Classic Smoky Eyes
Ready to step it up? A classic smoky eye is a timeless choice that works for evening events. Start by applying a soft primer to your eyelids to prevent creasing. Using a medium to dark eyeshadow, start from the lash line, blending upwards into the crease. Be sure to soften the edges with a clean brush to create a gradient effect. Line both your upper and lower lash lines with a dark pencil or gel liner for added drama. Finish with mascara and a nude lip to balance the boldness of the eyes. This look enhances confidence and sophistication while still being beginner-friendly.
Pop of Color
Inject some fun into your look with a pop of color! Apply your foundation and neutral eyeshadow base as usual. Then, choose a vibrant shade of eyeliner or eyeshadow to apply along the lower lash line. This can be a bold blue, green, or even hot pink-whatever fits your personality. Pair this lively eye with a soft peach or pink blush and a coordinating lip color that ties the look together. This look is perfect for a day out with friends or casual gatherings, making makeup an expressive aspect of your style.
Tips for Success
To make the most of these tutorials, here are some key tips:
- Always work with clean brushes and sponges to ensure a smooth application.
- Invest in a basic set of quality makeup tools, such as a good foundation brush, a blending brush, and a brow pencil.
- Practice blending and layering techniques; they’re crucial for achieving a more polished look.
- Don’t be afraid to experiment with colors and products. Makeup is a fantastic way to express your individuality!
By incorporating these approachable looks into your routine, you’ll not only develop fundamental skills but also gain the confidence to explore your creativity. Embrace the process of learning, and remember that every great makeup artist started as a beginner, just like you.
FAQ
Q: What are the best beginner makeup tutorials to follow?
A: The best beginner makeup tutorials focus on essential techniques like foundation application, eyeshadow placement, and lip color matching. You can start with tutorials available on popular beauty platforms like YouTube, which offer visual guides. For structured learning, explore tutorials specifically mentioned in your article for step-by-step guidance.
Q: How long does it take to learn basic makeup skills?
A: Learning basic makeup skills can take as little as a few days to a few weeks with practice. Dedicating 20 minutes daily to practice can significantly enhance your technique and confidence. Check out the structured practice routines outlined in your article for effective learning.
Q: What makeup products should a beginner avoid?
A: Beginners should avoid overly complex products like heavy contouring kits or specialized makeup tools. Focus on essential items such as foundation, mascara, and a neutral eyeshadow palette. This helps simplify your routine and build foundational skills before moving on to advanced techniques.
Q: How can a beginner create a natural makeup look quickly?
A: To create a natural makeup look quickly, focus on light foundation, a hint of blush, and nude lipstick. Use your fingers for application to speed things up. The article’s section on “Building a Simple Daily Makeup Routine” offers great tips for effortless looks in just minutes.
Q: What’s the most common makeup mistake beginners make?
A: The most common makeup mistake beginners make is applying too much product, which can look heavy or uneven. Start with a small amount, building coverage gradually. Refer to the “Troubleshooting Common Makeup Mistakes” section for more insights on avoiding these errors.
Q: How do I choose the right foundation as a beginner?
A: Choosing the right foundation involves matching your skin tone and type. Test products in natural light and opt for lightweight formulas that offer buildable coverage. Your article’s section “Mastering the Art of Flawless Foundation Application” can guide you through the selection process.
Q: What are some quick tips for applying mascara perfectly?
A: To apply mascara perfectly, wiggle the wand at the base of your lashes and sweep upwards. Start with light layers and avoid pumping the wand to prevent clumping. For more tips, refer to the article’s section on “Beginner Tips for Applying Mascara Like a Pro.”
Q: Why is it important to use the right tools in makeup application?
A: Using the right tools improves application results, provides better control, and enhances the blending of products. Quality brushes and sponges can make a significant difference in achieving a polished look. The article discusses essential tools beginners need to achieve their makeup goals effectively.
Closing Remarks
Congratulations on mastering the essential skills of beginner makeup in just 20 minutes! Now that you have the tools and techniques, it’s time to put them into action and enhance your beauty routine. Don’t hesitate to explore our detailed product reviews on brands like Seint, Thrive, Ilia, and ELF, which can help you choose the right makeup for your style. Plus, if you’re looking to elevate your skills further, check out our step-by-step guides on advanced makeup techniques and professional barbering tips to refine your grooming expertise.
Ready to take the next step? Subscribe to our newsletter for exclusive tips and updates on the latest beauty trends. Remember, practice makes perfect, so keep experimenting, and share your journey with us in the comments below. Your confidence in beauty will grow as you embrace your unique style!