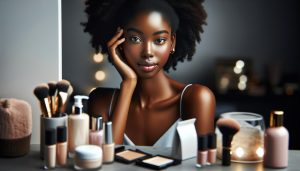
Contouring is a transformative makeup technique that allows you to sculpt and define your face in just minutes. By using shades that are darker and lighter than your natural skin tone, you can enhance your features and achieve that coveted model-like look. Whether you’re getting ready for a special occasion or just want to elevate your everyday makeup routine, mastering contouring can make a significant difference. Many people struggle with achieving a flawless finish, often feeling intimidated by the process. However, with the right tips and tools, contouring becomes not only accessible but also fun. As you delve deeper into this guide, you’ll discover easy-to-follow techniques that will empower you to create stunning looks effortlessly. Let’s unlock the full potential of your makeup skills and boost your confidence!
What Is Contour Makeup and Why It Matters
Contouring is the art of using makeup to enhance and define the natural structure of your face. This transformative technique plays a vital role in modern beauty routines, allowing individuals to sculpt their features in a matter of minutes. Contour makeup highlights the high points of your face, such as the cheekbones and brow bones, while simultaneously creating shadows in areas like the jawline and nose. This duality adds dimension to your complexion, helping you achieve a more polished look.
Understanding the significance of contouring is essential, as it can dramatically affect the overall aesthetic of your makeup. It matters not only for its visual impact but also for its capacity to boost confidence. Many individuals feel empowered when they can customize their look to reflect their individual style, accentuating their unique features and achieving the desired shape. Whether you’re preparing for a special event or just want to feel your best daily, contouring serves as an effective tool in your beauty arsenal.
Moreover, contour makeup is not just for the seasoned pros; it’s accessible to everyone. With the right techniques and tools, anyone can master the basics of contouring to elevate their makeup game. From subtle enhancements to bold definitions, the versatility of contouring offers endless possibilities. This inclusivity makes contouring an integral part of one’s beauty regimen, allowing everyone the chance to express themselves creatively and effectively.
The Essential Tools for Contouring Success
To achieve a stunning contour that elevates your facial features, having the right tools at your disposal is essential. Each tool plays a unique role in the contouring process, enabling you to create a flawless, sculpted look with precision and ease. Here’s what you need to get started on your contouring journey.
Brushes and Tools
- Contour Brush: A dense, angled brush is perfect for applying cream or powder contour. Its shape allows for precise placement along the cheekbones, jawline, and nose.
- Highlighting Brush: A soft, tapered brush is ideal for applying highlighter on the cheekbones, brow bones, and the bridge of the nose, adding to the lifted look of your makeup.
- Beauty Blender or Sponges: These are fantastic for seamless blending, particularly for cream-based contour products. Their unique texture helps create a smooth, airbrushed finish.
Makeup Products
Choosing the right contour products is crucial. Consider the following options:
- Contour Sticks or Creams: Products like those from Seint and Thrive allow for easy application and can be blended effortlessly for a natural look.
- Powder Contours: Brands like ELF offer matte powders in various shades that can be dusted over foundation to contour without weighing down your skin.
- Highlighters: Liquid, cream, or powder highlighters from brands like Ilia can enhance your high points, giving a radiant glow.
Setting Sprays and Powders
To ensure your contour lasts throughout the day, consider using setting sprays or powders. A light dusting of translucent powder from any reputable brand can lock in your makeup, while a setting spray can provide a dewy finish without disrupting your carefully crafted contour.
Equipped with these essential tools and products, you’ll find contouring not only becomes an easier task but also a creative outlet where you can showcase your artistic flair. Remember, practice makes perfect, and with each attempt, you’ll refine your technique, boost your confidence, and enhance your overall makeup application skills.
Step-by-Step Guide to Perfect Contouring
To create a stunning contour that enhances your facial features, one must master a few simple techniques. Contouring is not merely about applying makeup; it’s an art that transforms your face in minutes, allowing for a diverse range of looks from subtle enhancements to dramatic transformations. Here’s a comprehensive step-by-step guide to perfecting your contouring game, using the right tools and techniques to achieve a sculpted and professional finish.
Start by prepping your skin; a well-moisturized canvas ensures that your makeup applies smoothly. Apply a primer to create a smooth surface and enhance the longevity of your makeup. Once your skin is ready, use your foundation to create an even base. Choose a foundation that matches your skin tone perfectly; this ensures that your contour will stand out correctly against your chosen base.
With the base in place, it’s now time to apply the contour. Follow these steps for effective application:
1. Identify the Areas to Contour
- Cheekbones: Make a “fish face” to find the hollows of your cheeks, and apply contour from your ears to just past the middle of your cheeks.
- Jawline: Apply contour along the jawline to define it, blending downwards to avoid a stark line.
- Nose: Use a thin brush or a contour stick to apply a line down the sides of your nose, blending well for a more natural look.
- Forehead: If you wish to make your forehead appear smaller, apply contour along the hairline, blending down toward your temples.
2. Apply Highlighter
Highlighting the high points of your face is crucial to achieving a balanced and radiant look. Apply highlighter on the tops of your cheekbones, the bridge of your nose, the center of your forehead, and the cupid’s bow. These areas reflect light, creating a fresh and lifted appearance.
3. Blend, Blend, Blend
The key to flawless contouring is seamless blending. Using your Beauty Blender or contour brush, blend the contour in circular motions to soften harsh lines, ensuring the contour and foundation meld together beautifully. Ensure you blend upwards on your cheeks to create a lifting effect.
4. Set Your Look
To keep your contour in place throughout the day, finish with a light dusting of translucent powder over the contour areas, avoiding excess powder on highlighted spots. Setting spray can then be applied to lock in your makeup and enhance the finish.
Mastering these steps will not only elevate your contouring technique but will also instill confidence in your makeup skills. Experiment with different products, such as cream contours from brands like Seint or Thrive, which allow for easy blending, and finish your look with powder contours from ELF for added dimension. With practice, you’ll be able to create a variety of stunning looks tailored just for you.
Common Contouring Mistakes to Avoid
Contouring can instantly transform your look, but missteps in application can lead to an unflattering outcome that detracts from the desired effect. One of the most common mistakes is using the wrong shade. Opting for a contour product that is too dark or warm can create harsh lines that make your makeup look unnatural. Always choose a contour shade with cool, ashy undertones that mimic natural shadows on your face. Test the product on your jawline in natural light to ensure it complements your skin tone, creating a seamless blend that enhances rather than overwhelms your features.
Another frequent error is neglecting the crucial step of blending. Harsh, obvious lines can dramatically alter the effect of your contouring, leading to a disjointed appearance. The key is to use a light hand and a good blending tool, whether it’s a damp Beauty Blender or a contour brush, to diffuse the product into your foundation. Take your time blending in circular motions, especially around the edges of your jawline, cheeks, and hairline, to avoid stark demarcations.
Additionally, applying too much product is a common pitfall. Less is often more when it comes to contouring. Start with a small amount and build it gradually for a more natural look. Over-applying can make it harder to blend and lead to a heavy appearance, diminishing the effortless quality that contouring should provide. If you find you’ve used too much, try using a damp sponge to remove excess product and blend it out for a softer finish.
Lastly, failing to set your makeup can lead to unwanted shine and fading throughout the day. To maintain the sculpted look, always finish your contour with a light setting powder on the areas where you applied your contour and highlighter. Trust this final touch will lock everything in place, ensuring your contour remains fresh and radiant from day to night. By being mindful of these pitfalls, you can elevate your contouring technique and enhance your natural beauty with confidence.
How to Choose Your Contour Products
Choosing the right contour products is essential for achieving a flawlessly sculpted look. The right formulation can enhance your natural features and create dimension, while the wrong choices can lead to a makeup disaster. When selecting contour products, consider your skin type, tone, and the look you wish to achieve to find the perfect match.
Start by assessing your skin type. For those with oily skin, opt for matte formulations, such as cream or powder contours, which will help absorb excess oil and provide a long-lasting finish. If you have dry or combination skin, cream contours can provide a more hydrating texture, allowing for easy blending and a dewy look. A good rule of thumb is to choose products that are non-comedogenic and infused with skin-loving ingredients to maintain the health of your skin while you wear makeup.
When it comes to selecting shades, the key is understanding undertones. For a natural contour, select a product that has cool, ashy tones which mimic natural shadows. Avoid warm or reddish tones, as they can create a bronzed look that doesn’t provide the sculpting effect you want. Testing shades in natural light is crucial-swipe a little on your jawline and observe how it looks against your skin tone. For product recommendations, brands like Seint and Thrive offer a wide range of shades that cater to diverse skin tones, making them a reliable choice for many users.
Lastly, don’t overlook the application tools. Whether you are using creams or powders, the right brush or sponge can make a significant difference. A dense and tapered brush is ideal for powder application, as it can deposit product precisely where you want it, while a damp sponge can help seamlessly blend cream contours into the skin for a natural finish. Investing in quality tools can elevate your contouring game, ensuring that your application appears polished and professional.
By carefully selecting the right products based on your skin type, understanding shade selection, and utilizing the right tools, you can create beautiful, sculpted looks that enhance rather than overwhelm your features.
Contouring for Different Face Shapes
Contouring is an art that can truly transform your face, but the magic lies in understanding your unique face shape. By tailoring your contouring techniques to highlight your best features and create balance, you can enhance your natural beauty in ways you’ve only dreamed of. Let’s explore how to effectively contour different face shapes, ensuring that everyone can achieve a sculpted appearance that feels both natural and striking.
Oval Face Shape
Individuals with an oval face shape typically have balanced proportions, making it one of the easiest face shapes to contour. To enhance the natural harmony, focus on adding subtle definition. Apply contour along the jawline and lightly along the sides of the forehead to maintain balance. A touch of highlighter on the cheekbones elevates the look without overwhelming the natural contours.
Round Face Shape
For a round face, the goal is to elongate the appearance while slimming the cheeks. Start by applying contour on the sides of the forehead, extending to the temples, and down the sides of the face towards the jawline. Additionally, contouring beneath the cheekbones can create the illusion of a more sculpted face. Remember, blending is key for a seamless finish, so use a damp sponge or a fluffy brush for that natural look.
Square Face Shape
Those with a square face shape often have strong jawlines that can be softened through contouring. Apply contour along the edges of the jaw and across the forehead corners, focusing on creating a more oval appearance. A soft highlighter on the center of the forehead and the high points of the cheeks can lift the features and add a beautiful glow.
Heart Face Shape
To balance a heart-shaped face, which has a wider forehead and a narrow chin, contouring can create a more appealing symmetry. Apply contour to the sides of the forehead, and focus primarily on the jawline to minimize its width. Highlighting the center of the chin and the cheekbones will draw attention to the center of the face, creating a focal point that enhances the natural beauty.
Long Face Shape
For a long face, the goal is to create width and shorten the overall appearance. Contour along the sides of the forehead and under the chin to create the illusion of width. Applying contour down the sides of the cheeks and keeping the center of the face bright with highlighter can effectively balance the proportions.
Contouring tailored to your specific face shape not only highlights your best features but also enhances your confidence. With practice and the right techniques, transforming your look can become an empowering part of your daily routine. Embrace your individuality, and let contouring bring out the beauty in you!
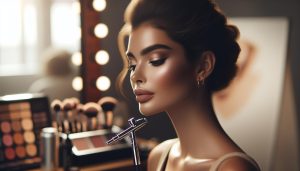
Advanced Contouring Techniques for Professionals
Mastering advanced contouring techniques opens a world of possibilities for professionals seeking to elevate their makeup artistry. These skills not only refine the silhouette of the face but also enhance the ability to manipulate light and shadow with precision. One of the most impactful strategies is using the Giorgio Armani Silk Foundation layered under a matte contour for a stunningly smooth finish. This combination helps achieve a seamless blend that looks both natural and polished.
Another effective method involves the use of colored cream contour products, which can create more depth and dimension. For example, use cream contours in warm undertones to sculpt the cheekbones, while incorporating cooler tones for the jawline. This ensures your contours mimic the natural shadows of the face. Applying contours with a Beauty Blender can enhance the blendability, giving a softer, airbrushed finish.
A more nuanced technique embraced by professionals is called the “strobing effect.” This entails highlighting specific areas like the cheekbones, brow bones, and down the bridge of the nose while keeping contouring minimal. The key is to build layers gradually, using either liquid highlighters or iridescent powders, such as Becca Shimmering Skin Perfector. This technique works beautifully in photography, offering a radiant glow that catches the light from multiple angles.
For those looking to push their contouring skills even further, integrating advanced tools can make a difference. Consider investing in contour palettes like Anastasia Beverly Hills Contour Kit and sculpting brushes, which allow for precision application and greater control. Techniques such as baking-utilizing a heavier setting powder on highlighted areas-can lock in your look, ensuring longevity even under the most demanding conditions.
In a real-world application, imagine transforming a client for an event or photoshoot; the ability to employ these techniques artfully can not only sculpt but also boost the client’s confidence. Empowering your clientele through impeccable contouring not only showcases your talent but is also a catalyst for business growth and personal artistry evolution. Embrace these advanced techniques, and your artistry will shine brighter than ever.
Transformative Contour Makeup Looks to Try
Transforming your look with contour makeup doesn’t just enhance your natural features; it also opens a world of artistic possibilities allowing you to express your individual style. Whether you’re preparing for a casual day out or a glamorous evening event, there are numerous transformative contour looks to explore. Each approach can drastically change the way you perceive your face and how others see you.
One stunning look to try is the “Sculpted Glam”. Start with a flawless base using a lightweight foundation like the Ilia Super Serum Skin Tint for a dewy finish. Apply a cream contour under your cheekbones and along your jawline, blending upwards toward the temples for a lifted effect. Highlighters with a pearlescent finish, such as Thrive Causemetics Brilliant Eye Brightener, can be applied to the tops of your cheekbones and the bridge of your nose to enhance your features dramatically.
For those adventurous with color, the “Sunset Bronze” look incorporates warm tones that mimic the sun-kissed glow of summer. Use a bronzer slightly deeper than your skin tone along the perimeters of your face, and pair it with blush in peach or coral hues on your cheeks. Blend it all together using a light hand, perhaps with a brush like the ELF Complexion Brush, to ensure a seamless transition between shades. This playful approach can instantly elevate your daytime look.
The “Retro Revival” design calls back to vintage styles with dramatic contouring and bold lip color. Utilize darker contour shades under your cheekbones and along your forehead. Finish off with a classic red lip, which can be achieved with products like Seint’s Lip + Cheek for long-lasting wear. This bold statement not only draws attention to the contours of your face but also adds a memorable touch to your overall aesthetic.
To keep your contouring efforts looking sharp throughout the day, a technique often overlooked is the “Setting Approach”. Lightly dusting a translucent powder like Laura Mercier’s Translucent Setting Powder over the highlighted areas can lock in your look while providing an airbrushed finish. Additionally, misting a setting spray like the NYX Dewy Finish Setting Spray after completion can provide that coveted glow without the worry of smudging or fading.
Experimenting with these transformative makeup looks not only enhances your features but also builds your confidence to personalize your style. Each technique serves as a step toward mastering your contouring skills, nurturing both professionalism and passion.
Blending Techniques for Flawless Contour
Achieving a flawless contour is less about the products used and more about the art of blending. Mastering the blending technique not only ensures that your makeup looks seamless but also transforms your face into a work of art. Whether you’re a beginner or a seasoned pro, understanding how to blend can elevate your contouring game and enhance your overall makeup application.
Begin with the right tools; a well-crafted brush and a damp beauty sponge can make all the difference. When applying product, opt for a cream contour for easier blending. Start with small amounts of product; you can always add more, but it’s challenging to tone down an overly heavy application. Focus on blending in circular motions to diffuse the contour into your foundation, working from the edges of the contour inward to create a natural gradient. This technique softens harsh lines and integrates the contour with your skin, offering an understated yet sculpted effect.
Technique Tips
- Use Different Brushes: Flat or angled brushes work great for applying cream products, while fluffy brushes excel at blending.
- Be Mindful of Your Base: Ensure your foundation is completely set before applying cream contours; this prevents uneven application.
- Layer Gradually: Build up your contour in layers, rather than applying a heavy coat at once, to maintain a natural look.
- Prioritize Lighting: Always check your contour in different lighting to ensure it appears blended and natural from all angles.
For advanced contouring practitioners, consider incorporating techniques like the ‘pinch and roll.’ This method involves pinching your damp sponge to create an edge, allowing you to roll it over the contour product for seamless blending. Another pro tip is to finish the look by lightly applying translucent powder over your contour to set it and ensure longevity. Mastering these blending methods will not only enhance your skills but also empower you to create stunning looks that maximize your natural features, allowing your artistic vision to shine through.
Day vs. Night Contour Makeup: Key Differences
The transformative power of contour makeup shines brightest when tailored to the time of day. Understanding the key differences between day and night contour applications can elevate your look, ensuring you’re camera-ready whether you’re facing the soft light of day or the bold shimmer of night.
During the day, the aim is subtly enhancing your natural features. Light, breathable products work best. A cream contour provides a soft finish while allowing the skin to breathe, giving you a more ethereal glow. Opt for shades that are only a shade or two darker than your skin tone to create delicate shadows; focus on blending around the edges of your forehead, along the hollows of your cheeks, and just a whisper along the jawline. Use a light hand to apply, ensuring your look is fresh and bright. Avoid heavy powders or harsh lines, as these can appear stark in daylight, which is unforgiving when it comes to makeup application.
In contrast, nighttime contouring calls for a bolder approach. With artificial lighting and flash photography in play, you can afford to amp up the drama. Here, utilize cream and powder contours together to achieve depth, allowing for more defined structures. Experiment with darker shades to create stronger shadows that can stand out under the glow of city lights. Do not shy away from adding highlighter on the high points of your face to catch the evening light beautifully. Powder contour can help set your cream base, ensuring longevity even in a warm club or at an event. Remember to consider the intensity of your eyes and lips as well; if you go heavy on one aspect, balance it with a slightly toned-down approach on the other.
Ultimately, the essence of contouring-whether for day or night-lies in the artistry of enhancement. Knowing how to adapt your technique, products, and blending methods based on the time of day can help you achieve that flawless, radiant look that transforms your confidence and style.
Maintaining Your Contour Throughout the Day
Maintaining that perfectly sculpted look throughout the day is key to mastering contour makeup. Think of your contour as an investment in your beauty routine; with a few simple strategies, you can ensure it stands the test of time, allowing your features to shine without fading or smudging.
To begin with, proper preparation and priming are essential. Before applying any contour products, use a high-quality primer suited for your skin type. A mattifying primer is great for oily skin, while a hydrating one caters to dry skin. This creates a smooth canvas and helps your makeup adhere better. Following this, select long-wear or waterproof formulas-these products are designed to resist melting or smudging and can significantly enhance longevity throughout the day.
During the day, especially if you have a busy schedule, consider carrying a few key touch-up products in your bag. A compact powder can be your best friend-lightly dust it over your contour areas to refresh the look without adding bulk. A setting spray can also be used post-application as well as throughout the day; it helps lock in your makeup and adds a fresh finish. For quick fixes, a small brush or beauty sponge can be handy; they allow you to blend any areas that may have settled or shifted without completely redoing your contour.
Lastly, be mindful of environmental factors like humidity and sweating. If you anticipate a full day outdoors or at an event, it’s helpful to layer with both cream and powder products at first. Begin with a cream contour for depth and finish with a powder that complements your cream shade. This layering technique not only enhances the durability of your contour but also creates a multidimensional effect that catches light beautifully, helping you to maintain that stunning, sculpted look all day long.
Real-Life Contour Makeup Transformations
Transforming your look with contour makeup can be both empowering and transformative, as it has the power to enhance your natural features and redefine your facial structure. Real-life examples of contour transformations reveal the magic that can happen with the right techniques and products. From subtle enhancements to dramatic sculpting, the results can be astounding.
Many have experienced the “before and after” sensation that contouring brings. Consider the case of someone with a rounder face who seeks a more angular appearance. By strategically applying contour along the sides of the forehead, beneath the cheekbones, and along the jawline, they can create the illusion of a more oval face shape. This not only elevates their features but also boosts their confidence. Each contour application helps to define the cheekbones more prominently, leading to a youthful and chiseled visage.
Practical Transformation Techniques
- Highlight and Contour: Use a lighter shade to highlight the cheekbones, brow bones, and the center of the nose for a lifted effect.
- Balance and Symmetry: For those with asymmetrical features, contour can help balance the face by applying darker shades to areas that need to recede.
- Color Matching: Experimenting with shades that complement your skin tone can drastically change the outcome. Products from lines like Seint or Thrive offer a variety of shades to perfect any look.
- Blend, Blend, Blend: The importance of blending cannot be overstated. A seamless blend ensures that contour looks natural and enhances rather than masks the features.
Individuals often share their experiences on social media platforms, showcasing their contour journeys. Take inspiration from beauty influencers who demonstrate transformative looks using both cream and powder formulas. These tutorials not only teach techniques but also highlight how contour makeup can be tailored for various occasions-be it an everyday look or something more glamorous for a night out.
In essence, contour makeup is not just about applying products; it’s about embracing the art of enhancement. Each brushstroke can empower users to explore their features, celebrate their uniqueness, and gain a fresh perspective on their beauty. Whether a novice or a seasoned pro, the ability to reshape the face in minutes is an exciting and creative outlet that can foster personal expression and confidence.
Frequently asked questions
Q: What are the benefits of contour makeup?
A: Contour makeup enhances facial features by creating the illusion of depth and dimension. It can define the cheekbones, slim the nose, and create a more structured jawline. Using contouring effectively can transform your look instantly, making it perfect for special occasions or everyday wear.
Q: How long does contour makeup last?
A: The longevity of contour makeup depends on the products used and your skin type. Generally, cream contours last about 4-6 hours, while powder formulas can last longer, especially when set with a spray. To maintain your look, consider touch-ups throughout the day.
Q: Can you contour without makeup?
A: Yes, you can achieve a contoured look using skincare products like bronzers or tinted moisturizers. Techniques such as shadowing areas of the face with darker shades of foundation can also mimic the effects of contour makeup. However, traditional contour products offer more pronounced results.
Q: What is the difference between contouring and highlighting?
A: Contouring uses darker shades to create shadows on the face, enhancing features like the cheekbones and jawline. Highlighting, in contrast, utilizes lighter shades to draw attention to areas such as the cheekbones, brow bones, and the bridge of the nose, adding a radiant glow.
Q: Why is blending important in contour makeup?
A: Blending is crucial in contour makeup to create a seamless and natural look. Harsh lines can make the makeup appear obvious and unflattering. Proper blending helps transitions between shades, resulting in a flawless finish and enhanced facial features without noticeable demarcation.
Q: How do I know what shade of contour to use?
A: Choosing the right contour shade depends on your skin tone. Typically, select a contour that is 1-2 shades darker than your foundation. For cooler skin tones, opt for ashy or taupe shades, while warmer skin tones benefit from bronze or caramel hues.
Q: Can contour makeup be used for everyday looks?
A: Absolutely! For everyday looks, use a light hand with contouring products. Focus on subtle enhancements instead of dramatic changes to maintain a natural appearance. Stick to softer shades and blend well for a radiant, effortless look suitable for any occasion.
Q: What is the best way to remove contour makeup?
A: To effectively remove contour makeup, use an oil-based cleanser or micellar water, which breaks down makeup formulas easily. Follow up with your regular cleanser to ensure all product is removed and your skin stays clean and healthy.
Future Outlook
Unlock the power of contour makeup and elevate your beauty routine today! Remember, mastering contouring is not just about enhancing your features-it’s about embracing your unique beauty and boosting your confidence in minutes. If you’re eager to explore more about makeup techniques, check out our detailed tutorials on product reviews for Seint, Thrive, Ilia, and ELF, or dive into step-by-step guides to perfect your application skills.
Don’t wait to transform your look-visit our resources now to find tools that can streamline your makeup application process and discover expert tips that cater to both beginners and seasoned pros. Share your contouring journey in the comments below; we love hearing from you! For even more beauty insights and exclusive offers, consider signing up for our newsletter. Keep experimenting, and let your beauty shine bright!